
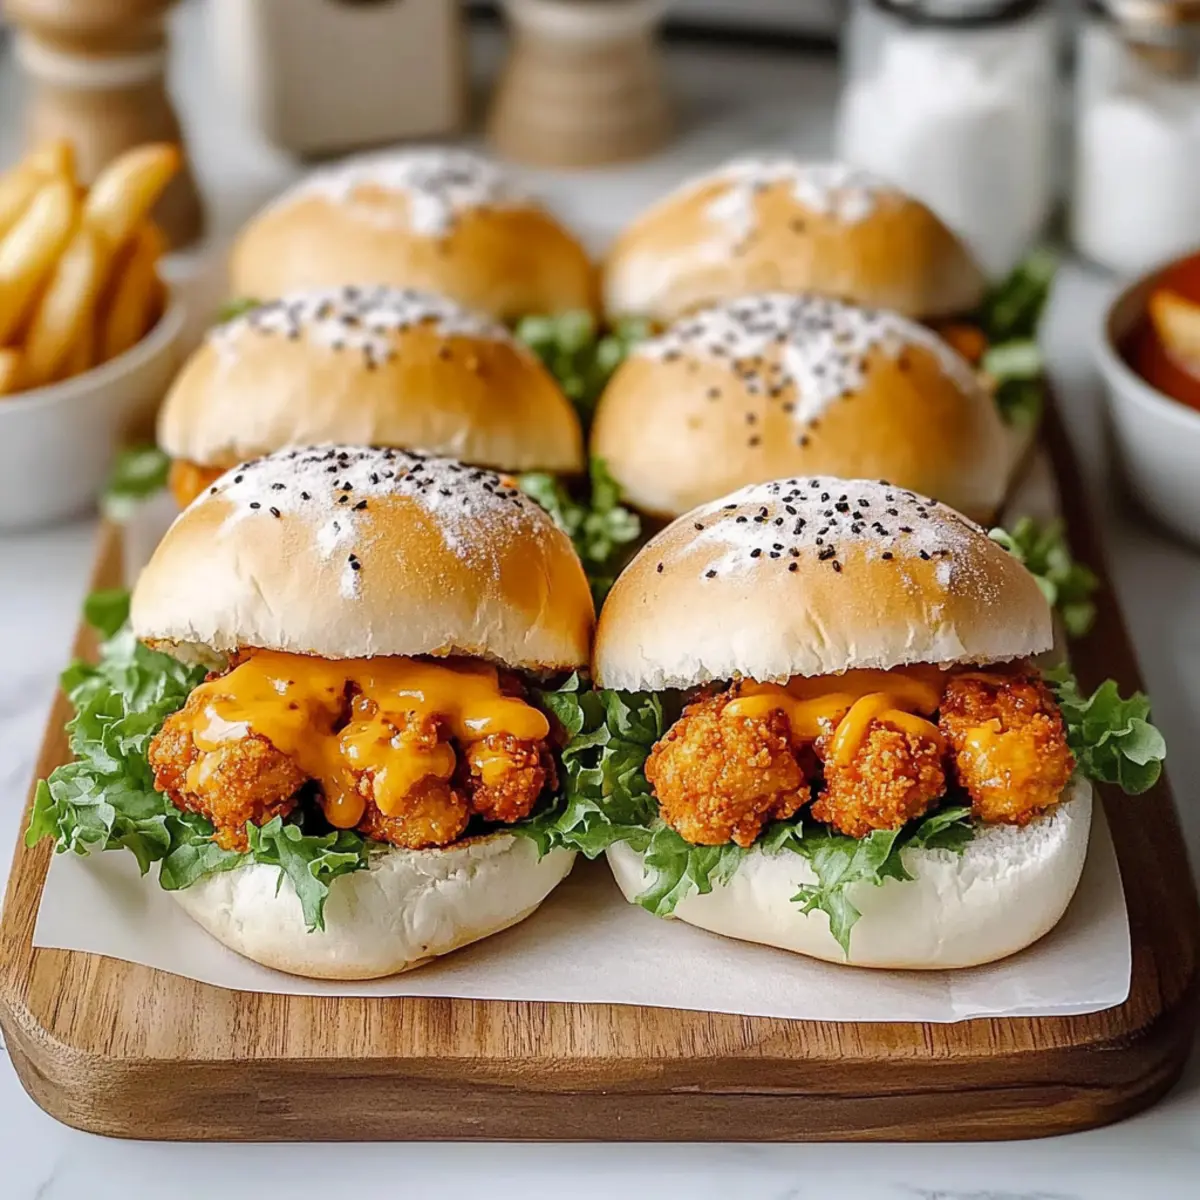
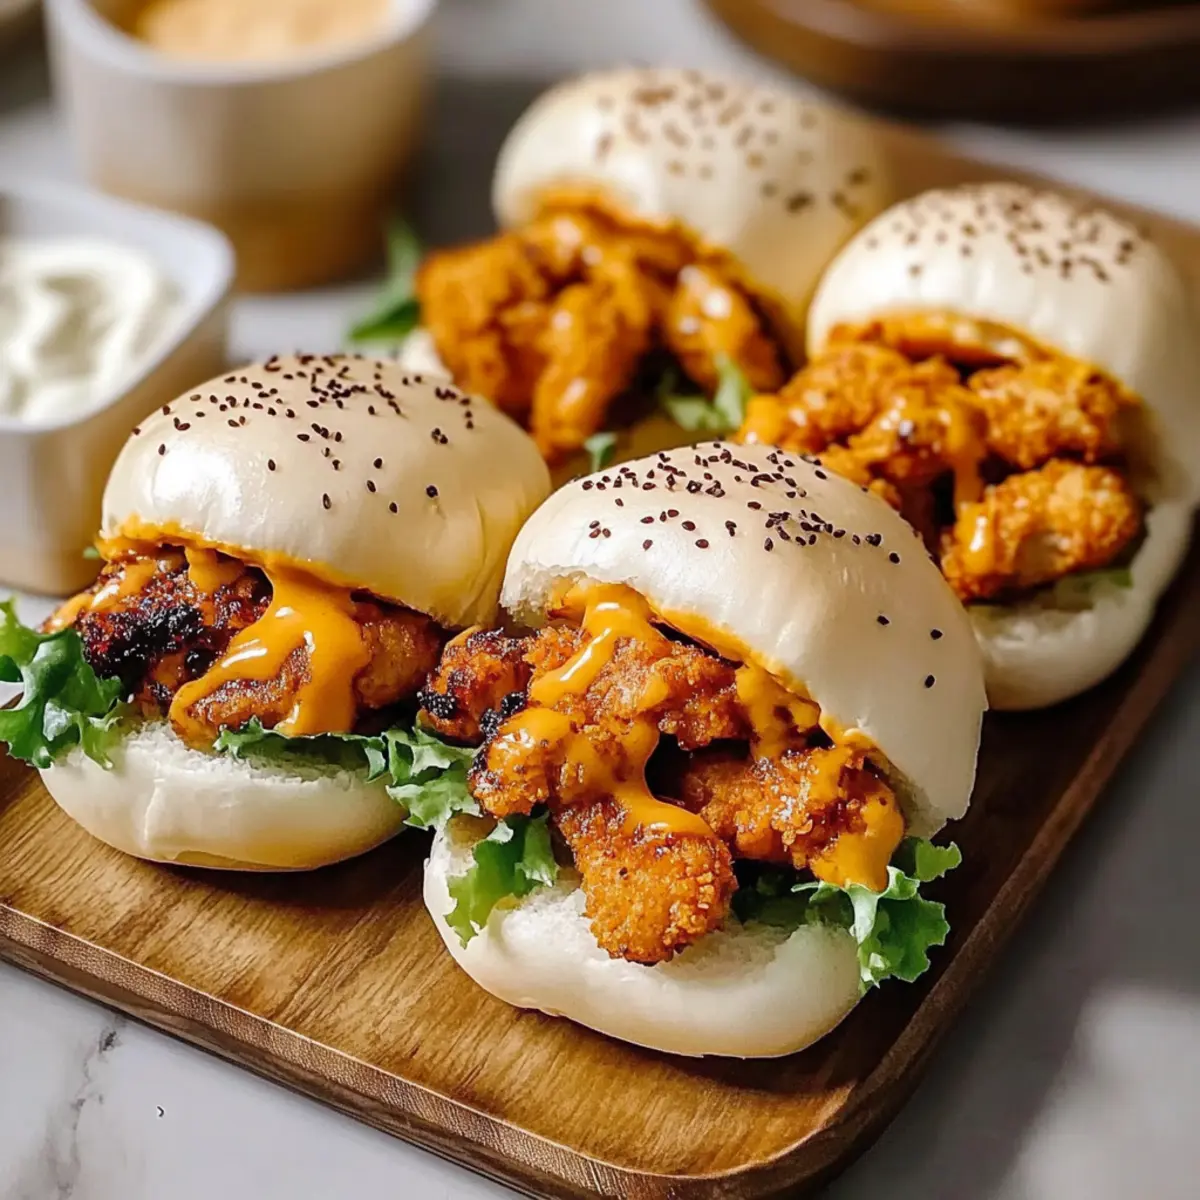
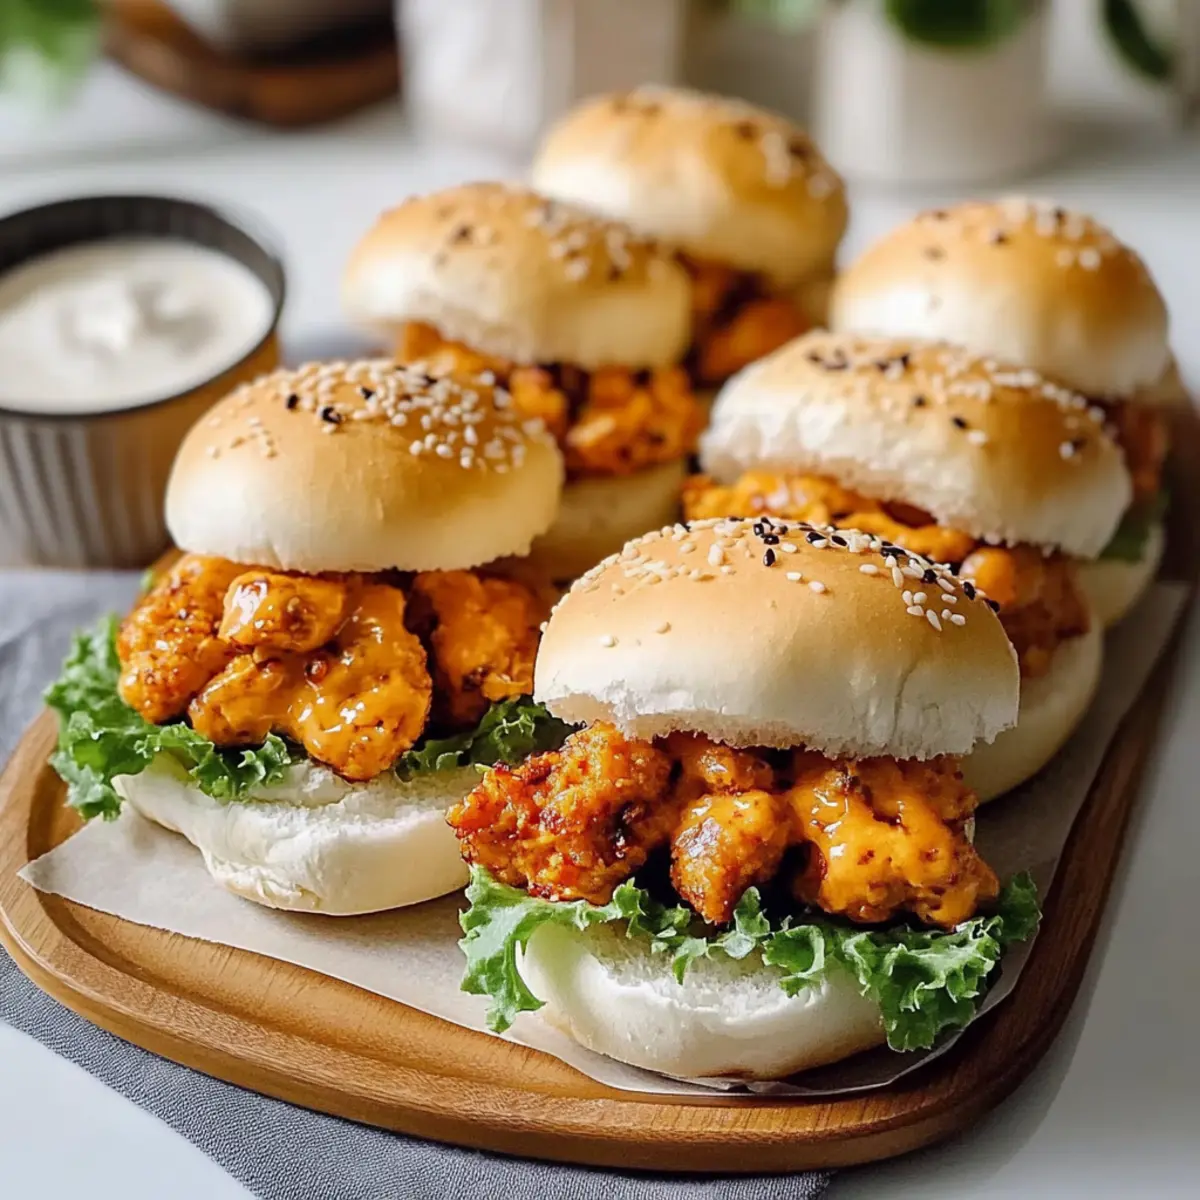
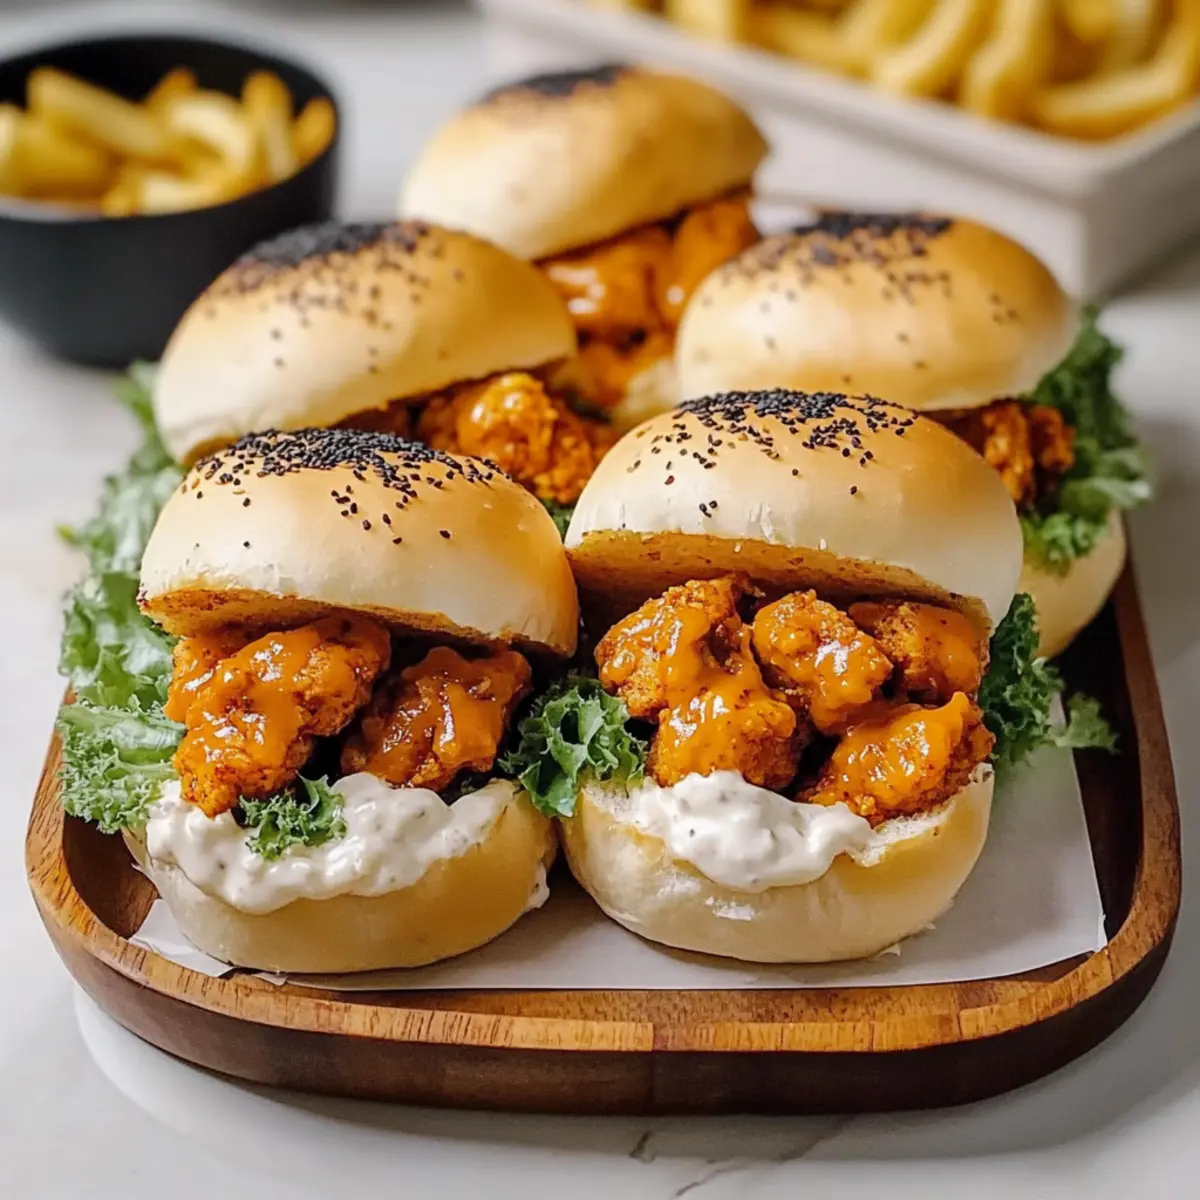
As the scent of freshly baked bread wafted through my kitchen, I couldn’t help but feel a rush of nostalgia. There’s something deeply comforting about homemade treats, and today, I’m excited to share my recipe for Cheesy Dynamite Chicken Buns. These spiced, gooey handheld snacks are perfect for a festive gathering or a cozy family night. With tender shredded chicken enveloped in a creamy cheese filling and wrapped in soft, pillowy buns, they offer a delightful twist on typical appetizers. Not only are they incredibly easy to make, but they’re also the kind of snack that makes everyone feel at home. Curious about how to bring this cheesy goodness to your table? Let’s dive into the recipe!
Why You’ll Crave Cheesy Dynamite Chicken Buns?
Irresistible Comfort: These buns offer a delightful blend of spicy and cheesy flavors that evoke a sense of warmth and nostalgia.
Easy to Make: You don’t have to be a baking expert to whip these up; the straightforward method makes it a fun kitchen project for anyone!
Handheld Perfection: Whether it’s a family gathering or a casual game night, these delicious bites are perfect for sharing and easy to eat.
Versatile Filling: Feel free to explore different proteins or add veggies to suit your taste—your creativity is the only limit!
Crowd-Pleasing Snack: Whether served as an appetizer or a main dish, these Cheesy Dynamite Chicken Buns will leave everyone asking for seconds! For more tasty ideas, check out my Chicken Garlic Parmesan or Grilled Chicken Veggie recipes!
Cheesy Dynamite Chicken Buns Ingredients
For the Dough
- Flour – Provides structure for the buns; can substitute with whole wheat flour for a healthier option.
- Sugar – Enhances flavor and helps activate yeast; adjust for sweetness preference if desired.
- Salt – Balances flavors and strengthens dough structure; use kosher or sea salt for best results.
- Instant Yeast – Leavening agent that helps the dough rise; do not substitute with active dry yeast without adjustments.
- Milk – Adds moisture to the dough and helps activate yeast; both dairy and non-dairy options work well.
- Water – Hydrates the dough; adjust temperature to body temperature when mixing.
- Butter – Adds richness and moisture to the dough; melted butter is also a great substitute.
For the Filling
- Olive Oil – Used for sautéing the filling; avocado oil or a neutral oil can substitute if needed.
- Onion – Builds flavor in the filling; red or yellow onions work well, while shallots offer a milder alternative.
- Garlic – Adds aromatic flavor; adjust quantity based on your personal preference for garlic.
- Tomato Paste – Provides a rich, savory base; ketchup can be a suitable substitute in a pinch.
- Smoked Paprika – Adds warmth and a smoky flavor; regular paprika can be used but will lack smokiness.
- Cumin – Enhances flavor depth; you can substitute with coriander if desired.
- Hot Sauce – Brings the heat; adjust according to your spice tolerance or substitute with chili flakes for a different kick.
- Shredded Chicken – The primary filling component; for a quick option, store-bought rotisserie chicken works well.
- Cream Cheese – Provides a creamy texture; mascarpone or ricotta can serve as alternatives.
- Mozzarella – Melts beautifully to complement the filling; cheddar or a blend can be used instead.
These Cheesy Dynamite Chicken Buns are sure to become a household favorite with their spicy and cheesy charm!
Step‑by‑Step Instructions for Cheesy Dynamite Chicken Buns
Step 1: Dough Preparation
In a large mixing bowl, combine flour, sugar, salt, and instant yeast to create the base for your Cheesy Dynamite Chicken Buns. Gently warm milk and water until they reach body temperature, then add to the dry ingredients along with softened butter. Knead the mixture for 8–10 minutes until it’s smooth and elastic, then cover it with a damp cloth and let it rise in a warm area for about 1 hour, or until doubled in size.
Step 2: Filling Preparation
While the dough is rising, heat olive oil in a skillet over medium heat. Sauté chopped onions until they turn translucent, about 5 minutes, then add minced garlic and stir for an additional 30 seconds until fragrant. Incorporate tomato paste, smoked paprika, cumin, and hot sauce, cooking until well combined, then stir in the shredded chicken and heat through. Remove from the heat and mix in cream cheese and mozzarella until melted and creamy.
Step 3: Shaping the Buns
Once the dough has risen, punch it down to release the air, then divide it into equal portions. Flatten each piece into a small circle and place a generous spoonful of the cheesy chicken filling in the center. Carefully fold the edges over to seal the filling completely, then shape each bun into a ball. Arrange the buns on a baking tray lined with parchment paper, and let them rest for 10–15 minutes, allowing them to puff slightly.
Step 4: Baking
Preheat your oven to 375°F (190°C) while the buns are resting. Once preheated, brush the tops of the buns with a beaten egg for a golden finish. Bake the Cheesy Dynamite Chicken Buns for 18–20 minutes, or until they are golden brown and puffy. Once baked, cool them slightly on a wire rack before serving to enhance their delicious flavor and texture.
What to Serve with Cheesy Dynamite Chicken Buns?
Imagine a table filled with vibrant flavors and comforting textures that elevate your mealtime experience.
-
Crispy Coleslaw: A cool, tangy slaw adds a refreshing crunch, perfectly balancing the spicy warmth of the buns. The contrast is simply delightful!
-
Garlic Parmesan Fries: These crispy, cheesy fries mirror the rich flavors of the buns, creating a satisfying and indulgent combination that will have everyone reaching for more.
-
Fresh Garden Salad: Bright greens and a simple vinaigrette offer a light counterpoint to the hearty buns, brightening each bite and adding a pop of color to your plate.
-
Spicy Mango Salsa: The sweetness of mango with a kick of spice enhances the flavors of the chicken buns while providing a gorgeous contrast in color and texture.
-
Buttery Corn on the Cob: Sweet, juicy corn brushed with butter rounds out the meal, creating that nostalgic summer feeling, perfect for family gatherings.
-
Creamy Potato Salad: A classic side dish with a rich and tangy base complements the cheesy goodness of the buns and creates a heartwarming feast.
-
Icy Lemonade: A chilled glass of lemonade adds a refreshing zing that cuts through the richness of the buns, making each bite feel lighter and more enjoyable.
-
Brownie Bites: For dessert, rich, fudgy brownie bites wrap up the meal on a sweet note, delivering a perfect end to a satisfying evening!
These pairings create a delightful spread that will impress your guests and make your meals more memorable. Enjoy!
Storage Tips for Cheesy Dynamite Chicken Buns
-
Room Temperature: Allow buns to cool completely, then store at room temperature for up to 2 days in a sealed container to maintain their softness.
-
Fridge: Keep in an airtight container for up to 3 days. Reheat in the oven wrapped in foil for about 10-15 minutes to revive their fresh-from-the-oven texture.
-
Freezer: For longer storage, freeze the unbaked buns on a baking sheet until solid, then transfer them to a freezer bag. They will stay fresh for up to 3 months. Thaw overnight in the fridge before baking.
-
Reheating: If already baked, reheat directly from the fridge or freezer. Wrapped in foil, they can be warmed in the oven at 350°F (175°C) for 15-20 minutes, ensuring their gooey filling stays intact.
Expert Tips for Cheesy Dynamite Chicken Buns
-
Perfect Dough Rise: Ensure that your dough rises in a warm, draft-free environment. A good rise contributes to the fluffy texture of your Cheesy Dynamite Chicken Buns.
-
Seal Them Well: Carefully fold and seal the edges of the buns to prevent any filling from leaking out during baking. This helps maintain the gooey goodness inside.
-
Adjust the Heat: If you’re sensitive to spice, start with less hot sauce in the filling and add more to taste after cooking. You can customize the heat level to your liking!
-
Check for Doneness: Keep an eye on the buns as they bake. They should be golden brown and puffy; if they’re overbaked, they could become dry.
-
Experiment with Fillings: Don’t hesitate to switch up the filling! Adding vegetables or different types of cheese can result in a delightful variation of the classic Cheesy Dynamite Chicken Buns.
Make Ahead Options
These Cheesy Dynamite Chicken Buns are perfect for meal prep, allowing you to enjoy fresh, gooey snacks even on your busiest days! You can prepare the dough up to 24 hours in advance—just follow the mixing and kneading steps, then let it rise, shape, and refrigerate until ready to use. The filling can be made and stored in the fridge for up to 3 days; simply cool it completely before transferring to an airtight container to maintain its creamy texture. When you’re ready to bake, allow the dough to come to room temperature, fill the buns, and bake them as instructed for that fresh-out-of-the-oven taste! This pre-planning ensures that your Cheesy Dynamite Chicken Buns are just as delicious with minimal effort.
Cheesy Dynamite Chicken Buns Variations & Substitutions
Feel free to tweak this recipe to match your taste preferences and dietary needs, creating a delightful explosion of flavors!
- Protein Swap: Substitute shredded pork or beef for chicken—both options bring their own unique flavor profile that’s equally delicious!
- Vegetarian Filling: For a meatless option, try using chopped mushrooms and spinach with extra cheese for a savory twist that satisfies.
- Heat Level Adjustment: Vary the heat by using different hot sauces—from mild to extra spicy, adjust to suit your palate. Even a dash of cayenne can pack a punch!
- Cheese Blend: Get creative with mozzarella by using pepper jack for an extra kick or a mix of cheddar for enhanced flavor depth.
- Whole Wheat Dough: Swap all-purpose flour for whole wheat flour to make your buns a bit healthier without sacrificing that soft, pillowy texture.
- Flavor Boost: Incorporate fresh herbs like cilantro or parsley to the filling for a fresh, aromatic burst of flavor that transforms each bite!
- Add Crunch: Toss in some thinly sliced jalapeños or bell peppers for additional texture and brightness that elevate the filling experience.
- Garnish Variations: Serve with avocado slices or a dollop of sour cream on the side—creamy accompaniments that perfectly balance the spiciness.
With so many delightful possibilities, you’ll never run out of ways to enjoy these Cheesy Dynamite Chicken Buns! For more inspiring dishes, check out my flavor-packed Hawaiian Chicken Salad or the savory Grilled Chicken Veggie recipes!
Cheesy Dynamite Chicken Buns Recipe FAQs
How do I choose the right ripeness of ingredients?
Absolutely! When selecting onions, look for ones that are firm and have shiny skin. For chicken, fresh, high-quality options are essential. If using rotisserie chicken, ensure it’s still juicy and not dried out. The cream cheese should be smooth yet not overly soft. Also, check for mozzarella that is fresh and has not started to turn rubbery—this guarantees that lovely gooey filling!
What is the best way to store Cheesy Dynamite Chicken Buns?
You can store these buns at room temperature for up to 2 days in a sealed container. For longer storage, place them in an airtight container in the fridge for up to 3 days. If you want to keep them longer, freeze the unbaked buns on a baking sheet until solid, then transfer them to a freezer bag, and they’ll stay fresh for up to 3 months!
Can I freeze Cheesy Dynamite Chicken Buns?
Definitely! Freeze the unbaked buns before they rise. Once they are formed, arrange them on a baking sheet and freeze until solid, then move them to a freezer bag. For best results, thaw them in the fridge overnight before baking. This way, you can have warm, cheesy goodness whenever you crave it!
How can I prevent the filling from leaking during baking?
Very important! After you spoon the filling onto the dough, make sure to pinch the edges together firmly to create a tight seal. I suggest rolling the bun gently between your hands after sealing to give it a uniform shape. This helps maintain the integrity of the filling during the baking process.
Are there any dietary considerations for Cheesy Dynamite Chicken Buns?
Sure thing! If you have dietary restrictions, consider using gluten-free flour to make the dough, and ensure that all your fillings—especially cheese—are gluten-free as well. For vegan options, substitute the chicken with plant-based protein, use vegan cream cheese, and replace butter and milk with their plant-based counterparts. Always double-check labels for potential allergens like dairy or gluten!
What should I do if my dough isn’t rising properly?
If your dough isn’t rising, it might be due to the yeast being inactive. Make sure your milk and water are warm, not too hot! Yeast thrives in temperatures between 100°F and 110°F (38°C and 43°C). If the dough is not rising after 1 hour, give it a gentle knead and allow it to rise in a warmer spot, or you can place it in a slightly heated oven (turned off) to help it along!
Cheesy Dynamite Chicken Buns: Spicy Comfort in Every Bite
Ingredients
Equipment
Method
- In a large mixing bowl, combine flour, sugar, salt, and instant yeast. Warm milk and water until body temperature, then add to dry ingredients with softened butter. Knead for 8–10 minutes until smooth, cover, and let rise for 1 hour.
- Heat olive oil in a skillet over medium heat. Sauté chopped onions for 5 minutes, add minced garlic and stir for 30 seconds. Incorporate tomato paste, smoked paprika, cumin, and hot sauce, then stir in shredded chicken and heat through. Mix in cream cheese and mozzarella until creamy.
- Once the dough has risen, punch it down and divide into equal portions. Flatten each piece, place filling in the center, fold edges over, and shape into a ball. Arrange on a baking tray and let rest for 10–15 minutes.
- Preheat your oven to 375°F (190°C). Brush the tops of the buns with a beaten egg. Bake for 18–20 minutes until golden brown and puffy. Cool slightly on a wire rack before serving.
Leave a Reply