
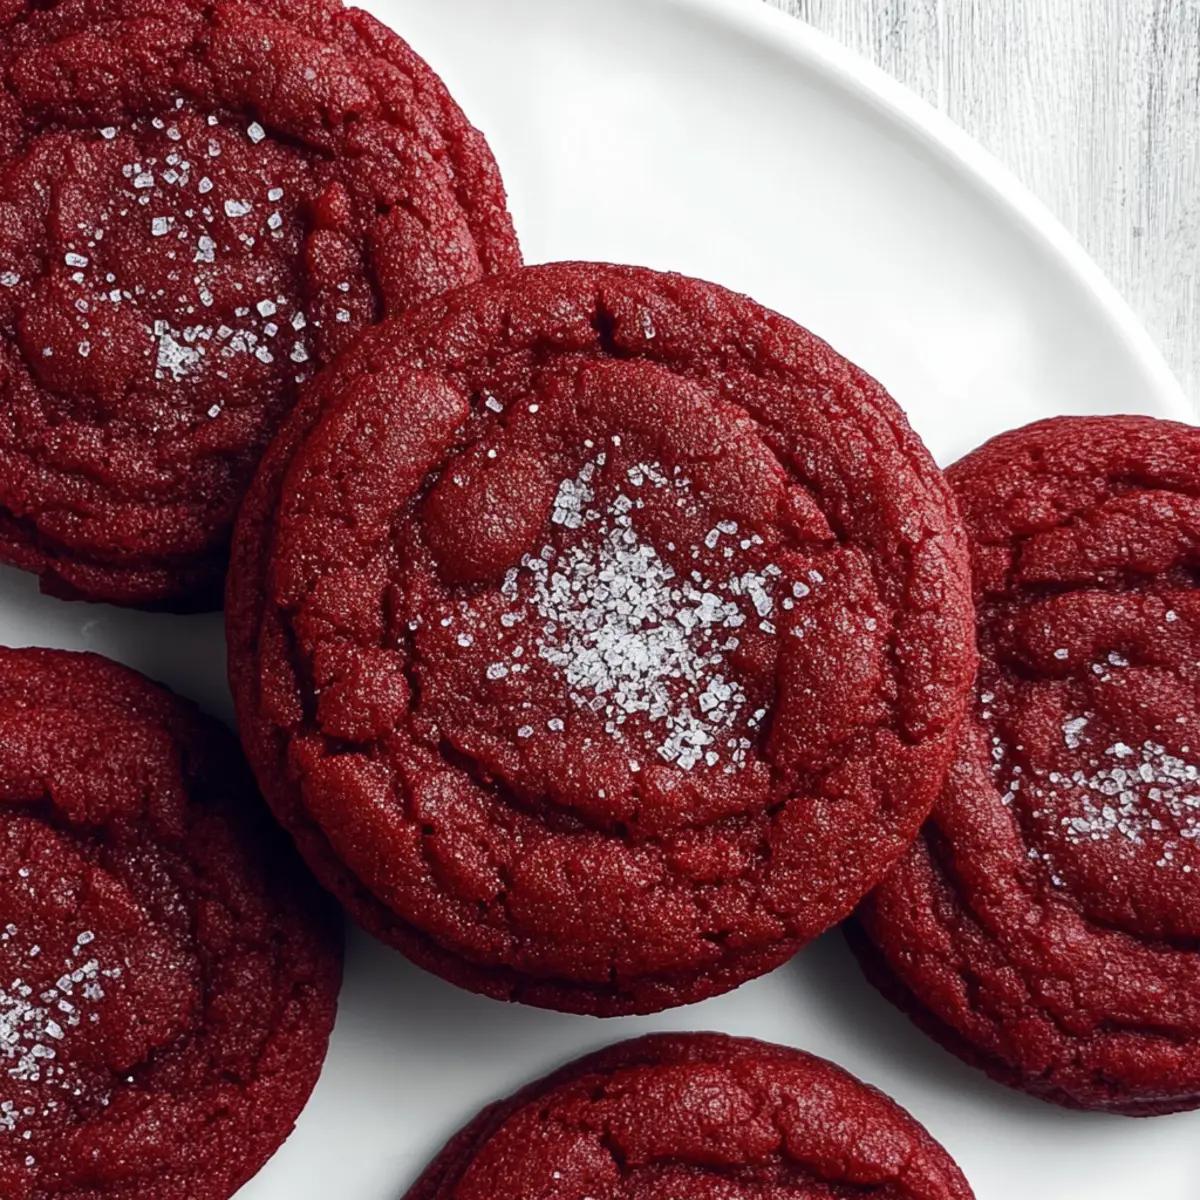
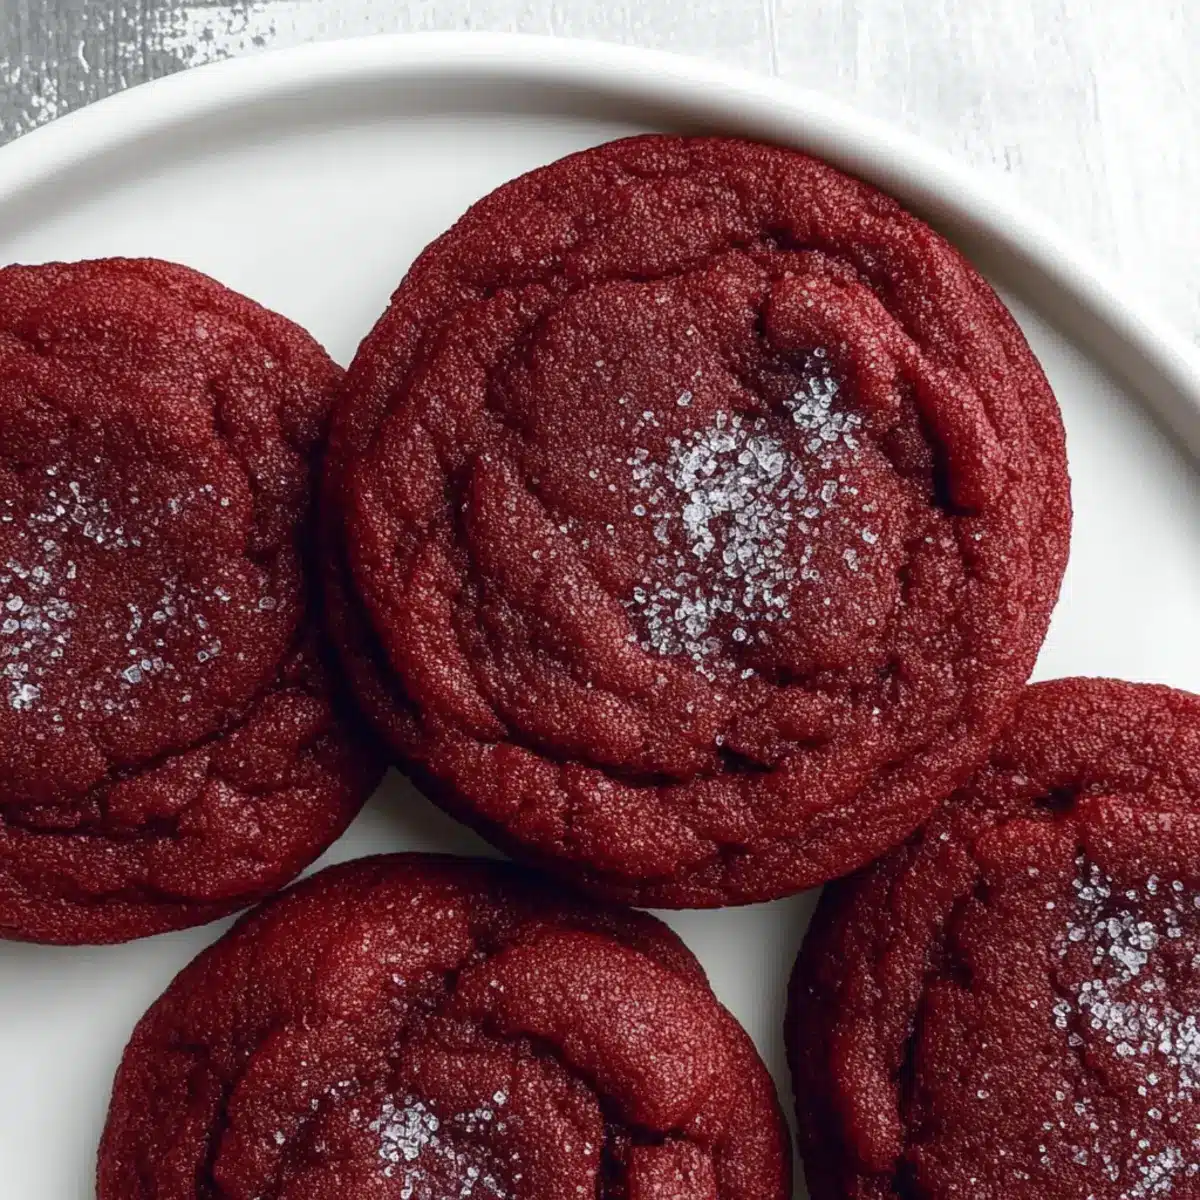
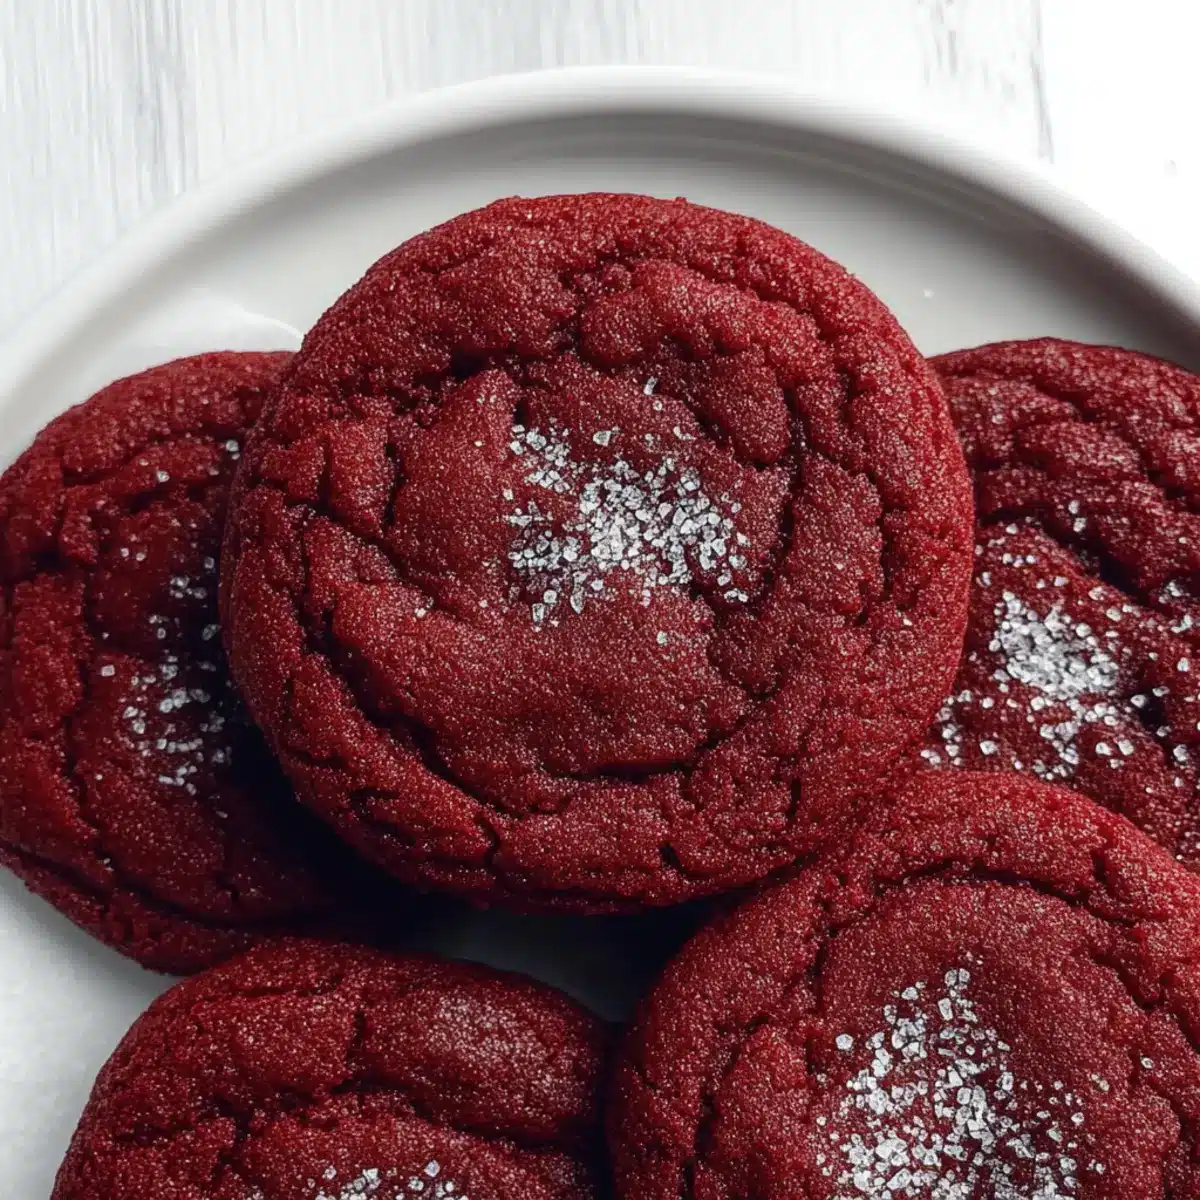
As I sat down with a cup of coffee, the aroma of freshly baked goods danced through the air, drawing me back to the comforting warmth of my childhood kitchen. That’s when I decided to whip up a batch of Red Velvet Cookies, a delightful merge of cake and cookie that has a unique twist! These treats are not only incredibly easy to make—no chilling time required—but they also promise a soft, chewy texture that melts in your mouth with every bite. Perfect for celebrations or simply indulging yourself, these cookies can be quickly prepared with just a bowl and a whisk. Are you ready to bring a pop of vibrant red into your cookie jar? Let’s dive into this delightful recipe together!
Why Are These Cookies So Special?
Irresistible Flavor: The rich, fudgy taste combined with just the right sweetness makes each bite unforgettable.
No-Chill Recipe: These soft and chewy cookies come together quickly—perfect for when you’re short on time but still want a homemade treat.
Colorful Presentation: Stunning red velvet color adds visual appeal, making them a showstopper for any occasion, from holiday parties to casual gatherings.
Versatile Options: Customize them with chocolate chips or cream cheese frosting to suit your taste and occasion—endless possibilities!
Gluten-Free Adaptation: With an easy swap of flour, these cookies can cater to gluten-sensitive family and friends, ensuring everyone can enjoy!
Every batch of these Red Velvet Cookies is sure to vanish quickly, so be prepared to share your delicious secret recipe!
Red Velvet Cookies Ingredients
For the Batter
- Butter – Adds richness; melt and cool before mixing to prevent cooking the eggs.
- Granulated Sugar – Sweetens the cookies and contributes to a soft, chewy texture.
- Brown Sugar – Provides moisture and enhances chewiness for an irresistible bite.
- Egg – Binds ingredients together; using room temperature eggs guarantees better emulsification.
- Vanilla Extract – Enhances overall flavor and can be swapped with almond extract for a twist.
- Red Gel Food Coloring – Gives the signature red color; use gel instead of liquid for optimal results and can be omitted for chocolate cookies.
For the Dry Mix
- All-Purpose Flour – Forms the structure of the cookies; substitute with a gluten-free flour blend for a gluten-free option.
- Unsweetened Cocoa Powder – Adds a rich chocolate flavor; Dutch-processed gives an extra depth of taste.
- Baking Powder – Acts as a leavening agent, providing softness and rise.
- Baking Soda – Ensures puffiness and browning, enhancing the cookie’s texture.
- Salt – Balances sweetness and enhances the overall flavor profile.
For Decoration
- Red Sanding Sugar – Sprinkles on top for a festive finish; feel free to use regular granulated sugar instead for a simpler appearance.
Now that you have all the key components ready, let’s get baking! These Red Velvet Cookies will surely be a hit at your next gathering—happy baking!
Step‑by‑Step Instructions for Red Velvet Cookies
Step 1: Melt the Butter
Begin by melting 1/2 cup of butter in a saucepan over medium-low heat. Watch closely as it transforms from solid to liquid, stirring occasionally to ensure even melting. Once fully melted, remove it from heat and allow the butter to cool, about 5-8 minutes, before proceeding to prevent cooking the eggs later.
Step 2: Mix Wet Ingredients
In a mixing bowl, whisk together the cooled melted butter, 1/2 cup granulated sugar, and 1/4 cup brown sugar until smooth and creamy. Next, add one room-temperature egg and 1 teaspoon of vanilla extract, stirring until fully incorporated and the mixture is glossy. This forms the base of your Red Velvet Cookies, combining all the rich flavors.
Step 3: Add Color
Now, incorporating color into your mixture is key to achieving those vibrant Red Velvet Cookies! Stir in 1 tablespoon of red gel food coloring, mixing until the color is even throughout. This step should evoke a beautiful, bold red hue that signals the deliciousness to come.
Step 4: Combine Dry Ingredients
In a separate bowl, whisk together 1 ½ cups of all-purpose flour, 2 tablespoons of unsweetened cocoa powder, 1 teaspoon of baking powder, 1/2 teaspoon of baking soda, and a pinch of salt. Ensure all dry ingredients are well combined to prevent uneven texture in your cookies, creating a balanced foundation for your dough.
Step 5: Combine Wet and Dry Mixtures
Gently fold the dry mixture into the wet ingredients until just combined, being careful not to overmix. The dough will be soft and slightly sticky, reflecting the perfect consistency needed for your Red Velvet Cookies. Set the dough aside to allow the flavors to meld while you prepare the baking sheets.
Step 6: Prepare for Baking
Preheat your oven to 350°F (175°C) and line two baking sheets with parchment paper. This step is crucial as it ensures your cookies bake evenly and don’t stick. Take a moment to gather your cookie scoop, which will help you portion the dough neatly, ensuring uniform cookies.
Step 7: Scoop and Roll Dough
Using the cookie scoop, portion out the dough into equal rounds and roll them in red sanding sugar for added decoration and texture. Place each rolled dough ball onto your prepared baking sheets, leaving space between them, as they will spread slightly during baking.
Step 8: Bake the Cookies
Place the trays in your preheated oven and bake the Red Velvet Cookies for 9-10 minutes. Keep an eye on them; they should look slightly puffy and set around the edges but still soft in the center. This slight underbake ensures you achieve the chewy texture that defines these delightful cookies.
Step 9: Cool the Cookies
Once baked, remove the trays from the oven and let the cookies cool on the sheets for about 5-10 minutes. This resting period allows them to firm up slightly before transferring them to a wire rack. This crucial step enhances their texture, keeping them perfectly soft and chewy.
How to Store and Freeze Red Velvet Cookies
Room Temperature: Store cookies in an airtight container at room temperature for up to 5 days to maintain their soft and chewy texture.
Fridge: If you’re keeping them longer, place cookies in the refrigerator, where they can last up to a week; just ensure they’re tightly wrapped to avoid dryness.
Freezer: For longer storage, freeze cookies in a single layer on a baking sheet until solid, then transfer to an airtight container or freezer bag for up to 3 months.
Reheating: When ready to enjoy your frozen Red Velvet Cookies, simply thaw at room temperature for a couple of hours or warm them gently in the microwave for about 10-15 seconds.
Expert Tips for Red Velvet Cookies
-
Avoid Overmixing: Gently fold the dry and wet ingredients together. Overmixing can make cookies tough, affecting their soft and chewy texture.
-
Watch the Baking Time: Pull the cookies from the oven when they look slightly puffy in the center. This helps maintain their chewy, fudgy center.
-
Use Quality Ingredients: Fresh, high-quality ingredients like pure vanilla extract and reliable food coloring can elevate the flavor and color of your Red Velvet Cookies.
-
Customize Flavor: Want a chocolate twist? Add up to 3/4 cup of chocolate chips for an extra decadent treat while keeping the original cookie profile.
-
Cool Gradually: Let cookies cool on the baking sheet for a few minutes before transferring them to a wire rack. This step is crucial for achieving that desirable chewy consistency!
What to Serve with Irresistibly Chewy Red Velvet Cookies?
These delightful treats will inspire you to create a full meal that dances between flavors and textures, ensuring joyful moments for everyone at the table.
- Cold Milk: A classic pairing, the creamy richness of cold milk complements the sweet, chewy texture of the cookies beautifully.
- Cream Cheese Frosting: Take the red velvet experience up a notch by dolloping or sandwiching with cream cheese frosting for a decadent treat.
- Fresh Strawberries: The tart juiciness of strawberries adds a refreshing contrast to the sweet richness of the cookies, making every bite a burst of flavor.
- Vanilla Ice Cream: On warm cookies, a scoop of vanilla ice cream creates a delightful melting moment, blending sweet and creamy indulgence.
- Chocolate Ganache: Drizzling warm chocolate ganache adds an elegant touch and enhances the chocolate flavor, marrying sweet and rich beautifully.
- Homemade Lemonade: The bright citrus notes of lemonade offer a refreshing contrast, balancing the cookies’ sweetness with a zesty twist.
- Coffee or Espresso: The rich, bold flavors of coffee heighten the cookies’ fudgy notes, creating a comforting afternoon treat you won’t want to miss.
- Sliced Bananas: Creamy and sweet, bananas lend a soft texture that can be a lovely, healthful sidekick to the chewy cookies.
- Nutty Trail Mix: A handful of nutty trail mix provides a delightful crunch and additional flavors, enhancing the overall experience of your dessert.
Make Ahead Options
These Red Velvet Cookies are perfect for meal prep enthusiasts looking to save time without sacrificing deliciousness! You can prepare the cookie dough up to 24 hours in advance; simply mix all the ingredients as directed and store the dough in an airtight container in the refrigerator. When you’re ready to bake, let the dough sit at room temperature for about 10-15 minutes before shaping and rolling in sanding sugar. For an even simpler option, you can scoop the dough into balls and freeze them for up to 3 months; just bake them directly from the freezer, adding a couple of extra minutes to the baking time. This way, you can enjoy fresh, chewy Red Velvet Cookies with minimal effort!
Red Velvet Cookies Variations
Feel free to unleash your creativity with these variations and make the red velvet cookies truly yours!
-
Gluten-Free: Substitute all-purpose flour with a gluten-free flour mix for deliciously inclusive cookies that everyone can enjoy.
-
Natural Coloring: Swap red gel food coloring for beet powder, giving your cookies a beautiful hue without artificial ingredients. The earthy sweetness of beets adds to the flavor too!
-
Flavor Varieties: Add white chocolate chips, butterscotch chips, or even toffee bits to the dough for a delightful twist. Each variation introduces a new layer of sweetness, creating a cookie experience that’s uniquely yours.
-
Cream Cheese Frosting: Top with cream cheese frosting for a true red velvet experience. Spread it on right after baking for a melty layer of goodness, or turn them into decadent cookie sandwiches!
-
Nutty Crunch: Fold in chopped walnuts or pecans for a savory crunch amidst the soft, chewy texture, adding a delightful contrast that keeps every bite interesting.
-
Spiced Up: Sprinkle in a touch of cinnamon or nutmeg to the batter for a warm, spicy note that elevates the overall flavor profile, perfect for cozy gatherings.
-
Cocoa Boost: Increase unsweetened cocoa powder to ¼ cup for a richer chocolate flavor, enhancing the beloved cookie’s cake-like essence, making each bite deeply satisfying.
-
Zesty Vibe: Add a dash of orange zest for a fresh, zesty flavor that brightens up this classic treat, making it enjoyable for warm summer gatherings or any day you need a citrusy uplift.
With so many options, your red velvet possibilities are endless! For additional inspiration, say, check out my tips on customizing cookie recipes and explore the world of alternative baking solutions to fit your taste preferences perfectly. Happy baking!
Red Velvet Cookies Recipe FAQs
How do I choose the best ripe ingredients for my Red Velvet Cookies?
Absolutely! Using high-quality ingredients is key. Ensure your butter is fresh and at room temperature for easy blending. Eggs should be at room temperature too—this helps with emulsification, enhancing texture. For the cocoa powder, opt for Dutch-processed for a richer flavor, and always check that your baking powder is fresh for optimal rise!
What is the best way to store Red Velvet Cookies, and how long do they last?
Very! Store your Red Velvet Cookies in an airtight container at room temperature for up to 5 days. For longer preservation, refrigerate them, where they can last for up to a week. Just be sure to keep them tightly wrapped to maintain moisture!
Can I freeze Red Velvet Cookies, and how should I do it?
Absolutely! For freezing, first arrange your cookies in a single layer on a baking sheet and freeze until they are solid. Then, transfer them to an airtight container or freezer bag, where they can be stored for up to 3 months. When you’re ready to indulge, simply thaw at room temperature for a couple of hours, or if you’re in a hurry, microwave for 10-15 seconds to enjoy that fresh-baked taste!
What should I do if my Red Velvet Cookies spread too much during baking?
If your cookies spread excessively, it could be due to melted butter being too warm or insufficient flour. For next time, chill your dough in the refrigerator for 20-30 minutes before baking and ensure your measurements are exact. You can also add a little more flour to the mixture if you notice it’s too wet. Feel free to experiment; baking can be forgiving, and sometimes a little tweak makes a delicious difference!
Are there any dietary considerations I should be aware of when making Red Velvet Cookies?
Very! If you have gluten-sensitive friends or family members, you can substitute all-purpose flour with a gluten-free flour blend that contains xanthan gum to maintain texture. Also, as these cookies contain eggs, they are not suitable for vegans, but you can try swapping the egg with a flax egg (1 tablespoon flaxseed meal mixed with 2.5 tablespoons water) if you’re looking for a plant-based option. Always check for allergies regarding ingredients like food coloring and vanilla extract as well!

Soft and Chewy Red Velvet Cookies That'll Melt Your Heart
Ingredients
Equipment
Method
- Melt the Butter: Melt 1/2 cup of butter in a saucepan over medium-low heat. Cool for 5-8 minutes.
- Mix Wet Ingredients: In a bowl, whisk melted butter, 1/2 cup granulated sugar, and 1/4 cup brown sugar until smooth. Add 1 egg and 1 tsp vanilla, mix until glossy.
- Add Color: Stir in 1 tablespoon of red gel food coloring until evenly mixed.
- Combine Dry Ingredients: In another bowl, whisk 1 1/2 cups flour, 2 tbsp cocoa powder, 1 tsp baking powder, 1/2 tsp baking soda, and a pinch of salt.
- Combine Wet and Dry Mixtures: Fold the dry ingredients into the wet until just combined. Dough will be soft and slightly sticky.
- Prepare for Baking: Preheat oven to 350°F (175°C) and line baking sheets with parchment paper.
- Scoop and Roll Dough: Use a cookie scoop to portion the dough and roll in red sanding sugar. Place on baking sheets.
- Bake the Cookies: Bake for 9-10 minutes until slightly puffy. They should remain soft in the center.
- Cool the Cookies: Let cookies cool on the baking sheets for 5-10 minutes before transferring to a wire rack.
Leave a Reply