
While rummaging through my fridge one morning, I stumbled upon a bowl of leftover mashed potatoes, just waiting for a new purpose. That’s when I remembered the charm of Irish Potato Farls. These delightful treats not only breathe new life into humble ingredients but also make for a snack or a hearty breakfast item that’s both budget-friendly and versatile. With their crispy, golden crust enveloping a soft and fluffy interior, you’ll find these farls to be the perfect addition to any meal. Whether you’re whipping them up for a weekend brunch or sneaking them into a busy weekday breakfast, Irish Potato Farls will soon steal the spotlight on your plate. Curious about how to turn those leftovers into something magical? Let’s get cooking!
Why are Irish Potato Farls so special?
Versatility at Its Finest: Irish Potato Farls effortlessly transform leftover mashed potatoes into a new, mouthwatering dish that fits any meal.
Budget-Friendly Delight: Utilizing simple ingredients, this recipe is gentle on your wallet while still delivering comfort and satisfaction.
Quick and Easy: With a straightforward preparation process, you can whip up these farls in no time—perfect for busy mornings.
Crowd-Pleasing Flavor: The irresistible combination of crispy edges and fluffy centers makes these farls a hit with family and friends alike.
Gluten-Free Adaptable: Not only can you use gluten-free flour, but the recipe also allows for creative mix-ins like herbs or cheese, ensuring everyone can enjoy them!
Discover more ways to make these delightful farls in your kitchen and elevate your breakfast game with our helpful tips and tricks!
Irish Potato Farls Ingredients
• Transform leftovers into delicious treats!
For the Dough
- Mashed Potatoes – Provides the base and moisture; cooled leftovers work best for a perfect texture.
- All-Purpose Flour – Gives structure and a slight nuttiness; swap for gluten-free flour if desired, but expect some texture changes.
- Salt – Enhances flavor; adjust to your taste preference.
- Butter (melted) – Adds richness and aids in browning; use plant-based butter for a dairy-free option.
Step‑by‑Step Instructions for Irish Potato Farls
Step 1: Prepare the Dough
In a large mixing bowl, combine your cooled mashed potatoes with all-purpose flour, salt, and melted butter. Use your hands or a fork to mix until a soft dough forms, about 2–3 minutes. The dough should be smooth and slightly sticky but manageable. If you prefer gluten-free Irish Potato Farls, substitute the flour with a gluten-free mix here.
Step 2: Knead Gently
Transfer the dough onto a lightly floured work surface. Flour your hands to prevent sticking, and gently knead the dough for about 1–2 minutes until it becomes smooth. Be careful not to overwork it; the goal is to keep the texture airy. Once completed, your dough should feel soft and slightly tacky without clumping.
Step 3: Roll Out the Dough
Using a rolling pin, roll the dough into a circle approximately 1/4 inch thick. Keep the surface lightly floured as needed to prevent sticking. The rolled dough should be even, ensuring consistent cooking for your Irish Potato Farls. Aim for a perfect round shape, which not only looks appealing but cooks evenly.
Step 4: Cut the Farls
With a sharp knife or a dough cutter, cut the rolled dough into quarters, forming triangle-shaped farls. Each piece should be about the same size for even cooking. If the edges become ragged, use your fingers to gently neaten them up for a better presentation.
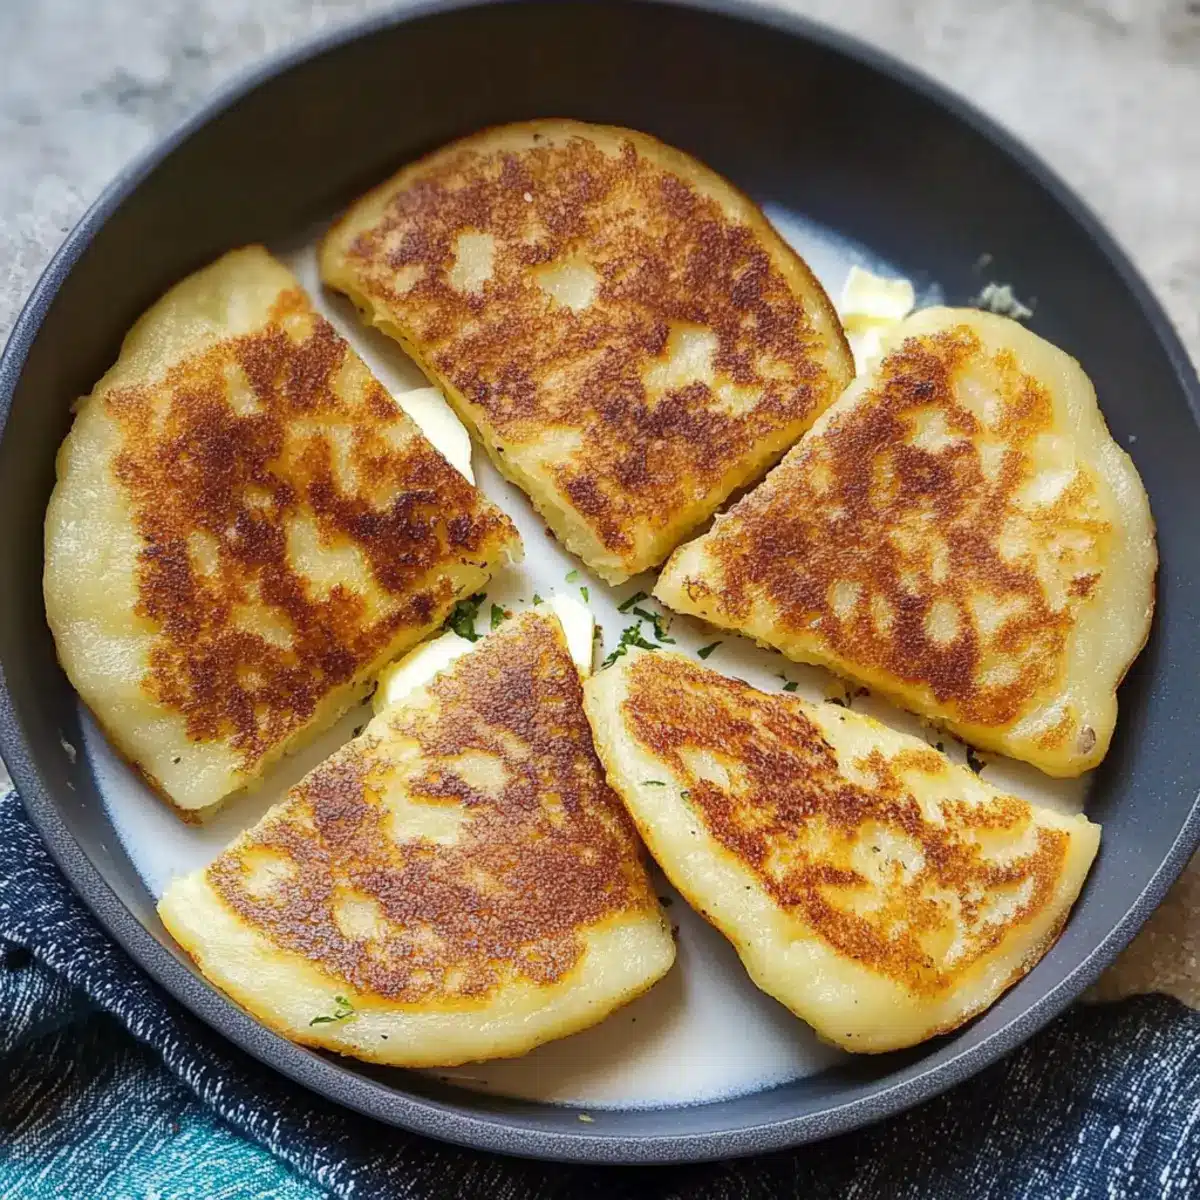
Step 5: Cook the Farls
Heat a non-stick skillet or griddle over medium heat. You won’t need any oil as the melted butter earlier will help with browning. Place the farls onto the skillet and cook for 3–4 minutes per side. You’re looking for a golden-brown crust that hints at crispness, so watch closely until each side is beautifully toasted.
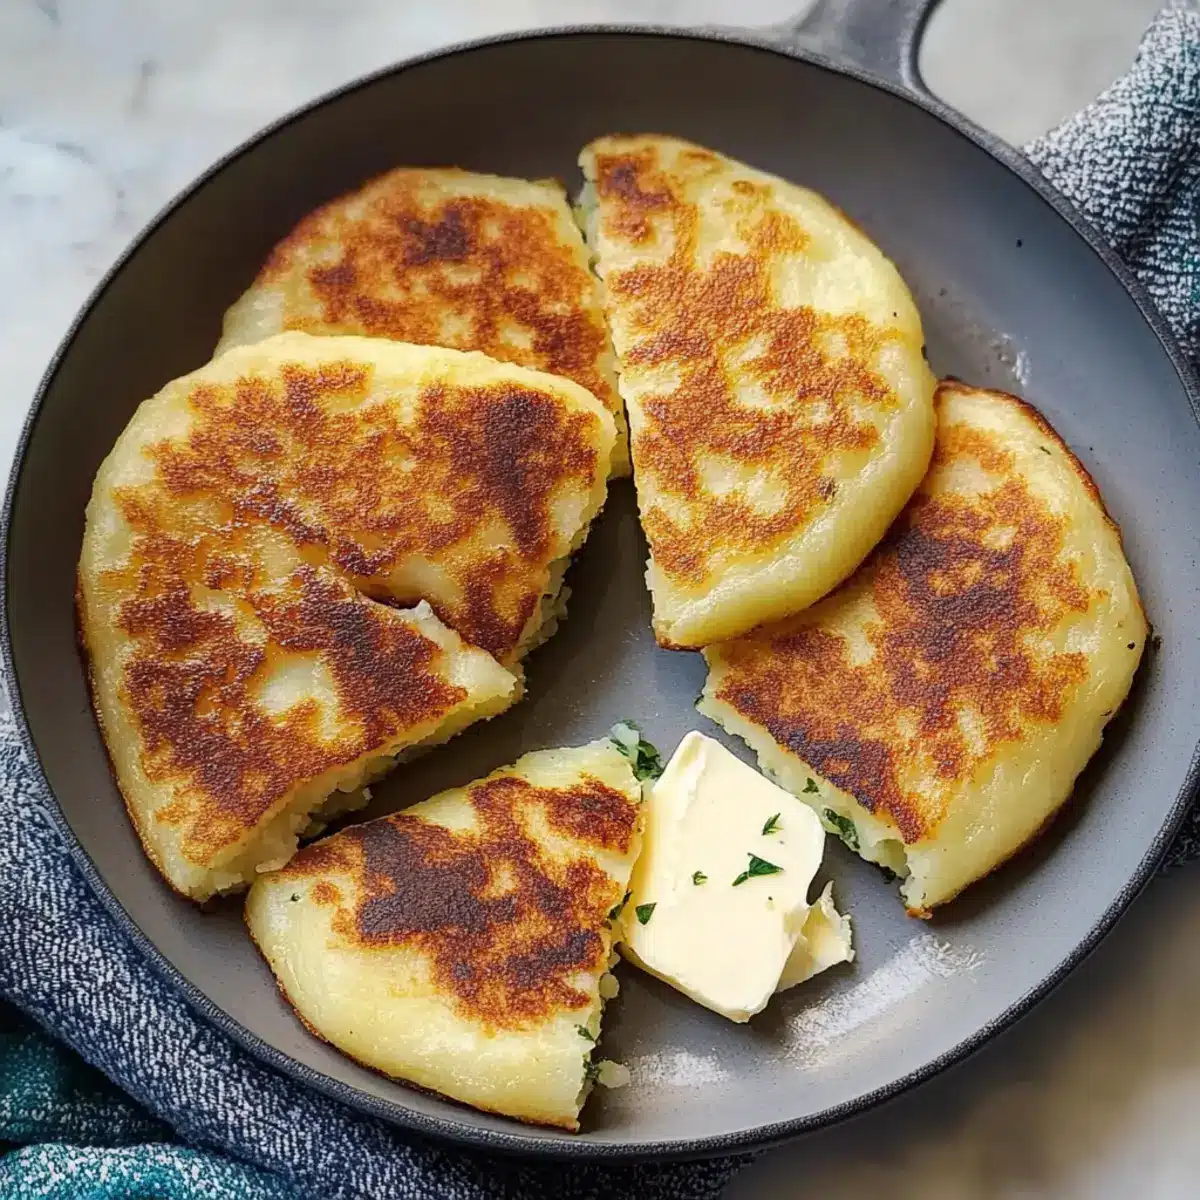
Step 6: Serve Warm
Once the farls are cooked to perfection, remove them from the skillet and serve them warm. Enjoy your delicious Irish Potato Farls with a pat of butter, alongside eggs, or with smoked salmon for a lovely breakfast spread. Their crispy exterior with a fluffy interior makes them a wonderfully comforting addition to any meal.
Expert Tips for Perfect Irish Potato Farls
- Cool the Potatoes: Always start with cooled mashed potatoes to avoid a gummy texture—this assures a light and fluffy interior for your farls.
- Knead Lightly: Gently knead the dough just enough to combine ingredients. Over-kneading can lead to denser farls; aim for a smooth but airy texture.
- Watch the Heat: Maintain medium heat while cooking to achieve that desired golden-brown crust without burning the farls. Patience is key!
- Alter Flour Type: If you’re using a gluten-free alternative, expect slight differences in texture. Understand that the farls might be less airy—but still delicious!
- Mix and Match: Get creative by adding herbs, cheese, or spices to the dough. This way, your Irish Potato Farls become a unique dish everyone will love!
Storage Tips for Irish Potato Farls
- Room Temperature: Store leftover farls in a cool, dry place for up to 2 days. Place them in a paper bag to allow airflow and prevent sogginess.
- Fridge: Keep Irish Potato Farls in an airtight container in the refrigerator for up to 3 days. This helps maintain their texture while preventing odors from other foods.
- Freezer: For longer storage, freeze cooled farls in a single layer, then transfer to an airtight container or freezer bag. They can be frozen for up to 3 months without losing flavor.
- Reheating: To reheat, simply warm them in a non-stick skillet over low heat for about 2-3 minutes per side, or pop them in a toaster for a quick and crispy revival.
Irish Potato Farls Variations & Substitutions
Feel free to mix it up and craft your perfect version of Irish Potato Farls with these fun and tasty twists!
- Gluten-Free: Swap all-purpose flour for a gluten-free blend to cater to dietary needs.
- Herb-Infused: Incorporate fresh herbs such as chives or thyme into the dough for a delightful flavor boost that elevates each bite.
- Cheesy Goodness: Add grated cheese like cheddar or mozzarella to the mix for a rich and savory twist on traditional farls.
- Against the Heat: For a spicy kick, sprinkle in some crushed red pepper flakes or finely chopped jalapeños to give your farls a zesty kick.
- Sweet Touch: Drizzle in some honey or maple syrup into the dough for a hint of sweetness that pairs perfectly with breakfast toppings.
- Savory Add-Ins: Toss in sautéed onions or garlic for an aromatic flavor that complements the creamy potatoes beautifully.
- Texture Play: For a crunchier texture, skip the rolling pin and press the dough directly into a pan, then cut into squares before cooking.
- Breakfast Stack: Layer your farls with smoked salmon, cream cheese, and capers to create a decadent breakfast that feels like a treat.
Feel free to explore these variations and make the recipe your own! If you’re interested in more creative ideas, check out our delicious breakfast recipes for inspiration or give our homemade butter a try to enjoy with your farls!
Make Ahead Options
These Irish Potato Farls are an excellent option for make-ahead meal prep that saves you precious time during busy mornings! You can prepare the dough up to 24 hours in advance—simply combine your cooled mashed potatoes, flour, salt, and melted butter, then cover and refrigerate. If you want to take it a step further, you can also shape the farls and keep them in the fridge, ensuring they’re well-wrapped to maintain moisture. When you’re ready to serve, just heat your non-stick skillet and cook the farls for 3–4 minutes per side until golden brown. This way, you’ll enjoy flavorful, crispy Irish Potato Farls that taste just as delicious as when freshly made!
What to Serve with Irish Potato Farls
Cozy up your dining experience by pairing these delightful creations with complementary flavors that elevate every bite.
- Fried Eggs: Creamy yolks balance the crispy farls perfectly, making for a classic breakfast combination that warms the soul. They add richness and extra protein to power your day.
- Grilled Tomatoes: Their juicy sweetness provides a refreshing contrast to the crispiness of the farls, brightening your plate with a splash of color and flavor.
- Smoked Salmon: This luxurious addition elevates your farls into a fancy brunch option, adding depth with its smoky flavor and silky texture that pairs well with a touch of crème fraîche.
- Avocado Slices: The creaminess of ripe avocado complements the golden crust of the farls, creating a delightful mouthfeel that’s both satisfying and nutritious.
- Baked Beans: A hearty side that adds texture and a touch of sweetness, baked beans merge seamlessly with the fluffy centers of the farls for a comforting meal.
- Sauerkraut: This tangy topping offers a nice crunch while cutting through the richness, introducing a delightful zing that makes the dish even more interesting.
- Herbed Yogurt Dip: A light, refreshing sauce filled with dill and citrus brings an unexpected layer of flavor, perfectly contrasting with the warm, buttery farls.
- Buttery Peas: Their pop of sweetness makes a charming pairing, adding both color and texture to your breakfast table while being a delightful and healthy option.
- Coffee or Tea: A warm beverage—like a bold cup of coffee or herbal tea—perfectly balances the savory notes of your meal, rounding off your breakfast with warmth and comfort.
Irish Potato Farls Recipe FAQs
How do I choose the best mashed potatoes for this recipe?
For the best Irish Potato Farls, make sure to use cooled leftover mashed potatoes. Freshly made, warm mashed potatoes can lead to a gummy texture, which you want to avoid. Look for smooth and creamy mashed potatoes with no dark spots or lumps—this ensures your farls have a pleasant texture.
What is the best way to store Irish Potato Farls?
Store leftover farls at room temperature for up to 2 days in a paper bag to prevent sogginess. Alternatively, place them in an airtight container in the refrigerator for up to 3 days. If you’re preparing them ahead of time, freezing is a great option, as they can last for up to 3 months in the freezer if wrapped well to avoid freezer burn.
Can I freeze Irish Potato Farls?
Absolutely! To freeze, allow your farls to cool completely. Arrange them in a single layer on a baking sheet and place in the freezer until firm. Once firm, transfer them to an airtight container or freezer bag, layering them with parchment paper if needed. This will prevent them from sticking together. When ready to enjoy, simply reheat them directly from the freezer.
What should I do if my dough feels too sticky?
If your dough is too sticky to handle, it’s likely you need to add a little more flour. Sprinkle in just a tablespoon of flour at a time as you gently knead until it becomes smooth and manageable. Be cautious not to overdo it, as too much flour can make your farls dense instead of light and fluffy.
Are Irish Potato Farls suitable for a gluten-free diet?
Yes, you can easily make Irish Potato Farls gluten-free! Substitute the all-purpose flour with a gluten-free blend. Keep in mind that the texture may differ slightly, but they’ll still be delicious. Just ensure that your gluten-free flour blend contains xanthan gum or a similar binder to help maintain the desired consistency.
Irish Potato Farls - Comforting, Crispy Breakfast Bliss
Ingredients
Equipment
Method
- In a large mixing bowl, combine your cooled mashed potatoes with all-purpose flour, salt, and melted butter. Use your hands or a fork to mix until a soft dough forms, about 2–3 minutes.
- Transfer the dough onto a lightly floured work surface and gently knead for about 1–2 minutes until it becomes smooth.
- Using a rolling pin, roll the dough into a circle approximately 1/4 inch thick.
- With a sharp knife, cut the rolled dough into quarters, forming triangle-shaped farls.
- Heat a non-stick skillet or griddle over medium heat. Place the farls onto the skillet and cook for 3–4 minutes per side until golden-brown.
- Once cooked, remove the farls from the skillet and serve warm.
Leave a Reply