
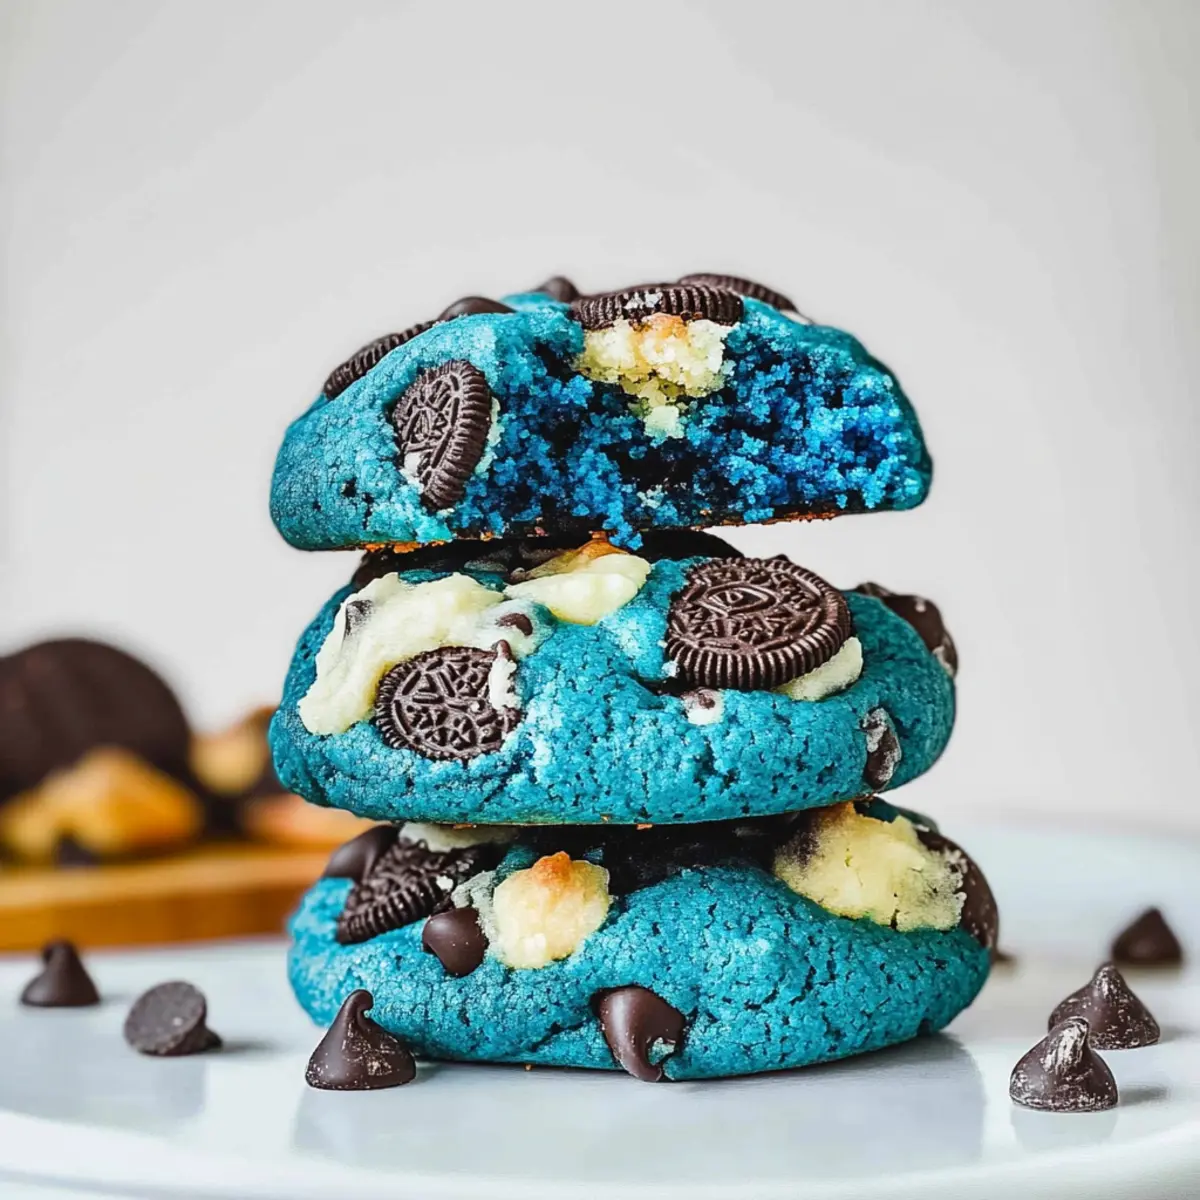
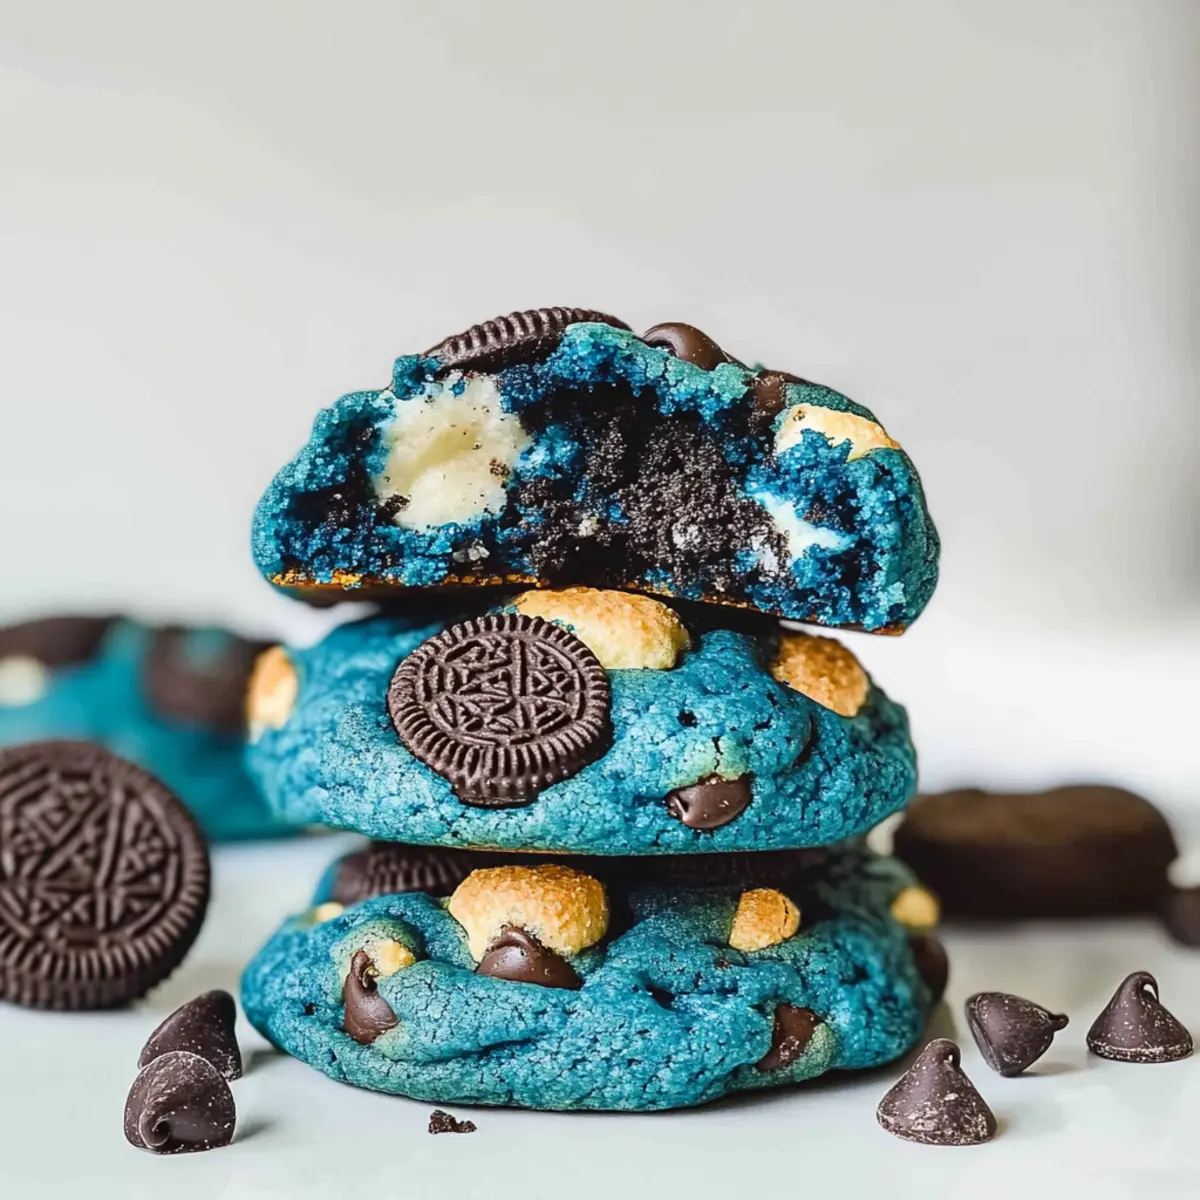
Stepping into my kitchen, I was greeted by a vibrant ocean of blue—the kind that makes your heart skip with a wink of nostalgia. What was taking shape? A batch of Cookie Monster Cookies, packing in crunchy Oreos and gooey chocolate chips for a delightfully whimsical treat. These cookies are not just visually striking; they bring endless joy to parties or cozy nights in with the family. With a cheery blue hue and a soft, chewy texture that’s as satisfying as it is fun, these treats manage to bridge the gap between childhood memories and adult cravings. Plus, they come together quickly, making them an easy go-to for any occasion. Aren’t you curious to see how such playful cookies can light up your dessert table?
Why Are Cookie Monster Cookies So Special?
Whimsical Appeal: The captivating blue color instantly brings a smile and sparks excitement, making them ideal for parties.
Chewy Perfection: Achieving a delightful balance of soft and chewy textures ensures each bite is memorable.
Oreo Surprise: Hidden chunks of Oreos elevate the flavor and take your cookies to the next level.
Quick & Easy: With simple steps in the recipe, you can whip these up in no time for spontaneous gatherings or cozy nights in.
Versatile Fun: Feel free to switch up the colors or add-ins for any occasion, keeping things fresh and exciting. Try pairing them with a refreshing glass of milk for the ultimate treat!
Cookie Monster Cookies Ingredients
• Unleash your baking creativity with these colorful treats!
For the Dough
- Butter – Adds richness and moisture to the cookie dough. Substitute with margarine if needed.
- Granulated Sugar – Provides sweetness and helps achieve a chewy texture. Brown sugar can add extra moisture for those tasty Cookie Monster Cookies.
- Brown Sugar – Contributes to a deeper flavor and chewiness. Can be mixed with white sugar for balance.
- Egg – Binds ingredients together and adds moisture. No direct substitute; aquafaba may work for a vegan option.
- Vanilla Extract – Enhances flavor. Can substitute with almond extract for a different profile.
- Blue Gel Coloring – Gives cookies the signature blue color. Use food-safe colorings suitable for baking.
For the Dry Mix
- All-Purpose Flour – Provides structure. For gluten-free cookies, substitute with a gluten-free flour blend.
- Baking Powder & Baking Soda – Create leavening for the cookies to rise. Ensure they are fresh for best results.
- Salt – Balances sweetness. Important for enhancing overall flavor.
For the Mix-Ins
- Chocolate Chips – Adds delicious chunks of chocolate. Any type (dark, milk, or white) can be used according to preference.
- Oreo Cookies – Provides the fun stuffing and signature look. Substitute with similar filled cookies if desired.
Step-by-Step Instructions for Cookie Monster Cookies
Step 1: Prepare Dough
Start by creaming together softened butter, granulated sugar, and brown sugar in a mixing bowl using an electric mixer on medium speed for about 1-2 minutes until smooth and fluffy. The mixture should be light in color and well combined, indicating that it’s ready for the next step.
Step 2: Mix Wet Ingredients
Next, add in one large egg, a splash of vanilla extract, and your blue gel coloring to the creamed mixture. Continue mixing on low speed until everything is evenly combined and a vibrant blue color appears, which will give your Cookie Monster Cookies their playful look.
Step 3: Combine Dry Ingredients
In a separate bowl, whisk together the all-purpose flour, baking powder, baking soda, and salt to ensure they are well mixed. Gradually add this dry mix to the wet ingredients, folding gently with a spatula until just combined. The dough should be thick and slightly sticky, with no visible streaks of flour.
Step 4: Incorporate Add-ins
Now it’s time to fold in the chocolate chips and chopped Oreo cookies, ensuring they are evenly distributed throughout the dough. Use a wooden spoon or spatula to gently mix until the add-ins are well incorporated, creating a colorful cookie dough that will be bursting with flavors in every bite.
Step 5: Shape Cookies
Scoop out a generous ball of dough (about 2 tablespoons) and flatten it slightly in your palm. Place an Oreo in the center and wrap the dough around it to create a ball, ensuring the cookie is completely enclosed. Repeat this process with the remaining dough, placing each shaped cookie on a lined baking sheet, leaving space between them.
Step 6: Chill Dough
Cover the baking sheet with plastic wrap or parchment paper and refrigerate the cookie dough for 30 minutes. This chilling step is crucial for the Cookie Monster Cookies, as it helps prevent them from spreading too much during baking and ensures a chewy center.
Step 7: Bake
Preheat your oven to 180°C (350°F) while the dough chills. Once ready, space your chilled dough balls on another lined baking sheet, baking them for 12-15 minutes. Look for the edges to turn golden brown while the centers remain soft; a little gooeyness is perfect for achieving that chewy texture!
Step 8: Cool
After baking, allow the Cookie Monster Cookies to rest on the baking sheet for about 5 minutes, letting them set before transferring to a wire rack. This cooling time will help them firm up, ensuring they hold their shape while still having a delightful, soft texture inside.
Expert Tips for Cookie Monster Cookies
Chill Your Dough: Ensure you chill the dough for at least 30 minutes; this prevents spreading and keeps the cookies thick and chewy.
Measure Flour Accurately: Use a kitchen scale to weigh your flour, as too much could lead to dry cookies; this is vital for perfect Cookie Monster Cookies.
Experiment with Colors: While blue is fun, feel free to swap in any food-safe gel color to match themes or seasons, but remember it will change the look!
Don’t Overbake: Keep an eye on baking time; cookies are done when the edges are golden but the centers look slightly underbaked for that ultimate chewiness.
Store Properly: Keep your cookies in an airtight container for freshness, but they’re best enjoyed within the first few days for optimal flavor and texture.
Storage Tips for Cookie Monster Cookies
Airtight Container: Store your Cookie Monster Cookies in an airtight container at room temperature for up to 1 week to keep them soft and fresh.
Freezer: Freeze the cookie dough balls for up to 3 months. Just scoop, freeze on a baking sheet until firm, then transfer to a baggie for fresh cookies whenever you desire.
Thawing: When ready to bake, there’s no need to thaw the dough; simply bake from frozen, adding a minute or two to the baking time for deliciously warm cookies.
Reheating: If you have leftover cookies, heat them in the microwave for about 10-15 seconds to restore their chewy texture and enjoy that delightful Oreo surprise once more!
Make Ahead Options
These vibrant Cookie Monster Cookies are perfect for meal prep, allowing you to enjoy delightful treats with less hassle! You can prepare the cookie dough up to 24 hours in advance—just chill it in the refrigerator wrapped tightly in plastic wrap to keep it fresh and prevent drying out. Additionally, you can also freeze the shaped cookie balls for up to 3 months. When you’re ready to bake, simply transfer the dough from the freezer to the fridge a few hours before baking and enjoy the delicious fresh-baked taste without the lengthy prep. Just pop them in the oven for 12-15 minutes once chilled, and you’ll have charming cookies that’re just as delightful as if made fresh!
Cookie Monster Cookies Variations & Substitutions
Feel free to add your personal touch to these delightful cookies and make them uniquely yours!
- Gluten-Free: Substitute all-purpose flour with a gluten-free blend for a cookie that everyone can enjoy.
- Dairy-Free: Use vegan butter and dairy-free chocolate chips to create a scrumptious, plant-based version.
- Nutty Delight: Incorporate chopped walnuts or pecans into the dough for an added crunch and depth of flavor.
- Fun Flavor Boost: Try swapping vanilla extract for almond extract to give your cookies a delightful nutty hint.
- Color Adventure: Change the gel coloring to bright pink or green for themed parties, adding a fun twist to your cookie celebration.
- Candy Surprise: Mix in colorful candy pieces like M&Ms or sprinkles for added sweetness and a pop of color.
- Heat Things Up: Add a pinch of cayenne pepper or chili powder for a surprising spicy kick amidst the sweet.
- Oreo Twist: Experiment with different flavored Oreos, like mint or birthday cake, to amplify the fun and flavor profile.
The beauty of baking is in the creativity! Whether for a gathering or just a cozy night in, these variations will excite and elevate your Cookie Monster Cookies. Pair them with a chilled glass of milk or hot chocolate, and watch everyone smile!
What to Serve with Cookie Monster Cookies
Let’s create a whimsical spread that enhances the joy of these colorful, chewy delights.
-
Cold Glass of Milk: The classic pairing makes for a nostalgic treat that complements the sweetness and balances the cookies’ rich flavors.
-
Vanilla Ice Cream: A scoop of creamy ice cream adds a delightful contrast to the warm cookies, perfect for an indulgent dessert experience.
-
Fresh Fruit Skewers: Colorful fruit kebabs offer a refreshing, light option that cuts through the sweetness and brings a vibrant touch to the table.
-
Chocolate Dipping Sauce: A warm, gooey chocolate sauce for dipping transforms the Cookie Monster experience into a fun interactive dessert.
-
Hot Chocolate: Rich and comforting, a steaming cup of hot chocolate makes for a cozy treat alongside these playful cookies, invoking fond childhood memories.
-
Candy Bar Trifle: Layer crumbled Cookie Monster cookies with whipped cream and chocolate pudding for a tiny dessert surprise that mirrors their whimsical look.
-
Coffee or Espresso: The bitter notes of coffee beautifully balance the sweetness of the cookies, creating a delightful pairing for adults enjoying an afternoon break.
-
Bright Fruit Salad: A medley of berries and citrus can provide a refreshing, juicy counterpoint to the chewy cookies, rounding out a colorful dessert spread.
-
Mini Cupcakes: Adorable mini cupcakes in fun colors can keep the playful theme going, while offering bite-sized sweetness to pair with the fantastic flavors of the cookies.

Cookie Monster Cookies Recipe FAQs
What is the best way to choose ripe and fresh ingredients for Cookie Monster Cookies?
Absolutely! For the best Cookie Monster cookies, choose ingredients at their peak freshness. When selecting butter, opt for unsalted for better control over saltiness. The sugars should be soft and free from lumps, and chocolate chips should be high quality to ensure a rich flavor. For the egg, a fresh one will bind everything perfectly. Lastly, check that your baking powder and baking soda are active, which is crucial for achieving the right rise and texture!
How should I store Cookie Monster Cookies, and how long will they last?
To keep your Cookie Monster cookies fresh, store them in an airtight container at room temperature for up to 1 week. This will help retain their soft, chewy texture. If you want to enjoy them longer, consider freezing them; this method preserves freshness and flavor for up to 3 months. Simply place them in a freezer-safe bag, and squeeze out as much air as possible before sealing.
Can I freeze Cookie Monster cookie dough?
Yes, you can absolutely freeze the dough! To do so, scoop the cookie dough into balls and place them on a baking sheet lined with parchment paper. Freeze for about 1-2 hours until firm, then transfer them to a freezer bag. This way, you’ll have ready-to-bake Cookie Monster cookies on hand! When it’s baking time, you can pop them straight into the oven from frozen, just add a minute or two to the baking time for that fresh-out-of-the-oven experience.
What if my cookie dough is too sticky or too dry?
It’s a common issue! If your cookie dough seems too sticky, it may need a little more flour. Add a tablespoon at a time until it reaches a manageable consistency. If it’s too dry, the mixture might need a touch more moisture, so try adding a small amount of melted butter or milk, blending until incorporated. Remember, the perfect cookie dough should be soft but not overly tacky or crumbly!
Are these cookies safe for pets or people with allergies?
Be cautious! Ingredients like chocolate, certain nut butters, and even some flavor extracts may not be safe for pets, particularly chocolate, which is toxic to dogs. If baking for someone with allergies, always check for potential allergens in the ingredients—like gluten in flour or dairy in butter—and consider using substitutes such as gluten-free flour or dairy-free margarine to accommodate those dietary needs.
Can I customize my Cookie Monster Cookies with different flavors?
Very much so! The beauty of Cookie Monster cookies lies in their versatility. You can switch out Oreos for different sandwich cookies like peanut butter or even add a mix of nuts and candies tailored to your flavor preferences. You could also alter the gel coloring to add a personal touch for special occasions, making each batch uniquely delightful!

Ultimate Cookie Monster Cookies That Wow Every Party
Ingredients
Equipment
Method
- Start by creaming together softened butter, granulated sugar, and brown sugar in a mixing bowl using an electric mixer on medium speed for about 1-2 minutes until smooth and fluffy.
- Next, add in one large egg, a splash of vanilla extract, and your blue gel coloring to the creamed mixture. Continue mixing on low speed until everything is evenly combined.
- In a separate bowl, whisk together the all-purpose flour, baking powder, baking soda, and salt. Gradually add this dry mix to the wet ingredients, folding gently with a spatula until just combined.
- Fold in the chocolate chips and chopped Oreo cookies, ensuring they are evenly distributed throughout the dough.
- Scoop out a generous ball of dough (about 2 tablespoons) and flatten it slightly in your palm. Place an Oreo in the center and wrap the dough around it to create a ball.
- Cover the baking sheet with plastic wrap or parchment paper and refrigerate the cookie dough for 30 minutes.
- Preheat your oven to 180°C (350°F) while the dough chills. Once ready, space your chilled dough balls on another lined baking sheet, baking them for 12-15 minutes.
- Allow the Cookie Monster Cookies to rest on the baking sheet for about 5 minutes before transferring to a wire rack.
Leave a Reply