
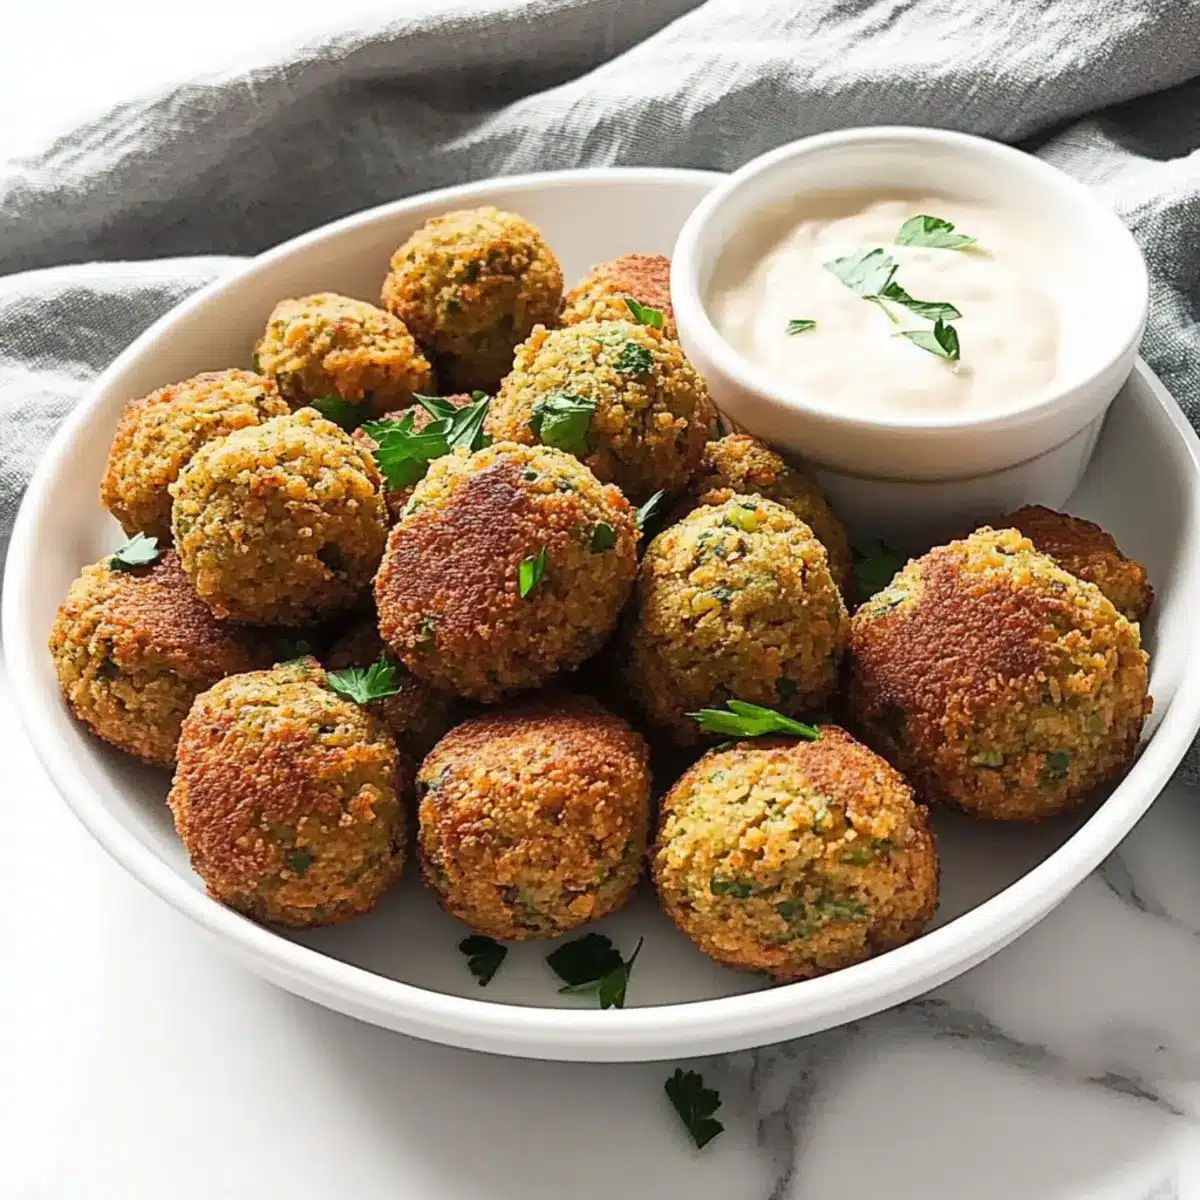
The delightful aroma of herbs and garlic wafting through the kitchen transports me back to bustling street corners in vibrant cities where falafel is the star. Today, I’m excited to share my Crispy Homemade Falafel recipe, perfect for anyone looking to elevate their cooking game. Using dried chickpeas brings a light and airy texture that canned versions simply can’t match. Not only is this dish naturally vegan and gluten-free, but it’s also a fantastic option for quick lunches or impressive dinners that will have everyone asking for seconds. With just a handful of everyday ingredients, you can create falafel that’s crispy on the outside and tender on the inside. Ready to set your tastebuds dancing? Join me in crafting this flavorful Middle Eastern classic that promises to be a perfect addition to your homemade meal repertoire!
Why Is Homemade Falafel So Good?
Crispy Delight: Each falafel ball is golden brown and crunchy on the outside, providing a satisfying contrast to the soft and fluffy interior.
Herb-Infused Flavor: Fresh parsley and cilantro bring vibrant flavors, making this dish a fragrant delight that dances on your palate.
Quick and Easy: With minimal prep time once the chickpeas are soaked, you’ll whip up a delicious meal without the hassle.
Versatile Serving Options: Enjoy these falafel in pita wraps, as part of a meze platter, or even on a salad for a nutritious crunch. If you’re in the mood for experimentation, try serving them with tahini sauce or tzatziki for an extra flavor punch!
Healthy Choice: Rich in protein and fiber, these falafels are not just tasty—they’re a nourishing option for any meal. You’ll love knowing that you’ve bypassed processed fast food for a wholesome, homemade alternative!
Get ready to impress friends and family with this flavorful recipe by following my easy guide to crafting truly irresistible homemade falafel!
Homemade Falafel Ingredients
• Here’s what you need to create the perfect homemade falafel!
For the Falafel Mixture
- Dried Chickpeas – Main ingredient providing structure and protein; do not substitute with canned chickpeas as they result in a mushy texture.
- Onion – Adds flavor and moisture; use half a large onion, roughly chopped.
- Fresh Parsley – Contributes freshness and vibrant color; can be replaced with spinach for a different flavor profile.
- Fresh Cilantro – Enhances the herbaceous taste; if unavailable, increase the parsley amount as a substitute.
- Salt – Essential for flavor enhancement; adjust according to taste.
- Garlic – Infuses the falafel with robust flavor; fresh garlic is recommended for the best taste.
- Cumin – Provides warmth and earthiness that is classic in falafel seasoning.
- Ground Coriander – Adds a light citrusy note; can use garam masala in its place for a different flavor.
- Baking Powder – Helps achieve a light texture; don’t omit, as it’s critical for fluffiness.
- Chickpea Flour – Binds the mixture and adds flavor; regular flour can be used if chickpea flour is unavailable.
Get these simple ingredients ready, and let’s embark on making your delicious homemade falafel!
Step‑by‑Step Instructions for Homemade Falafel
Step 1: Soak the Chickpeas
Begin by soaking 1 cup of dried chickpeas in a large bowl filled with plenty of water. Ensure the chickpeas are submerged, as they will expand significantly. Leave them to soak for at least 24 hours, giving them the time to soften and prepare for your crispy homemade falafel.
Step 2: Prepare the Mixture
Once the chickpeas are fully soaked and tender, drain them well. In a food processor, combine the soaked chickpeas with half a chopped onion, a handful of fresh parsley, cilantro, salt, garlic, cumin, and coriander. Pulse the mixture until it reaches a grainy consistency, avoiding pureeing it to retain a lovely texture.
Step 3: Combine the Ingredients
Transfer the processed chickpea blend to a mixing bowl. Add in the baking powder and chickpea flour, stirring well until evenly combined. This mixture should be cohesive but not sticky, which will help in forming your falafel balls. Set it aside to allow the flavors to meld while you prepare for the next step.
Step 4: Form the Falafel Balls
Scoop heaping tablespoons of the mixture and roll them into balls, then slightly flatten each ball. Place the formed falafel on a parchment-lined tray, ensuring there’s space between each one to prevent sticking. Your homemade falafel should look invitingly round and ready for frying, just waiting for their crispy transformation.
Step 5: Chill the Mixture
Refrigerate the tray of falafel for 1-2 hours. Chilling the balls helps them firm up, making them easier to fry later. This step is essential for achieving the perfect texture, allowing your falafel to maintain their shape while frying, resulting in that wonderfully crispy exterior.
Step 6: Heat the Oil
In a large skillet, pour vegetable oil to a depth of about 1-2 inches. Heat the oil over medium until shimmering and hot, which usually takes around 10 minutes. You can test the oil’s readiness by dropping a small piece of your mixture in; if it sizzles immediately, you’re set to fry your homemade falafel.
Step 7: Fry the Falafel
Carefully lower a few falafel balls into the hot oil, making sure not to overcrowd the pan. Fry them for about 30-60 seconds until they turn golden brown on one side; then, flip them gently and fry for another 30 seconds. Once crispy, remove them with a slotted spoon and drain on paper towels to absorb excess oil.
What to Serve with Crispy Homemade Falafel?
Creating a delightful spread around your falafel can transport your meal to a bustling Middle Eastern market filled with flavor and warmth.
-
Pita Bread: The perfect vessel for your falafel, warm pita wraps provide a soft and chewy counterpoint to the crispy texture of the falafel.
-
Tahini Sauce: Creamy and nutty, tahini sauce drizzled over your falafel adds a rich layer of flavor, enhancing each bite with a touch of tang.
-
Crisp Fattoush Salad: This vibrant salad with fresh veggies and crispy pita chips offers a refreshing crunch that contrasts beautifully with the warm falafel.
-
Hummus: Smooth and savory, hummus is a classic pairing that adds extra depth and creaminess to your plate, making every bite feel indulgent.
-
Pickled Vegetables: A bite of tangy pickled vegetables brightens the meal, balancing the warmth of the falafel with a zesty crunch.
-
Herb-Infused Quinoa: Light and fluffy quinoa, infused with herbs, provides a nutritious base that complements the falafel while adding a delightful texture.
-
Mint Yogurt Sauce: A delicate yogurt sauce with fresh mint brings coolness and creaminess, working wonders to counteract the spices in the falafel.
-
Fresh Lemon Wedges: Squeeze a bit of lemon over your falafel or salad for a burst of brightness that uplifts all the flavors in your meal.
-
Fruit and Nut Couscous: Sweet and savory, this dish rounds out the meal beautifully, offering texture and contrasting flavors with your crispy homemade falafel.
-
Mint Tea: Finish off your meal with a cup of fragrant mint tea, providing a soothing, aromatic finish to a delightful dining experience.
Tips for the Best Homemade Falafel
Oil Temperature Check: Before frying, ensure the oil is hot enough. A simple test is to drop a small amount of the mixture in; if it sizzles, you’re ready!
Avoid Overcrowding: Fry in small batches to prevent the temperature from dropping. This keeps your homemade falafel crispy rather than soggy.
Adjust Seasoning: Taste the mixture before forming balls. If it lacks flavor, don’t hesitate to add more salt, garlic, or spices to enhance the taste.
Chill for Shape: Refrigerating the formed falafel for 1-2 hours is key. This step prevents them from falling apart while frying, ensuring a perfect texture.
Don’t Skip the Baking Powder: It’s crucial for achieving that light, airy texture. Omitting it can lead to dense, heavy falafel instead of the crispy delights you desire.
Make Ahead Options
These crispy homemade falafel are perfect for meal prep and can save you time during busy weeknights! You can soak the dried chickpeas up to 24 hours in advance, ensuring they are soft and ready for blending. Additionally, after forming the falafel balls, refrigerate them for 1-2 hours to firm up; they can also be stored uncooked in the fridge for up to 3 days. To maintain quality, tightly wrap the tray or use an airtight container. When you’re ready to enjoy them, simply fry or bake the falafel straight from the fridge, and you’ll have a delightful dinner that’s just as delicious as if made fresh!
Homemade Falafel Variations & Substitutions
Feel free to get creative with this falafel recipe and make it truly your own!
-
Herb Twist: Substitute fresh parsley with a mix of dill and mint for a refreshing flavor change.
-
Spice it Up: Add a pinch of cayenne or paprika for a delightful heat that complements the falafel beautifully.
-
Nutty Flavor: Incorporate ground nuts, like almonds or walnuts, into the mixture for added richness and texture. Enhances the crunch and gives your falafel a lovely surprise!
-
Gluten-Free Flour: If you need a gluten-free option, almond flour works wonderfully in place of chickpea flour, still keeping it delicious and crispy.
-
Baked Option: Instead of frying, brush the falafel with olive oil and bake at 425°F for 20-25 minutes, flipping halfway for that perfect golden-brown finish.
-
Variations in Dips: Experiment with serving your falafel with different dips, such as spicy harissa sauce or cooling avocado crema, to elevate the experience.
-
Veggie-Packed: Add grated carrot or zucchini to the mixture for extra fiber and a pop of color—just be sure to drain excess moisture!
-
Freezing Variations: If you decide to prepare a batch for later, freeze the uncooked falafel balls. This allows for quick meal solutions anytime you crave homemade goodness.
Feel inspired? Explore how each of these variations can personalize your homemade falafel adventure!
How to Store and Freeze Homemade Falafel
Fridge: Store uncooked homemade falafel in an airtight container for up to 1-2 days. This keeps them fresh while allowing the flavors to enhance.
Freezer: For longer storage, freeze the formed but uncooked falafel on a baking sheet until solid, then transfer them to a freezer bag for up to 3 months.
Reheating: To reheat, bake frozen falafel at 400°F for 20-25 minutes, flipping halfway through, until heated through and crispy. Enjoy your delicious homemade falafel even on busy days!
Thawing: There’s no need to thaw the falafel before baking. Just pop them directly in the oven for a quick and easy meal.
Homemade Falafel Recipe FAQs
What is the best way to select dried chickpeas?
Absolutely! When choosing dried chickpeas, look for ones that are hard and free of any dark spots or damage. They should have a uniform color and feel heavy for their size. Always store them in a cool, dry place, and for the best results, use chickpeas that are less than a year old to ensure optimal cooking texture.
How long can I store uncooked falafel?
You can keep uncooked homemade falafel in the refrigerator for up to 1-2 days. Just place them in an airtight container to maintain freshness. I often make a batch and keep them ready for a quick meal during the week!
Can I freeze homemade falafel? How?
Yes, you can! To freeze your falafel, arrange them in a single layer on a baking sheet lined with parchment paper. Freeze the balls until solid (about 1-2 hours), then transfer them to a freezer-safe bag or container. They can last for up to 3 months. There’s no need to thaw them before cooking—just bake or fry them straight from the freezer!
What should I do if my falafel mixture is too wet?
Very! If your mixture seems too wet and isn’t holding together, simply add a bit more chickpea flour or breadcrumbs, a tablespoon at a time, until you reach the desired consistency. This ensures your balls will maintain their shape during cooking. It’s important they’re dry enough but still flavorful!
Are homemade falafel safe for people with allergies?
If you’re making falafel for someone with allergies, be sure to check each ingredient. The standard recipe is vegan and gluten-free when using chickpea flour. However, always verify that your spices and added herbs are also gluten-free as some brands may contain cross-contamination. Enjoy sharing your homemade falafel with everyone!
How should I store cooked falafel?
The best way to store cooked falafel is to allow them to cool completely and then place them in an airtight container in the refrigerator for 3-4 days. They can lose their crispiness, so when reheating, consider baking them in the oven at 375°F for about 10-15 minutes to regain some of that delightful crunch.
Irresistible Homemade Falafel: Crispy, Flavor-Packed Delight
Ingredients
Equipment
Method
- Soak 1 cup of dried chickpeas in water for at least 24 hours.
- Drain soaked chickpeas, then combine with onion, parsley, cilantro, salt, garlic, cumin, and coriander in a food processor. Pulse until grainy.
- Transfer mixture to a mixing bowl. Add baking powder and chickpea flour, stirring until combined.
- Roll heaping tablespoons of the mixture into balls, slightly flattening each. Place on a parchment-lined tray.
- Chill formed falafel for 1-2 hours to firm up.
- Heat vegetable oil in a skillet over medium until shimmering.
- Fry falafel balls in batches for 30-60 seconds on each side until golden brown. Drain on paper towels.
Leave a Reply