
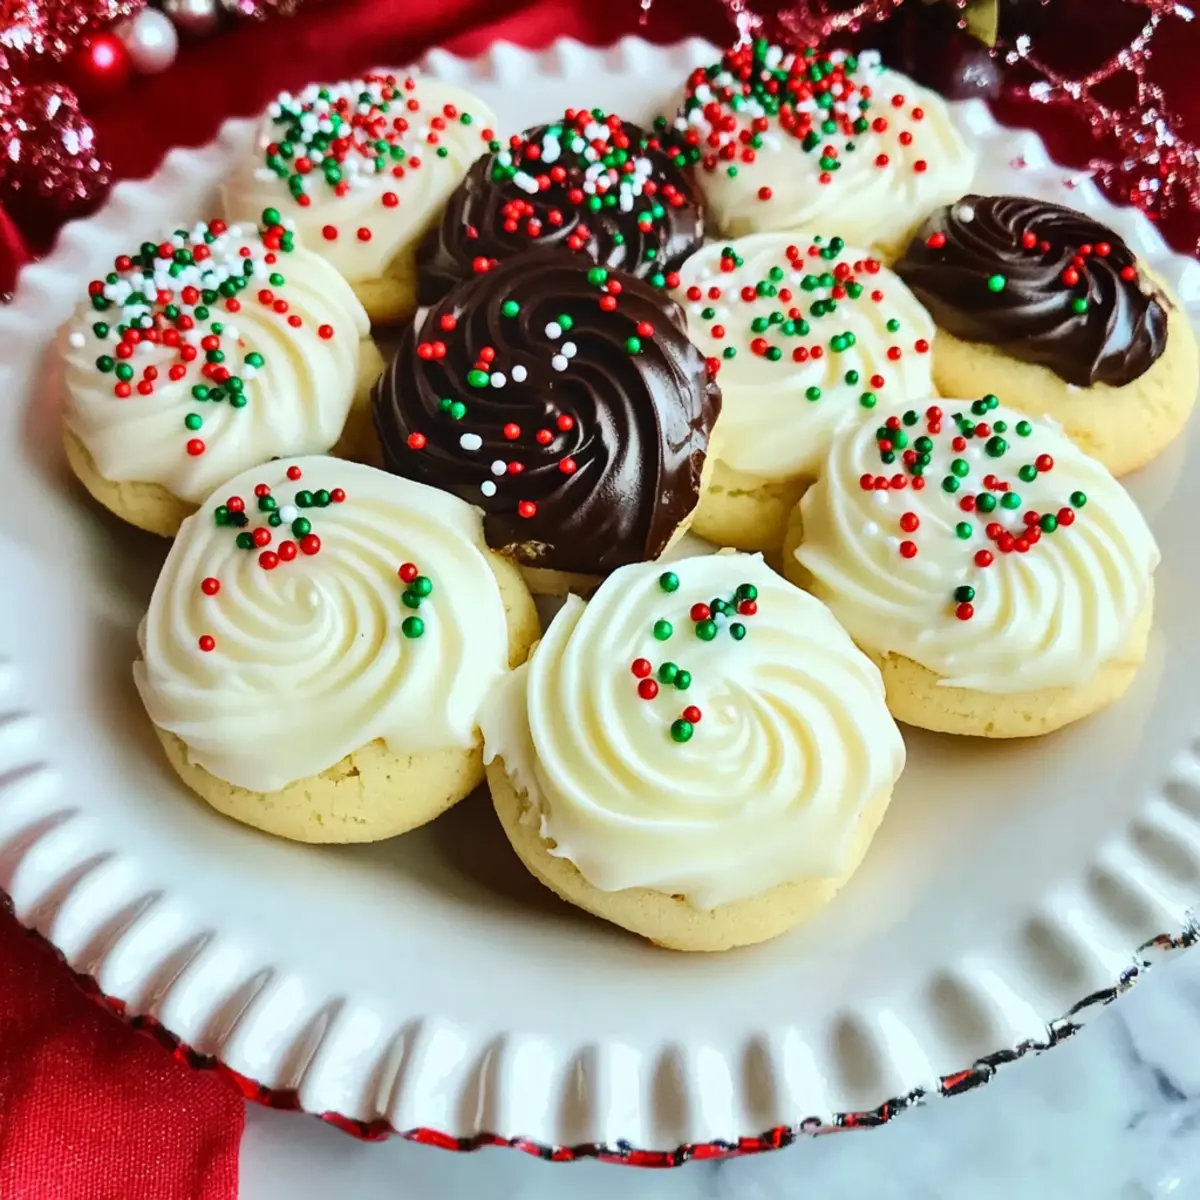
The aroma of melting butter and sugar wafts through my kitchen, instantly transporting me to sweeter, simpler times. As the holiday season approaches, I find myself reaching for a classic recipe that never fails to delight—Butter Cookies. These timeless treats are not only incredibly easy to whip up, but they also boast a melt-in-your-mouth softness that makes them irresistible. Whether you’re dipping them in velvety chocolate or adorning them with festive sprinkles, these cookies are guaranteed to be a hit at any gathering. Perfect for sharing with loved ones or as a thoughtful gift, they embody the warmth and joy of the holidays. Curious how to make these scrumptious delights? Let’s dive into this easy Butter Cookies recipe!
Why are Butter Cookies a Holiday Favorite?
Simplicity at Its Best: These butter cookies require minimal effort, making them an ideal choice for bakers of any skill level.
Melt-in-Your-Mouth Texture: The combination of rich butter and just the right sweetness creates a tender and crumbly bite, reminiscent of a cherished family recipe.
Versatile Options: Dip them in chocolate or sprinkle decorative toppings for a personalized touch—perfect for any festive occasion.
Crowd-Pleasing Treat: Whether at holiday gatherings or cookie swaps, these cookies will vanish off the platter in no time.
Make-Ahead Convenience: They freeze beautifully, ensuring you can prepare ahead of time without sacrificing freshness. Remember to check out my freezing tips to keep them at their best!
Indulge yourself and your loved ones with these delightful butter cookies that capture the essence of the season!
Butter Cookies Ingredients
• Get ready to create magic with these simple yet scrumptious butter cookies!
For the Dough
- All-purpose flour – Provides structure; swap it with a gluten-free blend if needed.
- Salt – Enhances flavors and balances sweetness beautifully.
- Unsalted butter (softened) – Adds richness and moisture; ensure it’s at room temperature for the best texture.
- Granulated sugar – Brings sweetness and contributes to that perfect cookie texture.
- Vanilla extract – Offers aromatic sweetness that elevates the overall flavor.
- Large egg (room temperature) – Binds ingredients and helps create that soft consistency.
- Milk (optional, 2-3 teaspoons) – Adjusts dough consistency for piping if necessary.
Optional Add-Ins
- White chocolate chips (optional) – Adds a touch of sweetness and decorative charm.
- Semi-sweet chocolate chips (optional) – Perfect for dipping; enhances flavor and adds richness.
- Coconut oil (optional) – Thins chocolate for dipping and makes it easier to coat.
- Sprinkles – A festive touch that makes these butter cookies visually delightful.
With these ingredients at hand, you’re just moments away from baking bliss! Dive in and let the baking begin!
Step‑by‑Step Instructions for Butter Cookies
Step 1: Prepare Dough
In a mixing bowl, whisk together the all-purpose flour and salt, setting it aside for later. In your stand mixer, beat the softened unsalted butter and granulated sugar on medium speed for about 2 minutes until creamy and light in color. Then, add the vanilla extract and room temperature egg, mixing for an additional minute until well blended. Gradually incorporate the flour mixture until just combined, forming a soft dough.
Step 2: Adjust Dough Consistency
To ensure the perfect piping texture, test your dough by placing it into a piping bag fitted with a star tip. If the dough feels too stiff or too loose, add 2-3 teaspoons of milk gradually until it can hold its shape when piped yet remains soft enough to squeeze. This will help your butter cookies look beautiful once they’re baked.
Step 3: Pipe Cookies
Line ungreased baking sheets with parchment paper, as this will help prevent the cookies from sticking. Using the piping bag, gently pipe swirls of dough about 2½ inches apart on the baking sheet, creating a whimsical shape. Make sure to keep an even pressure while piping to maintain uniformity in your butter cookies for a pleasing presentation.
Step 4: Refrigerate
Place the piped cookies in the refrigerator and chill them uncovered for 30-40 minutes. This step is crucial as it helps the cookies maintain their shape and prevents them from spreading excessively during baking, ensuring a lovely, delicate form when they emerge from the oven.
Step 5: Bake
Preheat your oven to 350°F (175°C). Once ready, carefully bake the chilled cookies for 12-15 minutes, watching closely for a light golden color around the edges. The center should remain soft, giving your butter cookies that delicious melt-in-your-mouth texture. When baked, let them cool on wire racks for optimal air circulation.
Step 6: Decorate
After your butter cookies have cooled completely, prepare your chocolate dipping station. Melt the semi-sweet chocolate in a microwave-safe bowl according to the package instructions, adding coconut oil if you’re using it to achieve a smoother consistency. Dip each cooled cookie halfway into the melted chocolate and then sprinkle with festive toppings if desired, allowing the chocolate to set before serving.
Tips for the Best Butter Cookies
-
Use Room Temperature Ingredients: Ensure your butter and egg are at room temperature for a smooth, well-blended dough, creating the perfect butter cookies.
-
Chill the Dough: Refrigerating piped cookies before baking helps maintain their shape and prevents spreading—key to achieving that delicate texture!
-
Watch the Bake Time: Keep an eye on your cookies in the oven; removing them at the right time ensures they remain soft and tender, delivering that melt-in-your-mouth experience.
-
Experiment with Toppings: Get creative! Use different chocolate types or festive sprinkles to give personality to your butter cookies, making them even more enjoyable.
-
Storage for Freshness: Keep baked cookies in an airtight container at room temperature for up to a week, ensuring your delicious butter cookies stay fresh and delightful!
How to Store and Freeze Butter Cookies
Room Temperature: Keep baked butter cookies in an airtight container at room temperature for up to one week for optimal freshness.
Fridge: If you prefer a longer shelf life, store them in the fridge in an airtight container, where they will remain fresh for up to two weeks.
Freezer: For extended storage, freeze unbaked piped cookies or baked cookies in a freezer-safe container layered with parchment paper. They can last for up to three months.
Reheating: To enjoy thawed cookies, let them sit at room temperature or pop them in a low oven for a few minutes to regain their melt-in-your-mouth texture.
What to Serve with Classic Butter Cookies
The festive spirit is in the air, and these delightful cookies can be the sweet star of your holiday gatherings.
-
Rich Hot Chocolate: A warm cup of chocolate creates a cozy pairing, enhancing the buttery flavors of the cookies while inviting you to indulge in a delightful dip.
-
Spiced Apple Cider: The warm spices and fruity notes in spiced cider perfectly complement the buttery sweetness, bringing a touch of autumn to your holiday table.
-
Creamy Vanilla Ice Cream: Scoop some velvety vanilla ice cream on the side for a delightful contrast; the richness of the ice cream elevates the cookies to decadent levels of joy.
-
Fresh Fruit Salad: A vibrant mix of seasonal fruits adds freshness and brightness to the table, balancing the cookies’ richness with a burst of natural sweetness.
-
Holiday Spritz Cookies: Featuring festive flavors and colors, these cookies not only enhance your cookie platter but also offer a fun variety to indulge in during celebrations.
-
Classic Milk: Simple yet nostalgic, a glass of cold milk is the perfect classic partner—dunk and savor your butter cookie experience to the fullest!
-
Festive Cheeseboard: Pair your cookies with assorted cheeses and nuts for an unexpected twist! The saltiness of the cheese balances the cookies’ sweetness, creating a delightful snack board.
-
Chocolate-Dipped Pretzels: The crunchy texture and salty-sweet flavor of chocolate-covered pretzels make them a great addition to your cookie spread, offering contrast and variety.
-
Nutty Biscotti: These crunchy treats provide a great dipping experience with coffee or tea, inviting guests to mix and match flavors for their perfect bite.
Make Ahead Options
These Classic Butter Cookies are perfect for meal prep, allowing you to enjoy fresh-baked goodness even on the busiest of days. You can prepare the cookie dough up to 24 hours in advance; simply cover it in plastic wrap and refrigerate until ready to pipe. Alternatively, after baking, these cookies can be stored in an airtight container for up to 3 days at room temperature, maintaining their delightful texture. For longer storage, freeze the baked cookies, layering them with parchment paper, and they will stay fresh for several weeks. When you’re ready to serve, simply thaw overnight in the refrigerator before dipping them in chocolate and adding festive sprinkles, ensuring they’re just as delicious as when freshly baked!
Butter Cookies: Creative Twists Await
Feel free to personalize your delightful butter cookies with these exciting variations that add extra flavor and fun!
-
Gluten-Free: Substitute all-purpose flour with a gluten-free blend for a delicious cookie everyone can enjoy. You won’t miss a beat!
-
Rich Chocolate Dip: Elevate your cookies by dipping them in dark chocolate instead of semi-sweet—perfect for those who love intense chocolate flavors. The contrast of sweet and rich will leave everyone craving more.
-
Nutty Bliss: Stir in chopped nuts like pecans or walnuts for added crunch and flavor. This texture twist not only enhances the taste but adds a lovely bite to each cookie.
-
Citrus Zest: Add a teaspoon of lemon or orange zest to your dough for a refreshing citrus twist. This bright flavor will awaken your senses and bring a cheerful note to your holiday treats.
-
Spiced Delight: Incorporate a pinch of cinnamon or nutmeg into the dough for a warm spice flavor perfect for the season. It adds a warmth that complements the buttery goodness of the cookies beautifully.
-
Fruity Fun: Top your cookies with mini M&Ms or dried fruit for a colorful and sweet finish, making them extra appealing for festive gatherings. Who could resist such a vibrant cookie!
-
Caramel Drizzle: Drizzle your finished cookies with melted caramel for a sticky, indulgent treat. Whether you’re making them for a special occasion or just a cozy night in, it’s a luscious addition that takes the cookies to a whole new level.
-
Boozy Treats: For a fun adult twist, add a teaspoon of bourbon or rum to the dough. This delightful enhancement will give your cookies a charming depth, perfect for adult gatherings.
Feel free to get creative with your butter cookies! These twists provide an opportunity to make each batch uniquely yours, ensuring every bite is just as delightful as the last. If you’re interested in a more in-depth look at flavor pairings, check out my article on perfect flavor combinations. Happy baking!
Butter Cookies Recipe FAQs
How do I choose the right butter for my cookies?
Absolutely! When it comes to butter, using unsalted, room-temperature butter is key for achieving that creamy texture and flavor balance. Make sure it’s soft enough to easily incorporate with sugar—this usually means leaving it out for about 30 minutes before mixing.
How should I store my butter cookies to maintain freshness?
Keep your baked butter cookies in an airtight container at room temperature for up to one week to enjoy their softness. You can also place a slice of bread in the container to help retain moisture, which keeps the cookies chewy and delightful!
Can I freeze my butter cookies, and if so, how?
Yes! To freeze your butter cookies, you can either freeze the unbaked piped cookies or the baked ones. For unbaked, flash freeze them on a baking sheet, then transfer to a freezer-safe container layered with parchment paper. For baked cookies, store them in a similar way. They can last up to three months—just thaw overnight in the refrigerator when you’re ready to enjoy!
Why did my cookies spread too much during baking?
Very! If your butter cookies spread too much, it could be due to the dough being too warm or not chilling them long enough. Ensure you refrigerate the piped cookies for 30-40 minutes before baking, as this helps maintain their shape. Also, check that your baking sheets are ungreased, as any extra oil might contribute to the spreading.
Are there any dietary considerations I should be aware of?
Definitely! If you have gluten sensitivities, you can substitute all-purpose flour with a gluten-free flour blend, which works wonderfully. Always remember to check if you’re using allergy-friendly chocolate and toppings. Additionally, avoid giving cookies to pets due to ingredients like chocolate, which can be harmful to them!
What’s the best way to reheat frozen butter cookies?
To restore the delightful melt-in-your-mouth texture, simply let the frozen butter cookies sit at room temperature for about 15-20 minutes. Alternatively, you can place them in a low oven (around 300°F or 150°C) for a few minutes. This gentle reheating will bring back their original softness!
Melt-in-Your-Mouth Butter Cookies for Joyful Holidays
Ingredients
Equipment
Method
- In a mixing bowl, whisk together the all-purpose flour and salt. Set aside.
- In your stand mixer, beat the softened unsalted butter and granulated sugar on medium speed for about 2 minutes until creamy and light.
- Add the vanilla extract and room temperature egg, mixing for an additional minute until well blended.
- Gradually incorporate the flour mixture until just combined, forming a soft dough.
- Test the dough's consistency by placing it into a piping bag fitted with a star tip, adjusting with milk if too stiff or loose.
- Line ungreased baking sheets with parchment paper and pipe swirls of dough about 2½ inches apart.
- Chill piped cookies in the refrigerator uncovered for 30-40 minutes.
- Preheat the oven to 350°F (175°C) and bake the chilled cookies for 12-15 minutes until light golden around the edges.
- Let cookies cool on wire racks for optimal air circulation.
- Melt semi-sweet chocolate and dip cooled cookies, adding toppings if desired. Allow chocolate to set before serving.
Leave a Reply