
Nothing quite matches the aroma of freshly baked bread wafting through your kitchen. Today, I’m thrilled to share my Easy No-Knead Artisan Bread Recipe, which will elevate your home baking game with minimal fuss and maximum flavor. This recipe is perfect for anyone who loves homemade food but may feel intimidated by baking. With just a few simple ingredients and no kneading involved, you’ll create a beautifully crusty loaf that’s soft on the inside. Not only is this bread a crowd-pleaser, but it’s also incredibly versatile, serving beautifully as sandwiches, toasted with a touch of butter, or alongside your favorite soups. Are you ready to roll up your sleeves and create something delicious? Let’s get started!
Why is No-Knead Bread So Special?
Simplicity at Its Finest: This no-knead artisan bread requires minimal effort, allowing even novice bakers to achieve stunning results.
Irresistible Aroma: Imagine the delicious scent of freshly baked bread filling your home, inviting everyone to gather around the kitchen.
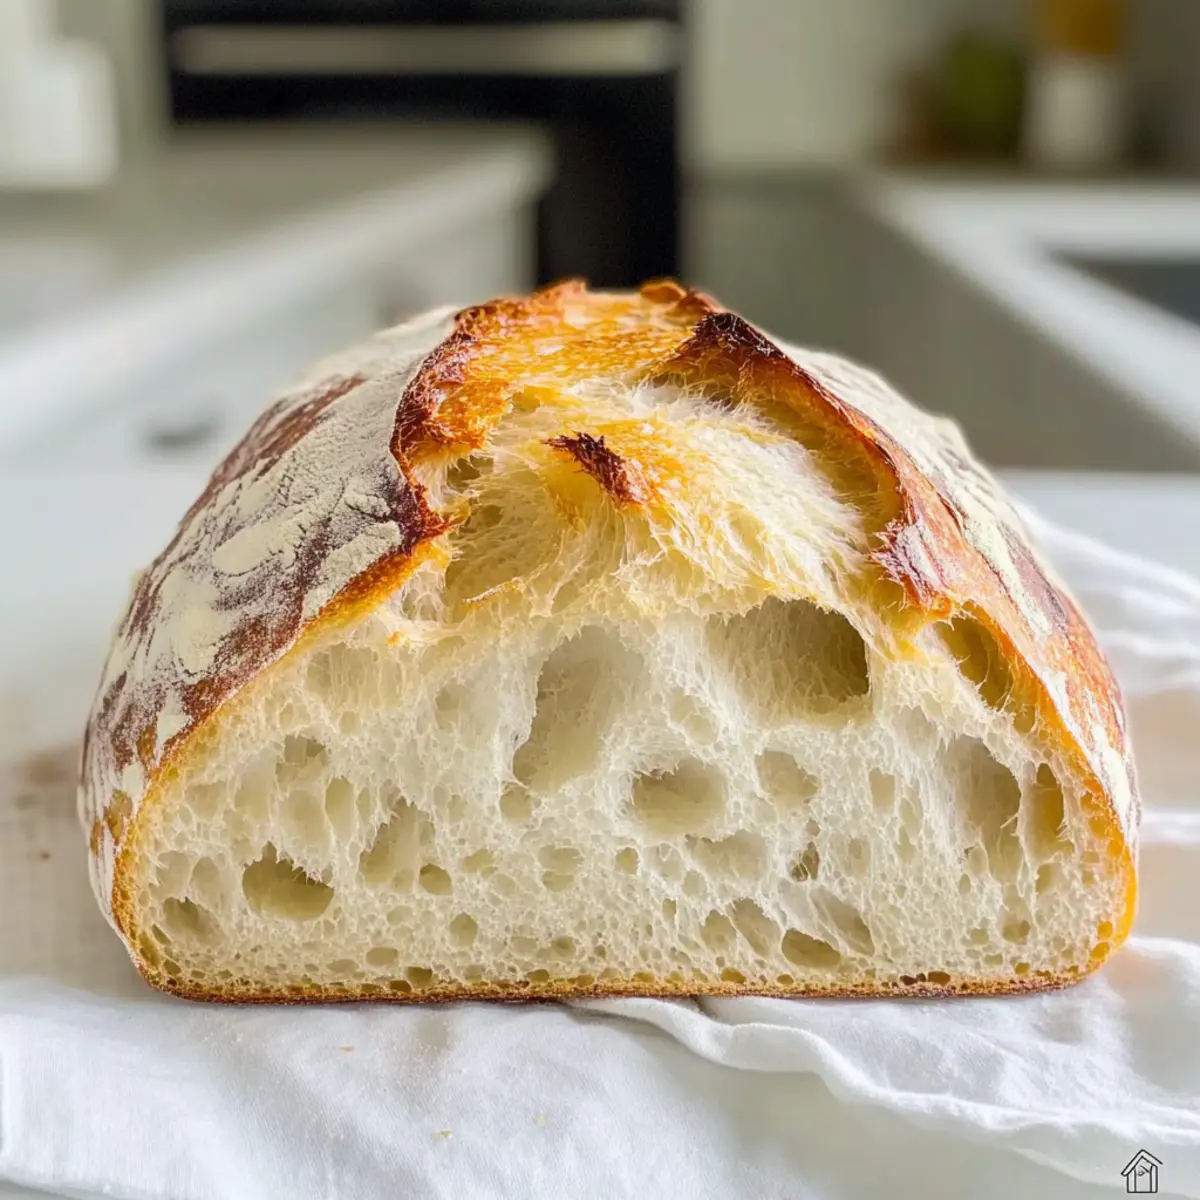
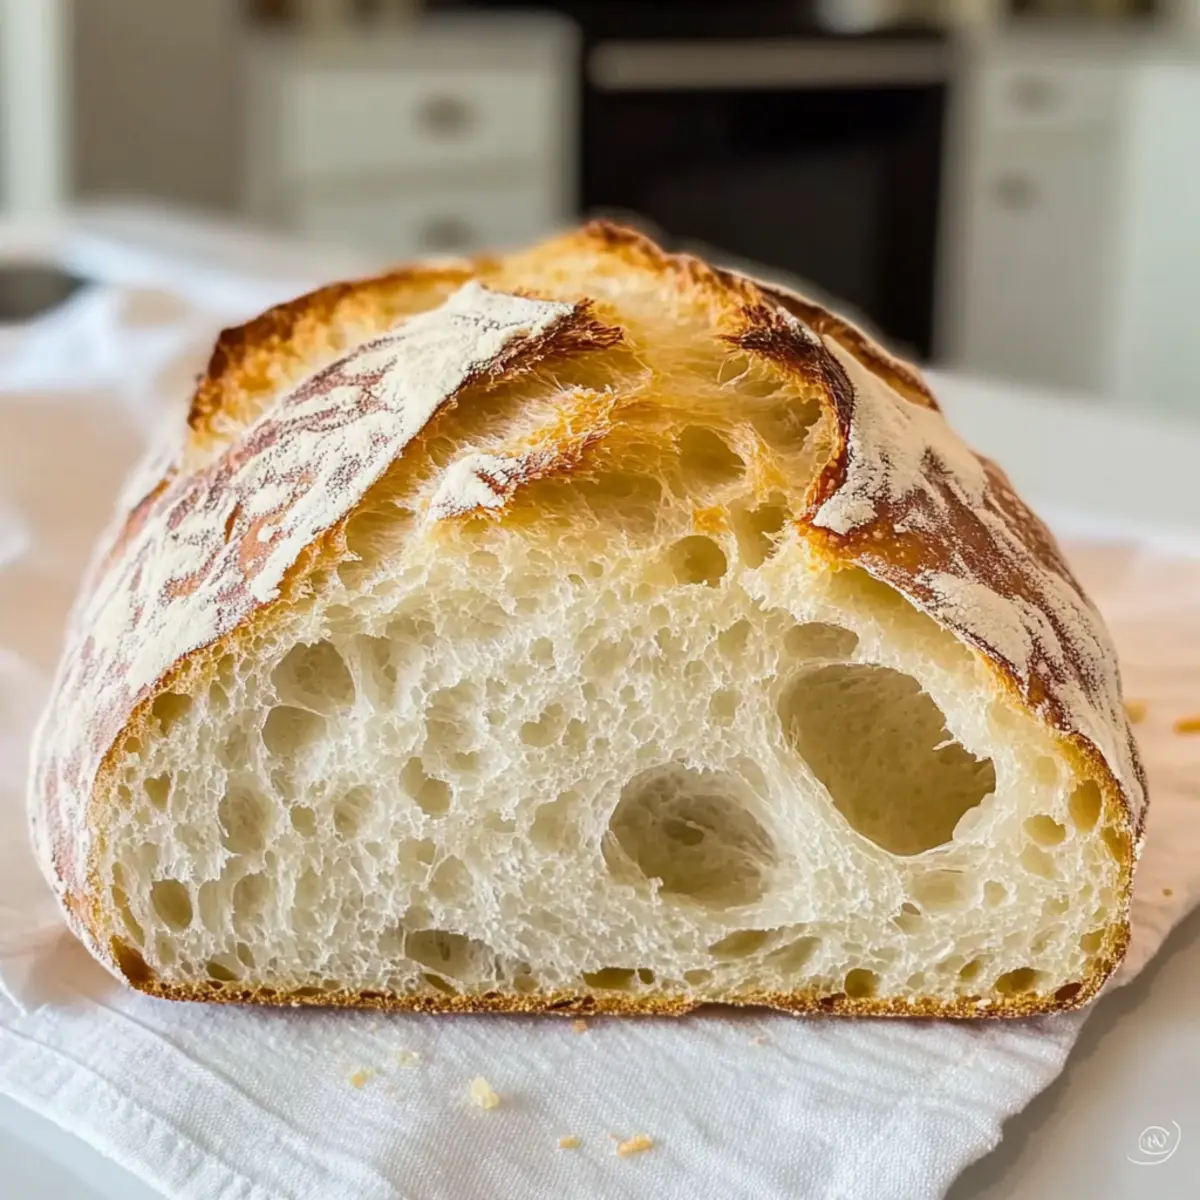
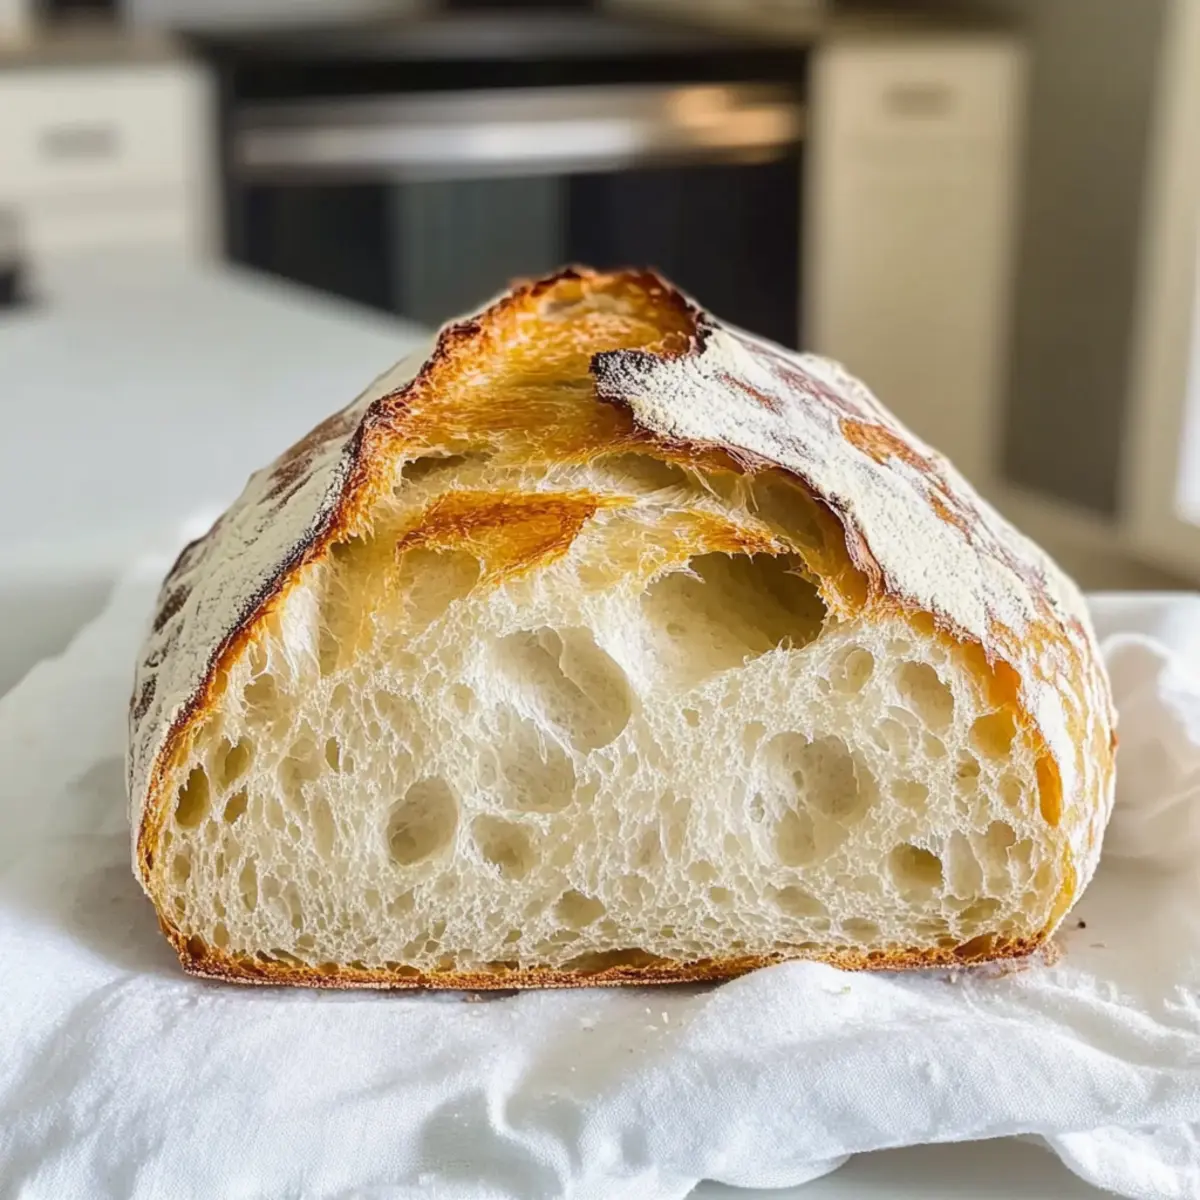
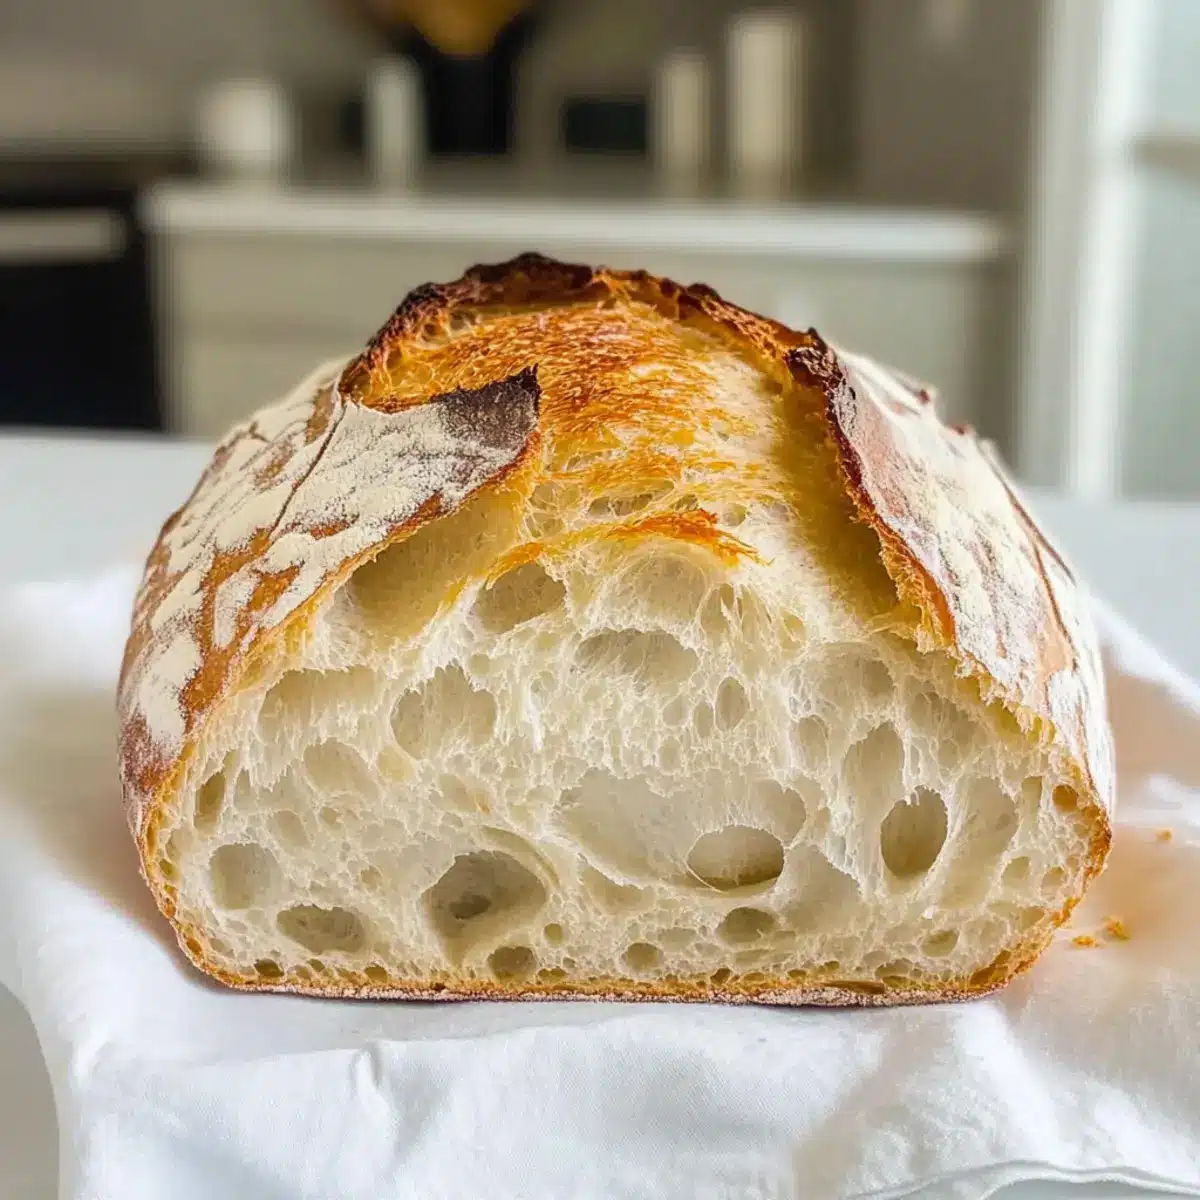
Crusty, Tender Delight: Enjoy a gorgeous, crunchy crust paired with a soft, airy interior, making every slice a delight.
Perfectly Versatile: Whether you’re crafting sandwiches or serving alongside a warm soup, this bread adapts beautifully to any meal.
Time-Saving Marvel: With long fermentation, you get complex flavors without excessive hands-on time—perfect for busy lives.
This recipe truly highlights why making homemade bread is a rewarding experience. Just like in my other favorite breads, you’ll find that the best flavors come from simple, wholesome ingredients combined with a little patience!
Artisan Bread Recipe Ingredients
Unlock the secrets to perfect no-knead artisan bread!
For the Dough
- All-Purpose Flour – 3 cups (395 grams); this forms the base of your bread and can be swapped with bread flour for a heartier texture.
- Kosher Salt – ½ tablespoon; essential for flavor and helps regulate yeast activity, ensuring your bread rises beautifully.
- Instant or Active Dry Yeast – ¼ ounce (2 ¼ teaspoons); the vital leavening agent; instant yeast can be combined directly with your flour, while active dry yeast requires proofing first.
- Warm Water – 1 ½ cups (105°F); this hydrates the dry ingredients and activates the yeast, setting the stage for that airy crumb.
For Extra Flavor (Optional)
- Dried Herbs – Consider adding herbs like rosemary or thyme; they provide an aromatic infusion that elevates your artisan bread recipe to a whole new level.
- Shredded Cheese – Toss in your favorite cheese for a cheesy variation; it melts beautifully and adds rich flavor.
- Olives or Nuts – Mixing in chopped olives or nuts offers texture and depth, making each bite an adventure.
Step‑by‑Step Instructions for Easy No-Knead Artisan Bread Recipe
Step 1: Mix Dough
In a large mixing bowl, combine 3 cups of all-purpose flour, ½ tablespoon of kosher salt, and 2 ¼ teaspoons of instant or active dry yeast. Pour in 1 ½ cups of warm water at around 105°F, mixing until a sticky dough forms. You’ll know it’s ready when it pulls away from the sides of the bowl but remains slightly tacky.
Step 2: First Rise
Cover the bowl with a clean kitchen towel or plastic wrap, and let the dough rest at room temperature for 2 to 10 hours. For optimum flavor, allow it to ferment overnight. The dough will roughly double in size and develop a bubbly surface, indicating it’s perfectly aerated.
Step 3: Shape Dough
Once the fermentation is complete, lightly flour a clean work surface and gently turn the dough out without punching it down. With wet hands, shape the dough into a round loaf, folding the edges toward the center to create surface tension. Avoid kneading; this step is all about maintaining the airy texture from the no-knead method.
Step 4: Second Rise
Transfer the shaped dough onto a piece of parchment paper. Score the top with a sharp knife to allow for expansion while baking. Cover it with a towel for another 20 to 30 minutes, allowing the bread to puff up slightly. You’re looking for a slight increase in size and a relaxed texture.
Step 5: Preheat Oven
About 30 minutes before baking, preheat your oven to 450°F. Place a Dutch oven or a pizza stone inside to heat up as well. This preheating is crucial for developing that glorious crust, as the hot surface helps create steam when the bread is added.
Step 6: Bake Bread
Carefully remove the hot Dutch oven from the oven and lift the parchment paper with the dough into it. For extra crustiness, you can add a splash of hot water to the bottom of the oven to create steam. Close the lid and bake for 25 to 30 minutes until the crust achieves a golden-brown color and sounds hollow when tapped.
Step 7: Cool
Once baked, remove the Dutch oven from the oven and let the bread cool on a wire rack for at least 30 minutes before slicing. This cooling period allows the crumb to set perfectly, ensuring your Easy No-Knead Artisan Bread has the right texture and moisture.
Make Ahead Options
These Easy No-Knead Artisan Bread Recipe elements are perfect for busy home cooks looking to save time! You can mix the dough and let it rise for up to 24 hours in advance; just cover it with plastic wrap or a towel so it stays moist. After the first rise, instead of shaping it right away, refrigerate the dough for up to 3 days. When ready to bake, simply take the dough out, shape it, and allow it to rise for 20-30 minutes at room temperature before proceeding to bake. This way, you’re guaranteed that gorgeous crust and soft crumb, just as if you had baked it fresh that day!
Artisan Bread Recipe Variations
Feel free to get creative with this delightful bread recipe and customize it to suit your taste buds!
-
Whole Wheat: Replace half or all of the all-purpose flour with whole wheat for a denser, nutty flavor. This swap not only gives a heartier texture but also adds a touch of wholesome goodness.
-
Herbs & Spices: Add dried herbs like rosemary, thyme, or even garlic powder to the dough for an aromatic twist. The infusion of these flavors elevates your bread and makes it perfect for snacking.
-
Cheesy Delight: Fold in shredded cheese like cheddar or mozzarella before shaping the dough. You’ll get pockets of gooey, melted cheese in every slice—an irresistible treat for cheese lovers!
-
Nutty & Seed Add-Ins: Mix in chopped nuts, sunflower seeds, or pumpkin seeds to enhance the texture of your bread. This not only adds a satisfying crunch but also boosts the nutritional value for a wholesome bite.
-
Savory Olives: Incorporate chopped olives into the dough for a Mediterranean flair. The briny flavor elevates every slice, making it perfect for dipping into your favorite spreads.
-
Sweet Surprise: To switch it up, add a handful of raisins or dried cranberries, along with some cinnamon for a subtly sweet version. Perfect for breakfast or as a snack!
-
Spicy Kick: If your palate craves a little heat, consider folding in some finely chopped jalapeños or crushed red pepper flakes. This spicy twist will definitely awaken your taste buds!
And if you’re curious about perfecting the crust, you might also want to try out my guide on creating bakery-quality crusts that can enhance any bread recipe. Whatever variation you choose, remember that the heart of this recipe is its simplicity, so have fun experimenting!
What to Serve with Easy No-Knead Artisan Bread?
Nothing elevates your homemade bread experience quite like the perfect accompaniments. Let’s explore some delightful pairings that will inspire your next meal.
-
Creamy Tomato Soup: A classic choice, the smooth, rich flavors of a tomato soup beautifully complement the bread’s crust, making each dunk even more satisfying.
-
Garlic Herb Butter: Spread this onto warm slices for an irresistible flavor boost. The buttery richness and aromatic herbs enhance the bread’s natural goodness.
-
Artisan Cheese Board: Pair your freshly baked bread with a selection of cheeses, fruits, and nuts. This adds variety in textures and flavors and creates an appealing presentation.
-
Savory Olive Tapenade: The salty, tangy notes of tapenade contrast wonderfully with the warm, soft bread, adding a Mediterranean flair to your meal.
-
Classic Salad: A refreshing mix of greens tossed in a zesty vinaigrette offers a crisp counterpart to the bread’s texture. Add colorful veggies for a burst of freshness.
-
Dipping Oils: A blend of olive oil and balsamic vinegar makes for a simple yet delightful pairing. The richness of the oils enhances every bite of bread.
-
Homemade Pesto: The vibrant flavors of basil and garlic in pesto bring a fresh taste to the bread. It’s perfect for slathering or using as a dip.
-
Roasted Vegetables: Their earthy sweetness and caramelized edges pair exquisitely with artisan bread, perfect for making hearty sandwiches.
-
Chilled White Wine: A crisp, chilled white wine complements the flavors and textures of the bread, making any meal feel more festive.
These pairings transform your no-knead artisan bread into a delightful feast, creating an inviting atmosphere for gatherings with family and friends.
How to Store and Freeze Artisan Bread
Fridge: Keep your artisan bread wrapped in a cloth or paper bag for up to 3 days. This maintains moisture while allowing the crust to remain somewhat crisp.
Freezer: For longer storage, tightly wrap the bread in plastic wrap or aluminum foil, then place it in an airtight freezer bag. It can be frozen for up to 3 months.
Reheating: To enjoy your frozen artisan bread, thaw it at room temperature and then reheat in a 350°F oven for about 10-15 minutes to crisp the crust once again.
Room Temperature: If you plan to consume the bread within a day or two, store it in a cool, dry place in a bread box or brown paper bag to help it stay fresh.
Expert Tips for Artisan Bread Recipe
-
Steam for Crust: Creating steam in the oven enhances the crust. Add hot water or ice cubes at the beginning to achieve that bakery-style crust.
-
Hydration Matters: A well-hydrated dough is key for a soft, airy crumb. If the dough feels too dry, add a splash more warm water to improve texture.
-
Gentle Handling: Avoid kneading; instead, gently fold the dough to maintain the air bubbles that produce that signature lightness.
-
Perfect Rising Time: Allow sufficient rising time, ideally overnight for the first rise. This slow fermentation develops richer flavors, making your artisan bread truly exceptional.
-
Temperature Check: Use an accurate thermometer for your warm water (105°F) to ensure the yeast activates correctly, resulting in a proper rise and texture.
Easy No-Knead Artisan Bread Recipe FAQs
How do I choose the right flour for artisan bread?
Absolutely! For this no-knead artisan bread recipe, I recommend using all-purpose flour for its versatility and accessibility. However, for a heartier texture, you can substitute with bread flour. Just remember that bread flour has a higher protein content, which contributes to a chewier crust, so choose according to your texture preference.
How should I store my artisan bread to keep it fresh?
Very simple! Keep your artisan bread wrapped in a cloth or a paper bag at room temperature for up to 3 days. This helps maintain moisture while preserving a crispy crust. If you’re planning to keep it longer, consider freezing it to prevent staleness.
Can I freeze artisan bread, and how do I do it?
Absolutely! To freeze your artisan bread, start by letting it cool completely after baking. Then, tightly wrap it in plastic wrap or aluminum foil and place it in an airtight freezer bag. This way, it’ll stay fresh for up to 3 months. When you’re ready to enjoy it, simply thaw it at room temperature and reheat at 350°F for 10-15 minutes for that freshly baked taste!
What should I do if my bread doesn’t rise properly?
Oh no! If your artisan bread isn’t rising, it might be due to inactive yeast. Make sure your warm water is around 105°F (not too hot or too cold) to activate instant or active dry yeast properly. If you’re using active dry yeast, be sure to proof it in the warm water with a pinch of sugar before mixing it with the flour. Lastly, ensure your dough is covered and in a warm environment during the first rise for the best results.
Is this artisan bread recipe safe for pets or allergies?
Great question! While the ingredients in this artisan bread recipe—flour, salt, yeast, and water—are generally safe for most pets, it’s best to avoid sharing any bread with dogs as yeast can cause digestive issues. Additionally, if anyone has a gluten allergy or sensitivity, this recipe would not be suitable, as it contains gluten. Always check for alternative flour options if needed!
Craft the Perfect Artisan Bread Recipe with No Kneading
Ingredients
Equipment
Method
- In a large mixing bowl, combine 3 cups of all-purpose flour, ½ tablespoon of kosher salt, and 2 ¼ teaspoons of instant or active dry yeast. Pour in 1 ½ cups of warm water at around 105°F, mixing until a sticky dough forms.
- Cover the bowl with a clean kitchen towel or plastic wrap, and let the dough rest at room temperature for 2 to 10 hours.
- Lightly flour a clean work surface and gently turn the dough out. Shape the dough into a round loaf.
- Transfer the shaped dough onto parchment paper. Score the top with a sharp knife and cover with a towel.
- Preheat your oven to 450°F about 30 minutes before baking.
- Carefully remove the hot Dutch oven, place the dough inside, and bake for 25 to 30 minutes.
- Remove the Dutch oven and let the bread cool on a wire rack for at least 30 minutes before slicing.
Leave a Reply