
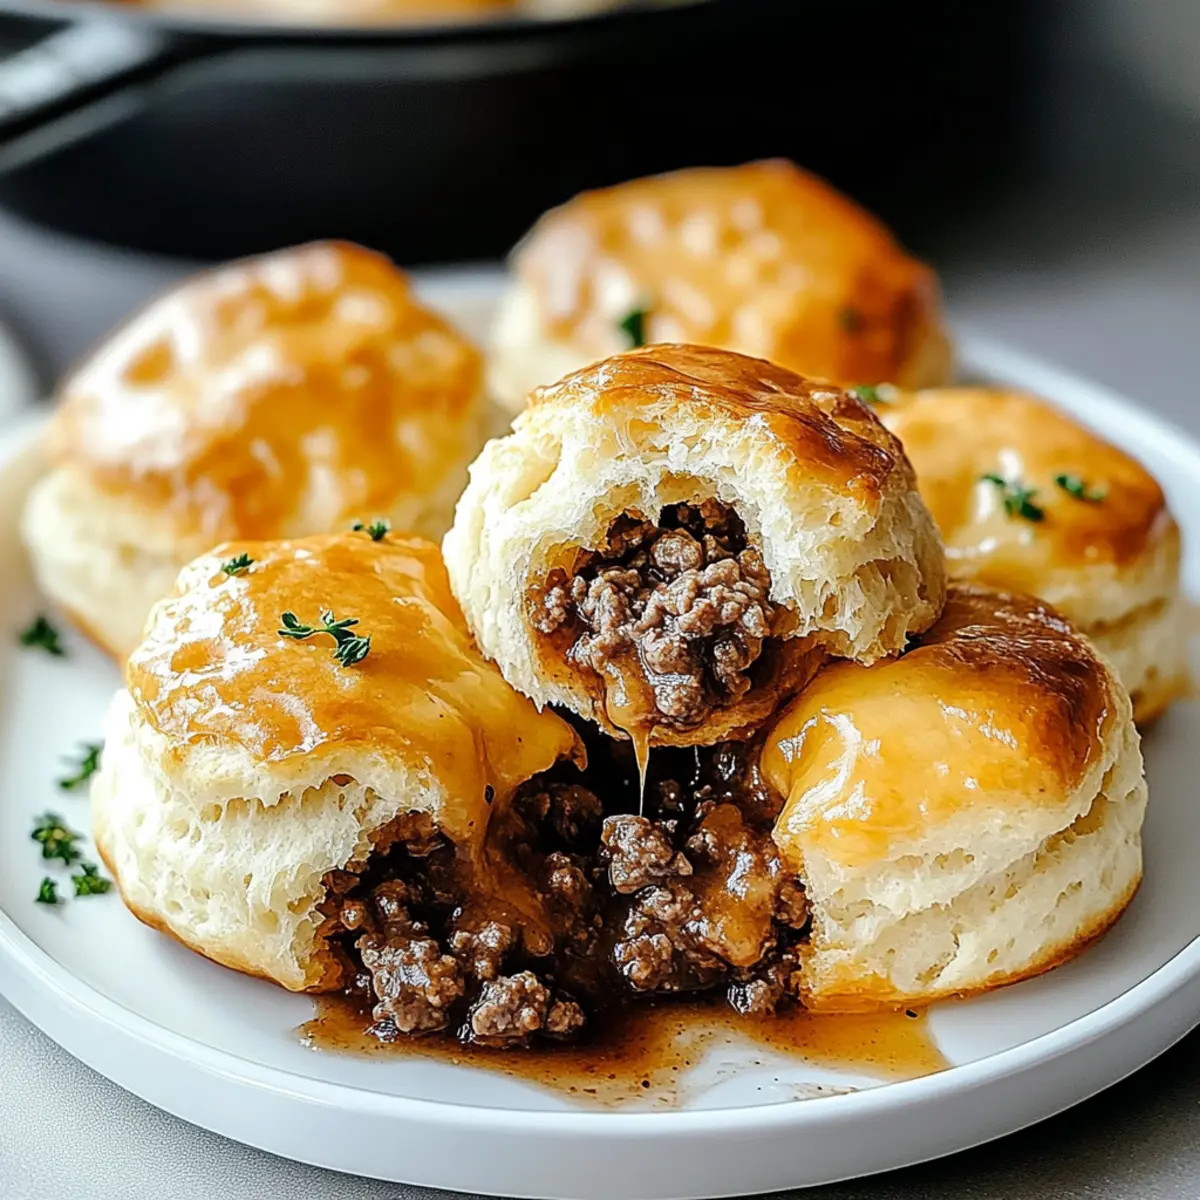
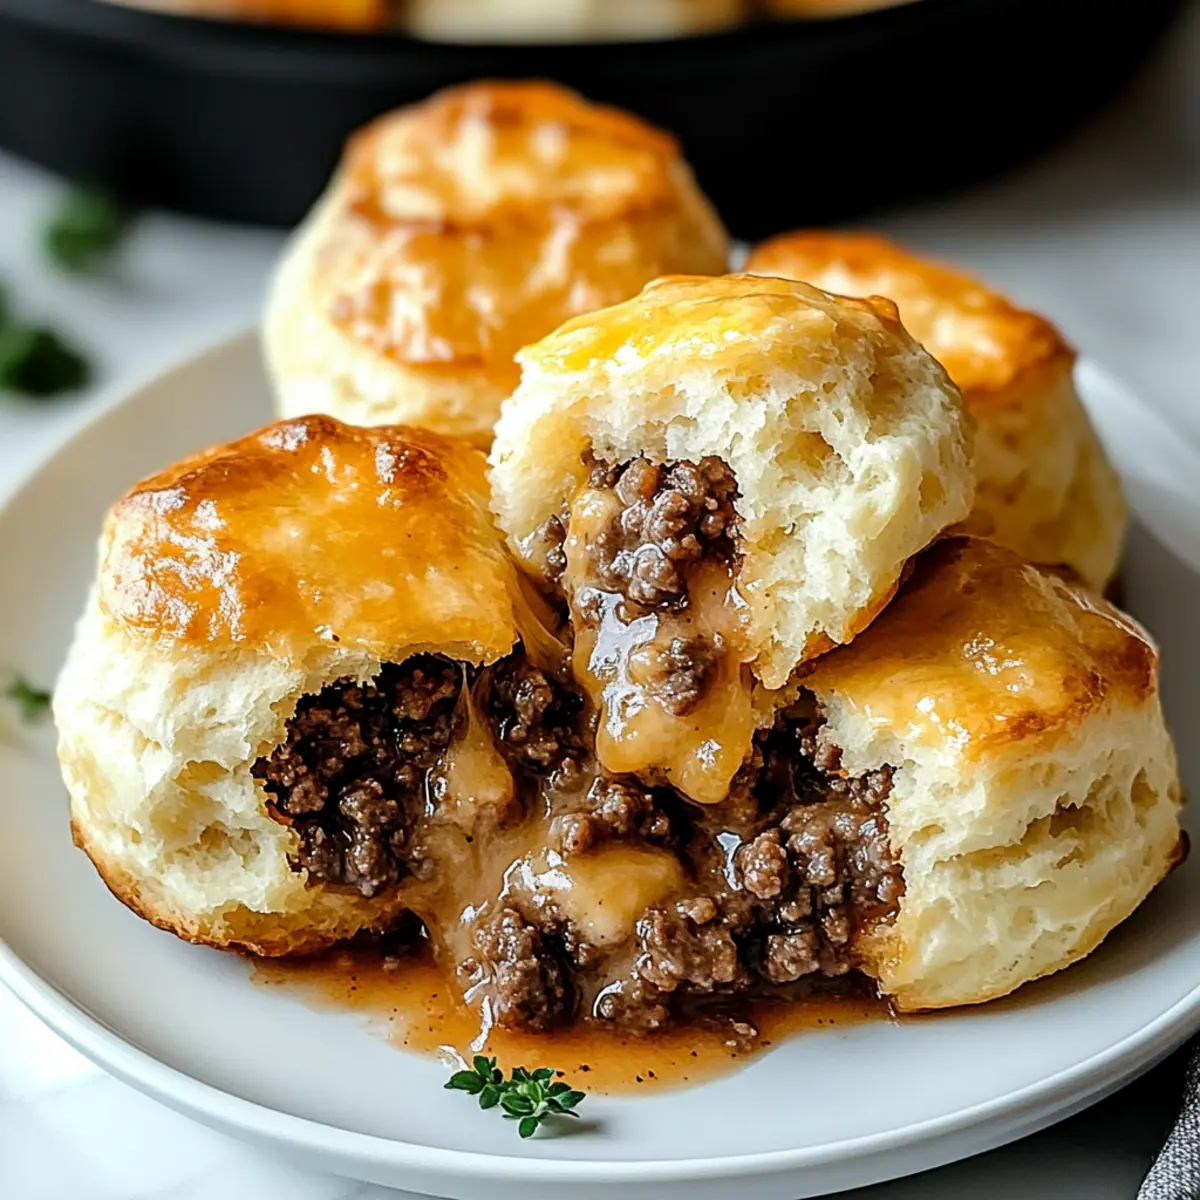
As I stood in my kitchen, a delicious aroma wafted through the air, reminding me of cozy family gatherings filled with laughter and joy. The star of the show? Cheesy Beef Biscuit Bombs. These little pockets of comfort are not only a breeze to whip up but also perfectly customizable to suit your taste. Whether you’re enjoying them as a quick snack or presenting them at a casual dinner with friends, these golden treasures are sure to impress. With a crispy, buttery exterior and a savory, gooey filling, they promise satisfaction in every bite. Ready to create your own batch of these delightful bites? Let’s dive into the recipe!
Why are These Biscuit Bombs a Must-Try?
Simplicity at Its Best: These Cheesy Beef Biscuit Bombs are incredibly easy to make, requiring no advanced cooking skills to whip up a delicious snack.
Flavor Explosion: The combination of savory ground beef and melty cheese wrapped in flaky biscuit dough creates a taste sensation that’s hard to resist.
Customizable Delight: Feel free to switch up the cheeses or add your favorite spices to suit your personal taste!
Perfect for Any Occasion: Whether it’s game day or a simple family dinner, these bite-sized delights are sure to please.
Quick and Convenient: Ready in just under 30 minutes, they are the ultimate solution for satisfying cravings without extensive prep.
Crowd-Pleaser Alert: These biscuit bombs are a hit with both kids and adults alike—serve them at your next gathering and watch them disappear!
Cheesy Beef Biscuit Bombs Ingredients
For the Filling
• Ground Beef – Provides a rich and savory filling; substitute with ground turkey or chicken for a lighter option.
• Shredded Cheddar Cheese – The star ingredient, known for its sharpness and melty texture; swap with mozzarella or Monterey Jack for a different flavor.
• Cream Cheese (softened) – Adds creaminess to the filling, binding the beef and cheese together for a rich texture.
• Grated Parmesan Cheese – Enhances flavor with a salty, umami kick, complementing the cheddar beautifully.
For the Dough
• Refrigerated Biscuit Dough – Soft and flaky exterior that bakes to a golden crisp; it’s essential for holding the filling in each cheesy beef biscuit bomb.
For Seasoning
• Garlic Powder – Offers aromatic depth that enhances the flavors without overpowering the dish.
• Onion Powder – Provides mild sweetness, boosting the beef’s savory profile.
• Black Pepper – Adds a slight heat that balances the richness of the filling.
For Baking
• Melted Butter – Brushed on before baking to ensure a crispy, golden finish on your biscuit bombs.
Step‑by‑Step Instructions for Cheesy Beef Biscuit Bombs
Step 1: Preheat the Oven
Begin by preheating your oven to 375°F (190°C). This initial step is crucial for ensuring that your Cheesy Beef Biscuit Bombs bake evenly and achieve that perfectly golden-brown exterior. While the oven heats up, you can prepare the filling, saving you valuable time and keeping things organized in your cooking process.
Step 2: Cook the Ground Beef
In a large skillet, cook the ground beef over medium heat for about 6-8 minutes, stirring frequently until it’s browned and crumbly. Ensure to drain any excess grease to keep the filling light and flavorful. This step is essential for creating a savory base for your biscuit bombs, so don’t rush it!
Step 3: Add Seasonings
Stir in the garlic powder, onion powder, and black pepper into the browned beef. Cook for an additional 1-2 minutes to allow the spices to meld beautifully with the meat, filling your kitchen with warm, inviting aromas. This seasoned beef will become the flavorful heart of your Cheesy Beef Biscuit Bombs.
Step 4: Mix Your Filling
Once the beef mixture has cooled slightly, transfer it to a mixing bowl. Add the softened cream cheese, shredded cheddar cheese, and grated Parmesan cheese to create a rich and creamy filling. Stir everything together until well combined, ensuring each bite of your Cheesy Beef Biscuit Bombs is cheesy and satisfying.
Step 5: Prepare the Biscuit Dough
Open the refrigerated biscuit dough and separate each biscuit carefully. Lightly flatten each biscuit into a disc shape, about 3 inches in diameter. This step is vital as it provides the perfect envelope for your cheesy beef filling. Keep the dough pieces laid out on a clean surface for easy assembly.
Step 6: Assemble the Bombs
Take a spoonful of the beef mixture and place it in the center of each flattened biscuit. Carefully fold the edges over the filling, pinching them together to seal completely. This is where the magic happens—encasing that delicious filling within the biscuit dough for a burst of flavor in every bite.
Step 7: Bake to Perfection
Arrange the sealed biscuit bombs on a greased baking sheet with enough space between them to allow for expansion. Brush the tops with melted butter for that golden-crisp finish. Bake in the preheated oven for 12-15 minutes, or until they are beautifully golden brown and the filling is hot and bubbly.
Step 8: Cool and Serve
Once baked, remove the Cheesy Beef Biscuit Bombs from the oven and allow them to cool for a few minutes on the baking sheet. This cooling time helps the filling set slightly, making them easier to eat. Serve warm, and enjoy these delightful bites with your favorite dipping sauce or just as they are!

Make Ahead Options
These Cheesy Beef Biscuit Bombs are perfect for meal prep! You can prepare the beef filling up to 3 days in advance, allowing the flavors to meld together beautifully. Simply cook the ground beef as directed, mix in the cheeses, and store it in an airtight container in the refrigerator. Additionally, you can assemble the biscuit bombs completely and refrigerate them for up to 24 hours before baking. When you’re ready to serve, just pop them in the oven as directed, and they’ll come out just as delicious! This way, you save valuable time on busy nights while still enjoying fresh, homemade comfort food that satisfies your cravings.
Cheesy Beef Biscuit Bombs Customizations
Feel free to get creative and make these cheesy delights your own with these fun variations!
-
Mixed Cheeses: Replace cheddar with a blend of cheeses like Monterey Jack and pepper jack for a creamy twist. This adds a luscious meltiness, making each bite even more delightful.
-
Veggie-Loaded: Toss in chopped bell peppers and onions to the filling for a crunchy texture and sweetness. This not only boosts the flavor but also adds an extra layer of nutritional goodness!
-
Spicy Kick: Mix in diced jalapeños or a dash of hot sauce into the beef filling for a spicy surprise. It’s perfect for those who love to heat things up a bit!
-
Herb-Infused Dough: Use herb-infused biscuit dough for a fragrant, flavorful base. It’s a simple yet effective way to enhance the aroma and overall taste of your biscuit bombs.
-
Alternative Proteins: Swap out ground beef for shredded chicken or spicy sausage for completely new flavor profiles. Each protein brings its own character to the party, ensuring there’s always something special for everyone.
-
Creamy Add-Ins: Stir in a tablespoon of sour cream or guacamole into your beef filling for added creaminess and a zesty flavor boost. This twist makes for a richer filling that melts beautifully in your mouth.
-
Sweet Touch: Consider adding a touch of barbecue sauce to the beef mixture for a sweet and tangy flavor twist, reminiscent of a backyard cookout. Pairing it with a fresh salad can make for a perfect meal combo.
-
Quick Dipping Sauce: Serve with a side of marinara for dipping, or try a zesty ranch dressing for a fun dip that complements the savory bites brilliantly.
Experimenting with these variations will only enhance your experience with these scrumptious cheesy beef biscuit bombs. Enjoy personalizing them and delighting your family and friends!
What to Serve with Cheesy Beef Biscuit Bombs
Enjoying these delightful cheesy bites? Here are some perfect pairings to elevate your meal experience.
- Marinara Sauce: A classic dip that adds a tangy flavor, perfectly contrasting the savory filling.
- Fresh Garden Salad: Crisp greens with a light vinaigrette provide a refreshing crunch that balances the richness of the bombs.
- Creamy Coleslaw: The cool, creamy coleslaw introduces a textural contrast while complementing the savory beef inside the biscuit bombs.
- Garlic Bread: Slightly toasted garlic bread enhances the meal with its fragrant aroma and buttery goodness. Perfect for sopping up any extra dips!
For a unique twist, serve these bomb bites with Spicy Salsa: the heat and zest of the salsa will awaken your taste buds, providing a delightful kick that contrasts beautifully with the cheesy comfort within each bite.
- Cheesy Nachos: As a fun side dish, melted cheese over tortilla chips echoes the cheesy goodness, creating a lively snack atmosphere worthy of a game night!
- Crisp Apple Slices: The sweet crunch of fresh apple slices offers a light, refreshing foil that cleanses the palate between bites.
- Lemonade or Iced Tea: Pair your meal with a refreshing drink like lemonade or unsweetened iced tea, which adds a crisp touch and helps balance out the savory flavors.
- Chocolate Chip Cookies: End on a sweet note! The warm and gooey cookies provide a comforting finish to your meal.
How to Store and Freeze Cheesy Beef Biscuit Bombs
Fridge: Store any leftover Cheesy Beef Biscuit Bombs in an airtight container in the refrigerator for up to 3-4 days to keep them fresh and delicious.
Freezer: For longer storage, wrap individual biscuit bombs in plastic wrap and place them in a freezer bag. They can be frozen for up to 3 months.
Reheating: When ready to enjoy, reheat frozen Cheesy Beef Biscuit Bombs directly from the freezer at 350°F for 8-10 minutes or until heated through for that perfect crispy exterior.
Room Temperature: If you’re serving them at a gathering, allow the bombs to sit at room temperature for no more than 2 hours for food safety.
Expert Tips for Cheesy Beef Biscuit Bombs
- Check Beef Temperature: Ensure the ground beef reaches 165°F (74°C) for safe consumption; use a meat thermometer for accuracy.
- Avoid Overstuffing: It’s tempting to add a lot of filling, but too much can cause the bombs to burst while baking. Use just enough to enclose the filling.
- Crispy Finish: Brushing the tops with melted butter not only enhances flavor but also contributes to a beautifully crisp exterior for your Cheesy Beef Biscuit Bombs.
- Dough Prep: Keep the biscuit dough cold until you’re ready to use it; this helps achieve that fluffy, flaky texture after baking.
- Reheating Right: For leftovers, skip the microwave. Instead, reheat in the oven at 350°F for about 10 minutes to maintain crispiness.
Cheesy Beef Biscuit Bombs Recipe FAQs
What is the best ground beef for these biscuit bombs?
Absolutely! For Cheesy Beef Biscuit Bombs, using lean ground beef (like 80/20) works perfectly to create a flavorful filling without too much grease. If you’re looking for a lighter option, feel free to substitute ground turkey or chicken, which will still deliver a deliciously savory experience without the extra calories.
How should I store leftover biscuit bombs?
To keep your leftover Cheesy Beef Biscuit Bombs fresh, store them in an airtight container in the fridge for up to 3-4 days. For longer shelf life, wrap each biscuit bomb in plastic wrap and keep them in a freezer bag; they can remain good in the freezer for up to 3 months! Just remember to label them with the date for your convenience.
Can I freeze these biscuit bombs before baking them?
The more the merrier! Yes, you can definitely freeze assembled, unbaked Cheesy Beef Biscuit Bombs. Simply prepare them as directed, then place them on a baking sheet lined with parchment paper and freeze until solid. Once frozen, transfer them to a freezer bag. When you’re ready to bake, just add a few extra minutes to the baking time (around 15-20 minutes), baking directly from the freezer!
What should I do if my biscuit bombs burst while baking?
No worries—this can happen! If your Cheesy Beef Biscuit Bombs burst, it’s usually caused by overstuffing. For better results next time, ensure you use just enough filling to allow the biscuit dough to seal completely. Additionally, pinching the edges tightly can help prevent any leaks. If they do burst, consider serving the filling with the crispy biscuits as a fun twist!
Can my pets enjoy these biscuit bombs too?
It’s best to be cautious! While the ingredients in Cheesy Beef Biscuit Bombs are safe for humans, some may not be suitable for our furry friends. Ingredients like cheese and spices could upset their stomachs. If you want to treat your pets, consider making a separate, plain version without seasonings or dairy, just plain cooked ground beef instead.
How do I make these biscuit bombs gluten-free?
Very much possible! To make Cheesy Beef Biscuit Bombs gluten-free, substitute the refrigerated biscuit dough with a gluten-free version that’s available in stores or make your own using gluten-free flour. There are great mixes available that can also help you maintain that soft and flaky texture. Just be sure to check all other ingredients for gluten content!

Delicious Cheesy Beef Biscuit Bombs for Ultimate Comfort Food
Ingredients
Equipment
Method
- Preheat your oven to 375°F (190°C).
- In a large skillet, cook the ground beef over medium heat for about 6-8 minutes until browned and crumbly. Drain excess grease.
- Stir in the garlic powder, onion powder, and black pepper into the browned beef. Cook for an additional 1-2 minutes.
- Transfer the beef mixture to a mixing bowl. Add softened cream cheese, shredded cheddar, and grated Parmesan. Stir until well combined.
- Open the refrigerated biscuit dough and separate each biscuit. Lightly flatten each into a disc, about 3 inches in diameter.
- Take a spoonful of the beef mixture and place in the center of each biscuit. Fold edges over filling and seal.
- Arrange sealed biscuits on a greased baking sheet, brush with melted butter, and bake for 12-15 minutes until golden brown.
- Remove from oven and cool for a few minutes before serving.
Leave a Reply