
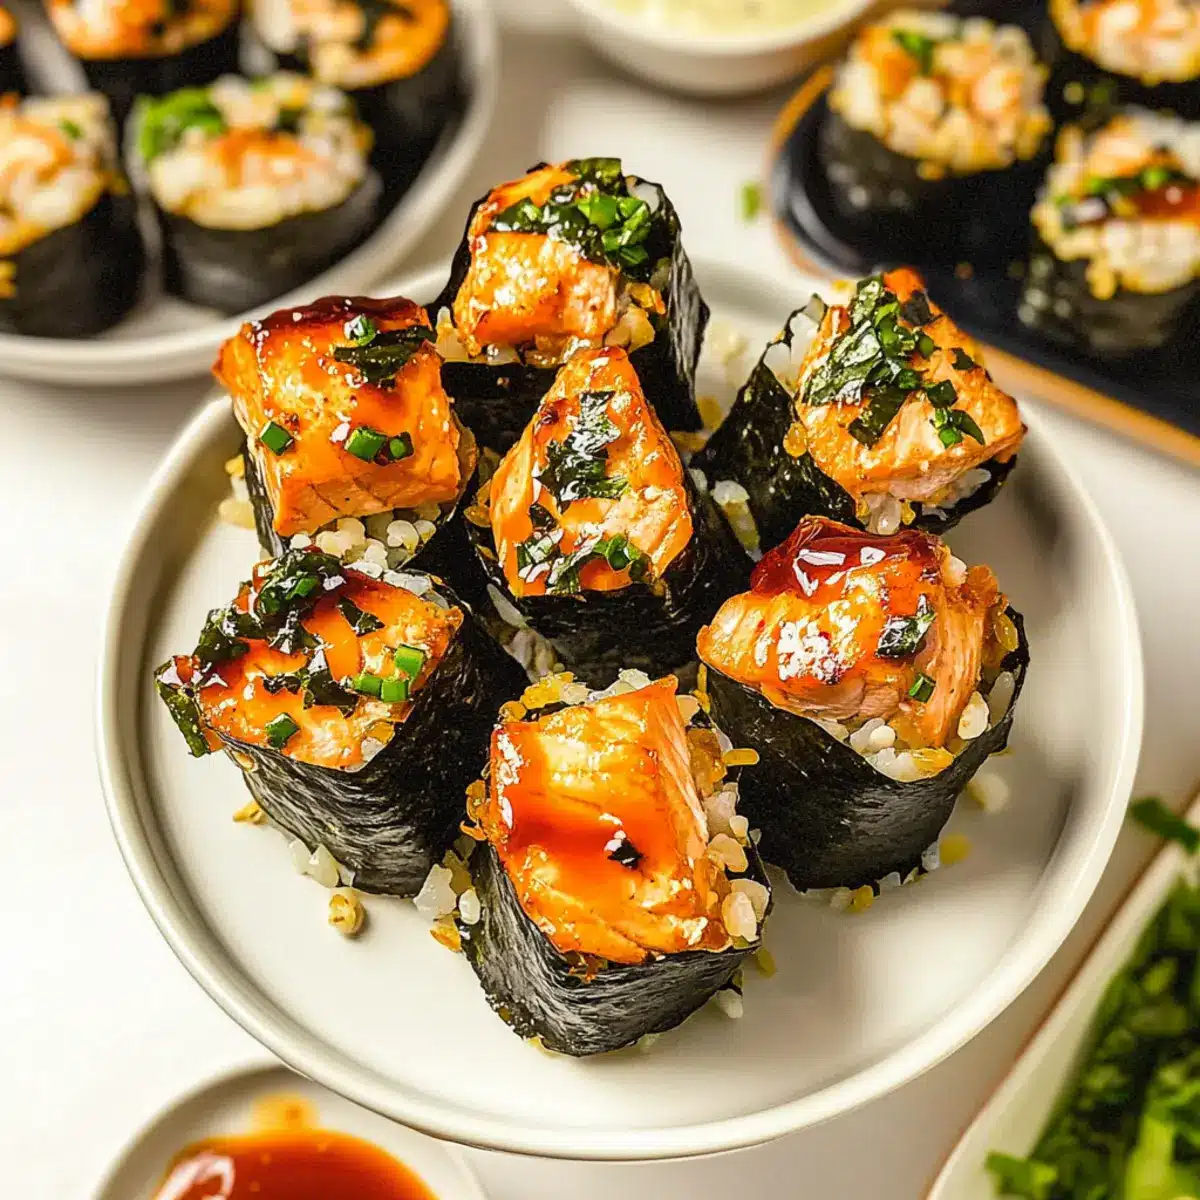
As I was experimenting in the kitchen last week, I stumbled upon a playful twist on traditional sushi that sparked joy at first bite. These Easy Baked Salmon Sushi Cups have quickly become my go-to snack for gatherings, combining the deliciousness of tender salmon, fluffy sushi rice, and crisp nori into a delightful bite-sized treat. What I love most about this recipe is not only how quick it is to prepare—perfect for those busy weeknights—but also how it impresses family and friends at any party. Imagine serving these vibrant cups and watching faces light up with each flavorful mouthful. Are you ready to dive in and create your own sushi masterpiece?

Why Are These Sushi Cups a Must-Try?
Simplicity at Its Core: With just a few easy steps, these sushi cups come together quickly, making them ideal for both novice cooks and seasoned chefs.
Unique Flavor Fusion: The combination of fresh salmon, creamy Kewpie mayo, and spicy sriracha creates a mouthwatering taste that elevates your snacking game.
Versatile Base: Feel free to swap out the salmon for shrimp or tofu, accommodating different dietary preferences without losing an ounce of flavor!
Eye-Catching Presentation: These colorful, bite-sized cups are sure to impress your guests and steal the spotlight at any gathering.
Quick Bake Time: In just 15 minutes, you’ll have a delicious appetizer ready to serve, helping you save time while tantalizing taste buds.
Crowd-Pleasing Appeal: Whether it’s a cozy family dinner or a lively party, these Easy Baked Salmon Sushi Cups are guaranteed to be a hit with everyone. They pair perfectly with our homemade miso soup or a light cucumber salad!
Easy Baked Salmon Sushi Cups Ingredients
For the Salmon Mix
• Salmon – Freshness and flavor are key; feel free to substitute with cooked seafood or tofu for a vegetarian option.
• Light Soy Sauce – Adds umami depth to the salmon; use tamari for a gluten-free alternative.
• Kewpie Mayo – Provides a creamy texture and unique flavor; opt for regular mayo if Kewpie is unavailable.
• Sriracha – Introduces a spicy kick; adjust the amount based on your heat preference.
• Sesame Oil – Enhances the aromatic profile of the dish; can be replaced with any neutral oil if necessary.
For the Sushi Base
• Uncooked Sushi Rice – Acts as the delicious base; ensure to use short-grain rice for optimal texture.
• Rice Vinegar – Adds a slight acidity for balance; white wine vinegar can work as a substitute.
• White Sugar – Balances the acidity of the rice vinegar; feel free to use honey or agave syrup for a natural sweetener.
For Assembly
• Nori Sheets – Essential for the structure of sushi cups; swap with blanched spinach for a low-carb option.
• Furikake – A delightful Japanese seasoning mix for garnish; can be replaced with sesame seeds for a simple twist.
• Green Onion – Offers a burst of freshness and crunch; chives make a great alternative.
• Cooking Spray – Prevents sticking to the muffin tin; any oil or butter can be used instead.
These Easy Baked Salmon Sushi Cups are not only simple to make, but they also deliver a vibrant flavor that will captivate your guests!
Step‑by‑Step Instructions for Easy Baked Salmon Sushi Cups
Step 1: Cook Sushi Rice
Begin by rinsing 1 cup of uncooked sushi rice under cold water until the water runs clear. In a medium saucepan, combine the rice with 1 ¼ cups of water and bring to a gentle boil. Once boiling, reduce heat to low, cover, and simmer for 18-20 minutes until the rice is tender and the water is absorbed. Remove from heat and let it sit covered for an additional 10 minutes to firm up.
Step 2: Prepare Salmon Mix
While the rice rests, chop ½ pound of fresh salmon into small cubes. In a mixing bowl, combine the cubed salmon with 1 tablespoon of light soy sauce, 2 tablespoons of Kewpie mayo, 1 teaspoon of sriracha, and 1 teaspoon of sesame oil. Stir well until all the ingredients are evenly coated, setting aside the salmon mixture to let the flavors meld together while you prepare the sushi cups.
Step 3: Preheat Oven
Preheat your oven to 400°F (204°C). This step is essential to ensure your Easy Baked Salmon Sushi Cups cook thoroughly and achieve a delightful golden color. Make sure your oven is preheated before you start assembling the cups so that they bake evenly once in the oven.
Step 4: Assemble Cups
Take 3-4 sheets of nori and cut them into 4–5-inch squares. Lightly grease a muffin tin with cooking spray to prevent sticking. Place the nori squares into each muffin tin slot, pressing them into the shape of cups. Spoon a generous amount of sushi rice into each nori cup, pressing gently to create a firm base, followed by a layer of the salmon mixture on top.
Step 5: Bake
Once assembled, place the muffin tin in the preheated oven and bake for 15 minutes. You’ll know the Easy Baked Salmon Sushi Cups are ready when the salmon is cooked through and the tops have turned a lovely golden-brown. Keep an eye on them during the final minutes to ensure they don’t overcook.
Step 6: Garnish and Serve
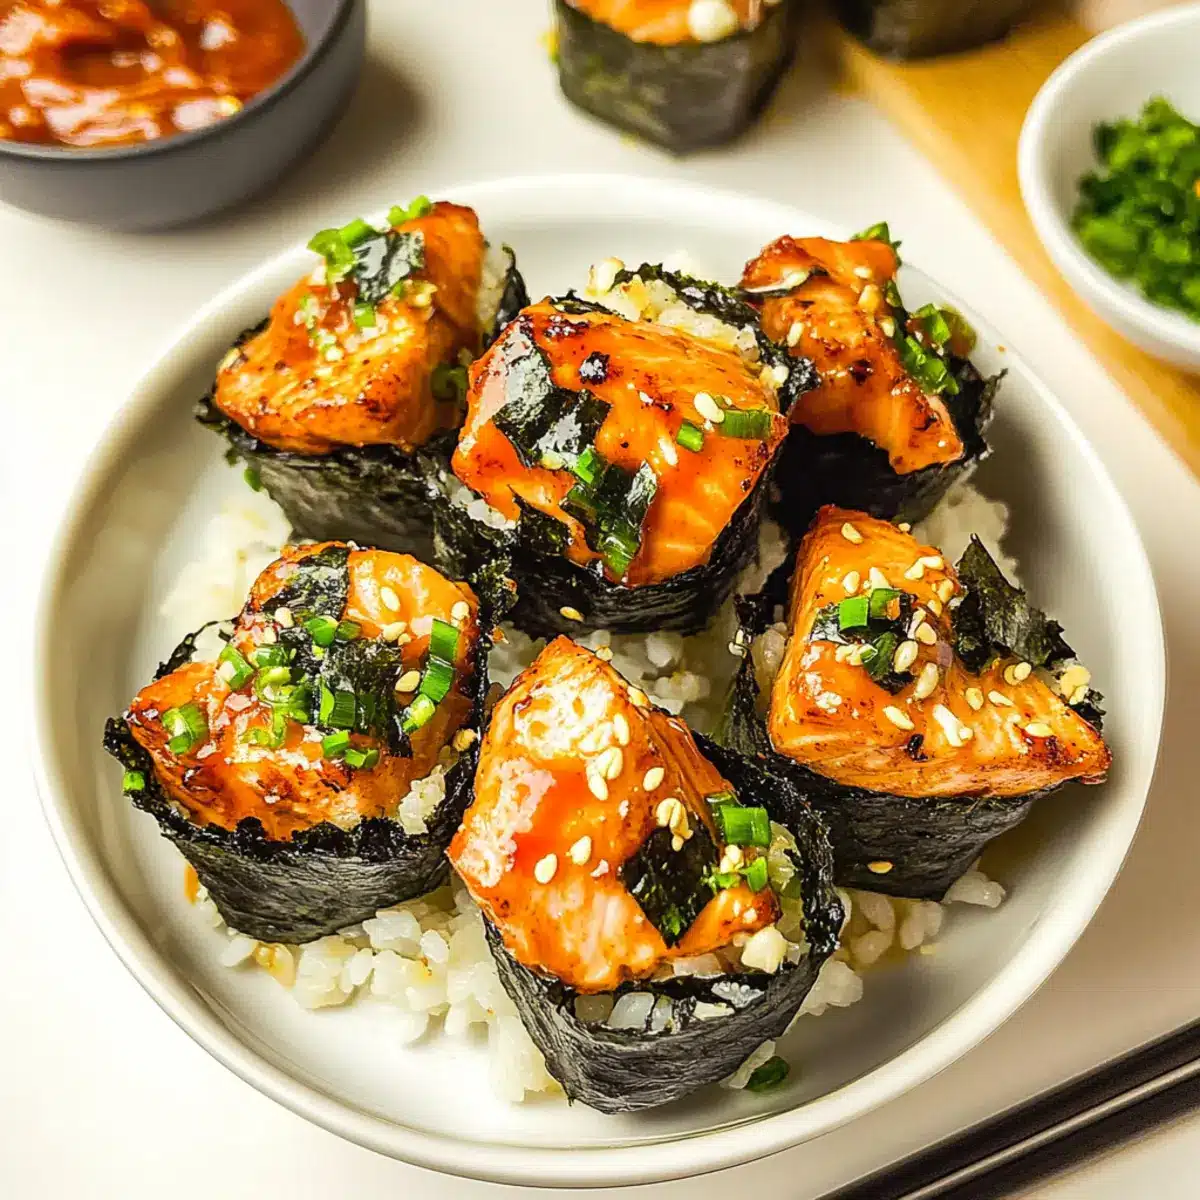
After baking, carefully remove the muffin tin from the oven and let the sushi cups cool for a few minutes. Drizzle additional sriracha or spicy mayo on top, and sprinkle with furikake and chopped green onions. Serve the Easy Baked Salmon Sushi Cups warm, allowing everyone to enjoy this delightful fusion of flavors right away.
What to Serve With Easy Baked Salmon Sushi Cups
These delightful sushi cups offer a burst of flavor, making for an entertaining meal or party centerpiece. Pair them with complementary dishes that enhance their vibrant taste and texture.
- Crisp Cucumber Salad: A refreshing side that adds crunch and lightness, balancing the richness of the sushi cups perfectly.
- Miso Soup: The warm, savory broth harmonizes beautifully, creating a comforting and traditional Japanese experience.
- Pickled Ginger: Serve alongside for a tangy contrast that cleanses the palate between bites of the savory sushi cups.
- Steamed Edamame: These tender, salty pods provide a delightful finger-food element, great for nibbling alongside your sushi cups.
- Sushi-Style Cole Slaw: A colorful, zesty slaw with sesame dressing adds a crunchy texture and bright flavor that pairs wonderfully.
- Green Tea or Sake: A soothing beverage that enhances the umami flavors of the sushi, making for a harmonious dining experience.
- Spicy Roasted Cauliflower: A warm vegetable side that complements the sushi cups, offering a satisfying contrast in both flavor and texture.
- Fruit Salad: A light and sweet end to the meal or a refreshing palate cleanser, providing a delightful finish to the savory flavors.
Make Ahead Options
These Easy Baked Salmon Sushi Cups are perfect for meal prep enthusiasts! You can prepare the sushi rice and salmon mixture up to 24 hours in advance—simply cook and season the rice, then combine the salmon with the remaining ingredients in a bowl. Store both components in airtight containers in the refrigerator to maintain freshness. When you’re ready to serve, assemble the cups in a greased muffin tin, bake at 400°F (204°C) for 15 minutes, and enjoy your delightful fusion of flavors with minimal effort. This prep-ahead strategy ensures your sushi cups are just as delicious while saving you valuable time on busy weeknights!
Expert Tips for Easy Baked Salmon Sushi Cups
-
Fresh Salmon Is Key: Always use sushi-grade salmon to ensure the best flavor and food safety for your Easy Baked Salmon Sushi Cups.
-
Firmly Press the Rice: Make sure to pack the sushi rice tightly into the nori cups to prevent them from falling apart during baking.
-
Uniform Sized Cups: Ensure all nori cups are evenly shaped to guarantee even baking; this will enhance the overall texture and presentation.
-
Monitor Baking Time: Keep an eye on the cups during the last few minutes in the oven to avoid overcooking; they should be golden brown and cooked through.
-
Spice to Taste: Adjust the amount of sriracha based on your spice tolerance. You can add more or less for a customized flavor profile.
Easy Baked Salmon Sushi Cups Variations
Invite your taste buds to embark on a delightful journey of customization with these Easy Baked Salmon Sushi Cups!
-
Avocado Boost: Add sliced avocado for a luscious creaminess and a boost of healthy fats that perfectly complements the salmon.
Slice ripe avocado and layer it atop the salmon before baking for an extra layer of indulgence. -
Seafood Swap: Try using tuna or shrimp in place of salmon for a different flavor and texture profile; both options are equally scrumptious!
Feel free to select sushi-grade tuna or fresh shrimp to keep that seafood essence alive in your cups. -
Vegetarian Delight: Replace salmon with marinated tofu or jackfruit for a plant-based alternative that doesn’t skimp on flavor!
Marinate your tofu in soy sauce and sesame oil to achieve a delightful taste that will satisfy even the most devoted meat-eaters. -
Crunchy Veggies: Add diced bell peppers or cucumber for a refreshing crunch that contrasts beautifully with the creamy mayonnaise and rich salmon.
Incorporate chopped vegetables directly in the salmon mix or layer them underneath for a delightful surprise. -
Heat It Up: Increase the sriracha or incorporate chili flakes for those who crave an extra kick!
A touch of heat can elevate your sushi cups and create a delightful balance with the creamy mayo. -
Citrus Zing: Add a splash of lime or lemon juice to the salmon mixture for a bright, zesty flavor that enhances every bite.
The citrus not only adds brightness but also cuts through the richness of the salmon, creating a well-rounded dish. -
Herb Infusion: Mix in chopped cilantro or basil for a fresh herbal twist that adds layers of flavor to your sushi cups.
This unique herb addition brings freshness and an aromatic quality that makes each bite delightful.
Each of these variations can be effortlessly adapted to create a unique version of your Easy Baked Salmon Sushi Cups, ensuring there’s something for everyone at the table! For an even more delightful experience, serve them alongside a refreshing cucumber salad.
How to Store and Freeze Easy Baked Salmon Sushi Cups
Fridge: Store leftover sushi cups in an airtight container for up to 2-3 days. This helps maintain their flavor and texture until you’re ready to enjoy them again.
Freezer: If you want to enjoy your Easy Baked Salmon Sushi Cups later, freeze them in a single layer on a baking sheet before transferring to a freezer bag for up to 1 month.
Reheating: To reheat from the fridge, warm in the oven at 350°F (175°C) for about 10 minutes. From frozen, cook in a preheated oven for 20-25 minutes or until heated through.
Serving Fresh: For the best experience, serve your sushi cups fresh. Reheat and garnish with extra sriracha and green onions right before serving!
Easy Baked Salmon Sushi Cups Recipe FAQs
What type of salmon is best for these sushi cups?
Absolutely! Always opt for fresh, sushi-grade salmon to ensure the best flavor and food safety. Look for salmon without dark spots or a fishy smell—fresh salmon should have a mild ocean scent and a vibrant color.
How should I store leftover Easy Baked Salmon Sushi Cups?
You can store leftover sushi cups in an airtight container in the refrigerator for up to 2-3 days. This will help preserve their flavor and texture until you’re ready to enjoy them again.
Can these sushi cups be frozen?
Yes, they can! To freeze your Easy Baked Salmon Sushi Cups, first let them cool completely, then place them in a single layer on a baking sheet. Once frozen, transfer them to a freezer-safe bag or container. They can be frozen for up to 1 month.
What are some tips for reheating leftover sushi cups?
To reheat sushi cups from the fridge, preheat your oven to 350°F (175°C) and warm them for about 10 minutes until they’re heated through. If they are frozen, cook them in a preheated oven for 20-25 minutes until hot. Always garnish with extra sriracha and green onions right before serving!
Can I use different ingredients in the recipe?
Very! You can substitute the salmon with cooked shrimp, tuna, or even tofu for a vegetarian version. You can also modify the toppings, adding avocado slices or crunchy veggies for added flavor and texture.

Easy Baked Salmon Sushi Cups for Satisfying Sushi Cravings
Ingredients
Equipment
Method
- Rinse 1 cup of uncooked sushi rice under cold water until clear. In a medium saucepan, combine the rice with 1 ¼ cups of water and bring to a gentle boil. Reduce heat to low, cover, and simmer for 18-20 minutes. Remove from heat and let it sit covered for 10 minutes.
- Chop ½ pound of fresh salmon into small cubes. In a mixing bowl, combine the cubed salmon with 1 tablespoon of light soy sauce, 2 tablespoons of Kewpie mayo, 1 teaspoon of sriracha, and 1 teaspoon of sesame oil. Stir well and set aside.
- Preheat your oven to 400°F (204°C).
- Cut 3-4 sheets of nori into 4–5-inch squares. Grease a muffin tin with cooking spray. Place nori squares into each slot, pressing them into the shape of cups. Spoon sushi rice into each nori cup, pressing gently, followed by a layer of salmon mixture on top.
- Place the muffin tin in the oven and bake for 15 minutes until the salmon is cooked through and the tops are golden-brown.
- Remove from the oven and let cool for a few minutes. Drizzle sriracha or spicy mayo, and sprinkle with furikake and green onions. Serve warm.
Leave a Reply