
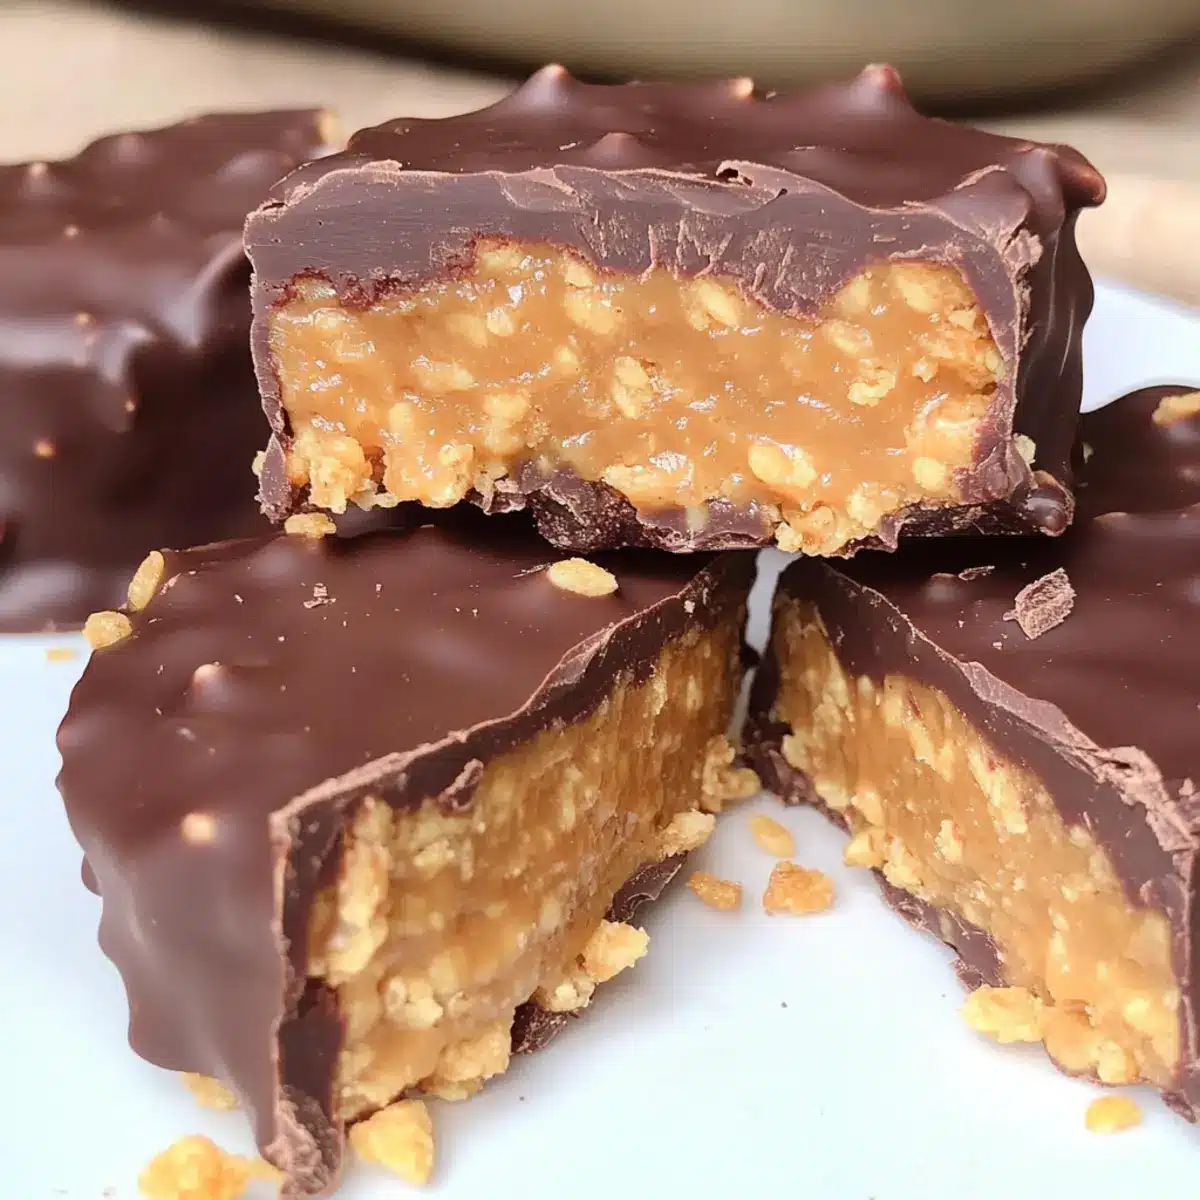
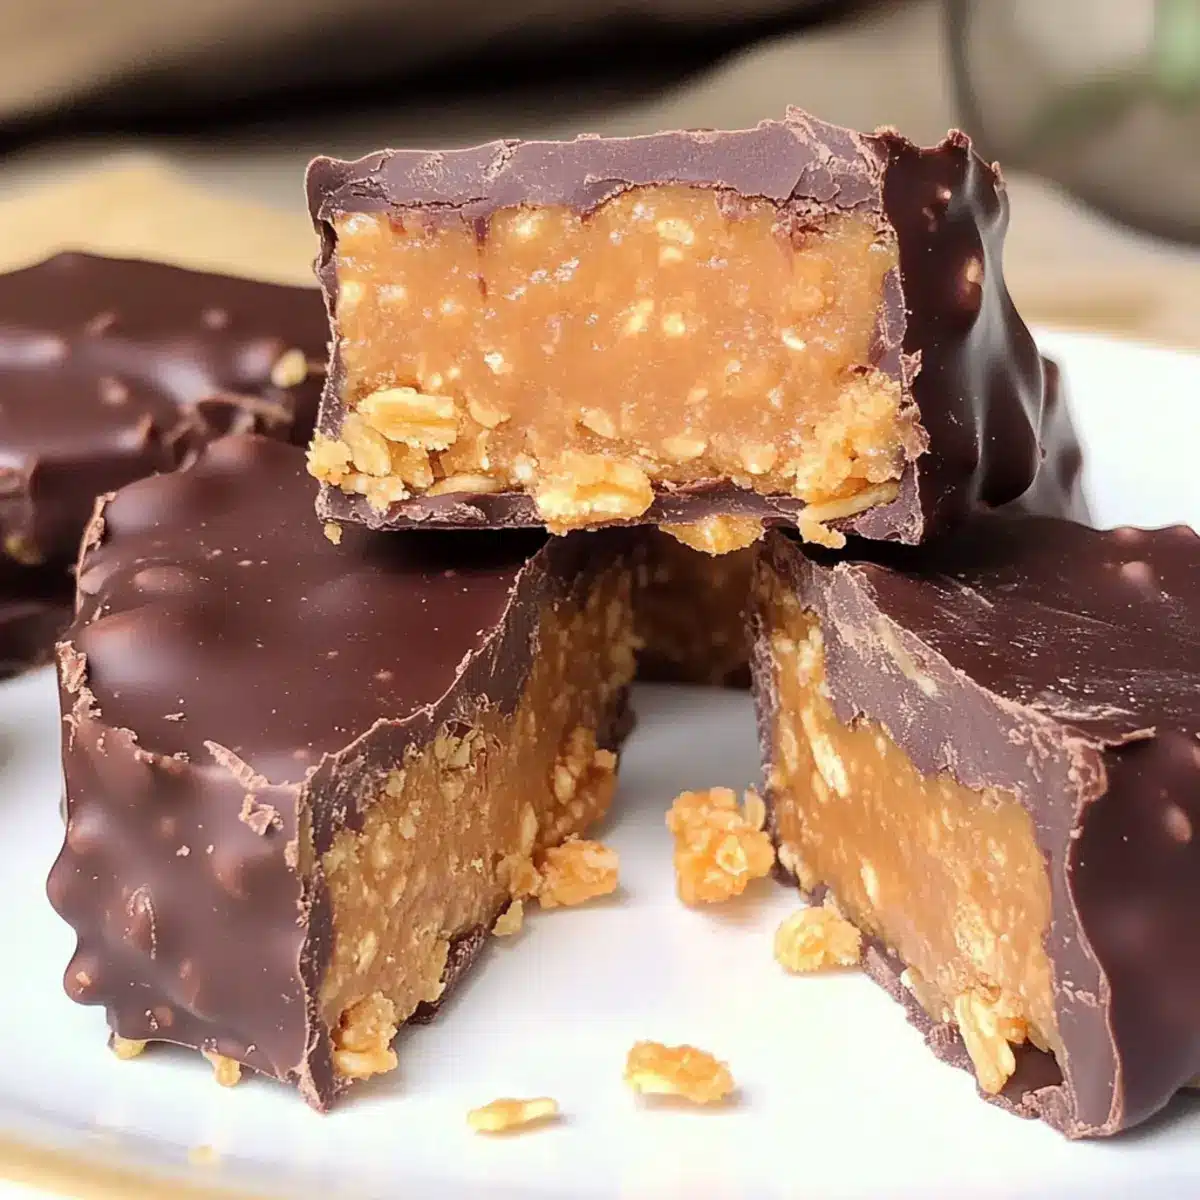
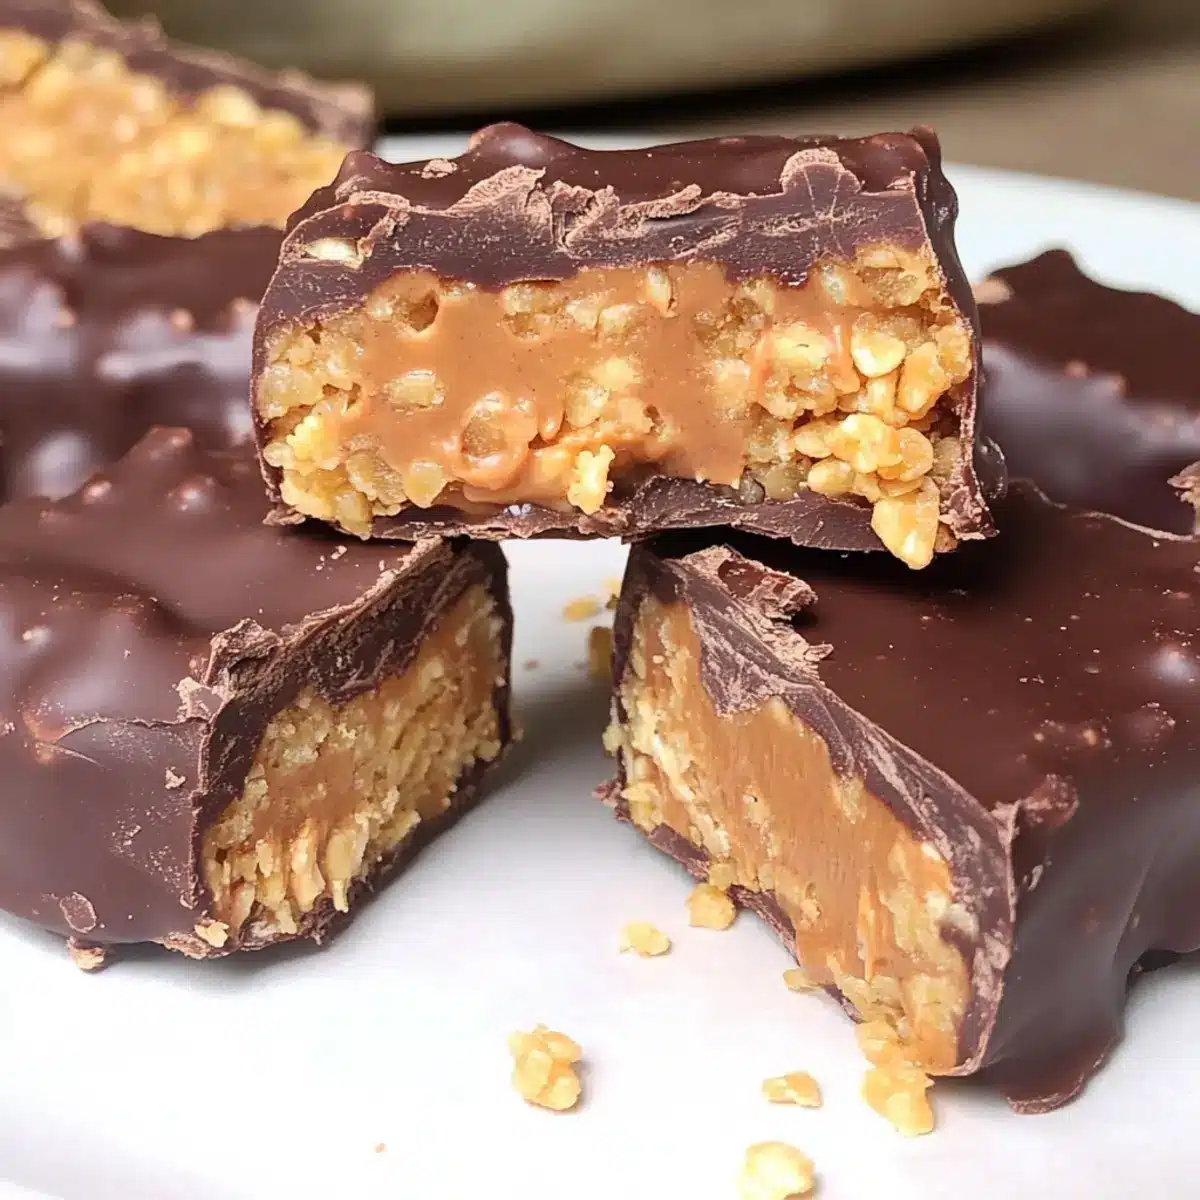
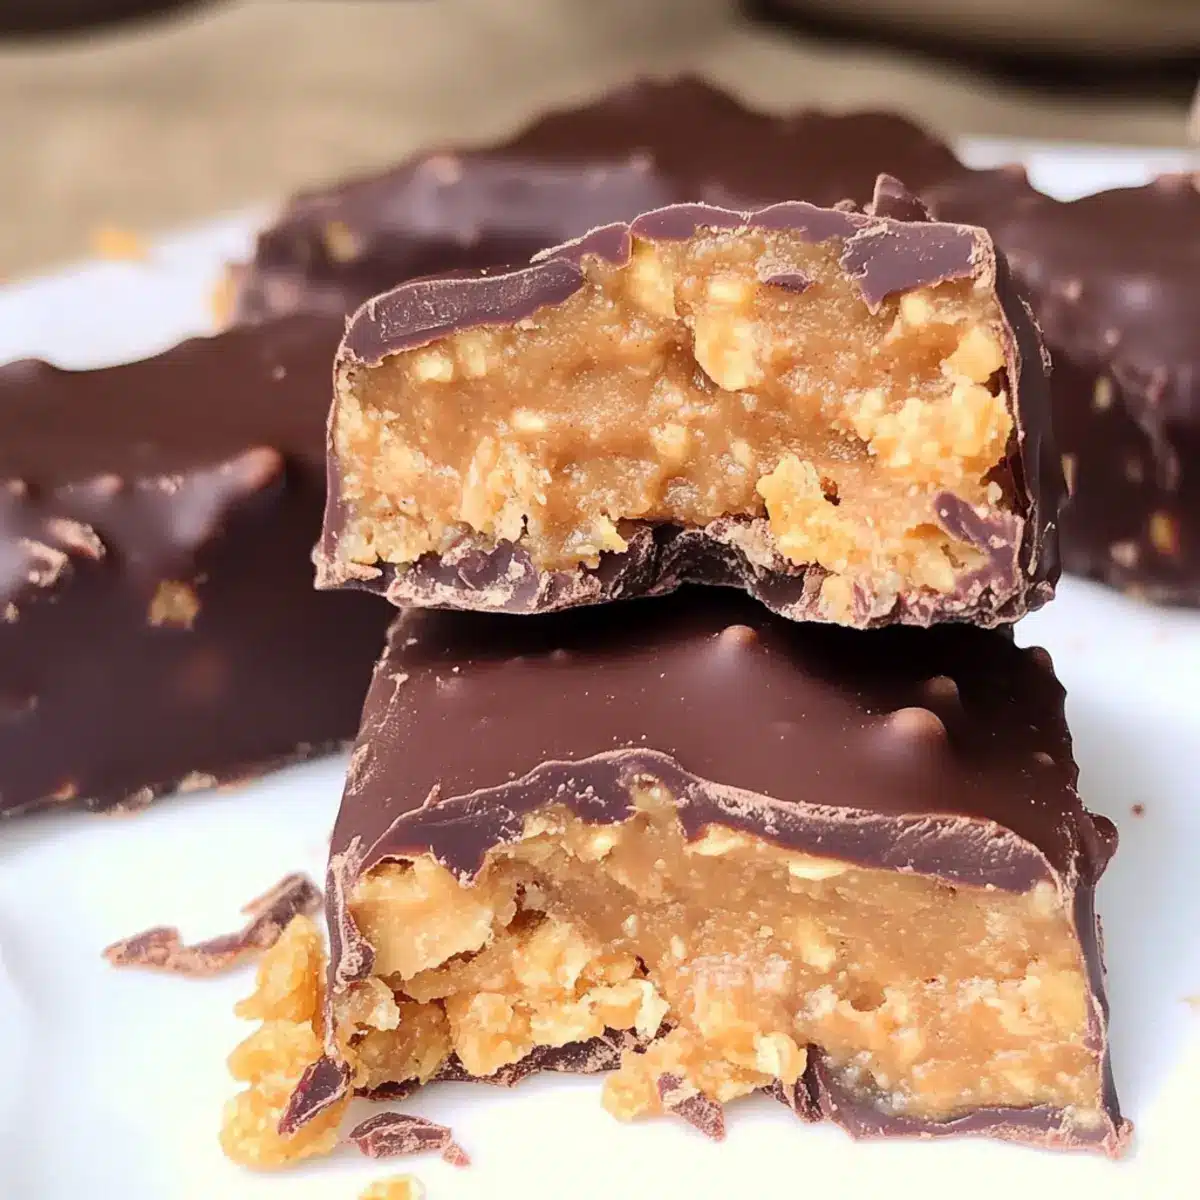
Overheard in the kitchen: “I wish I could indulge in candy without the guilt!” Well, consider your wish granted with my Healthy Copycat Butterfingers! This recipe captures the essence of that cherished peanut-buttery crunch we all love, but in a way that’s gluten-free, dairy-free, and packed with protein. With just six simple ingredients, you can whip them up in under an hour, making these bars a fantastic guilt-free treat any day of the year, especially during Halloween. Plus, they satisfy both your sweet tooth and your wellness goals—what could be better? Are you ready to create your own batch of these delightful bars? Let’s dive in!
Why Are These Butterfingers So Irresistible?
Healthy Indulgence: With just six simple ingredients, you can enjoy a classic favorite without the guilt.
Peanut Butter Perfection: The organic peanut butter provides a creamy base that takes these bars to the next level of deliciousness.
Crispy Crunch: Thanks to the crispy rice cereal, each bite delivers that satisfying crunch, reminiscent of the original candy.
Wholesome Ingredients: Gluten-free and dairy-free, these treats fit into various dietary lifestyles, making them perfect for everyone.
Time-Saving Treat: Ready to enjoy in under an hour, these Butterfingers are an easy solution for satisfying your sweet tooth.
Perfect for Any Occasion: Whether it’s a Halloween party or a post-workout snack, these bars will wow your friends and family. You might also enjoy exploring more delightful snacks in our Snack Ideas category.
Healthy Homemade Butterfingers Ingredients
• You’ll only need 6 simple ingredients to make these delicious bars!
For the Base
- Organic Peanut Butter – Provides richness and creaminess; choose natural brands without added sugar or oils for a healthier option.
- Coconut Flour – Acts as a binder, giving structure; you can substitute it with almond flour for a nutty twist.
- Crispy Rice Cereal – Adds that signature crunch; ensure it’s gluten-free to fit your dietary needs.
For the Sweetness
- Organic Liquid Sweetener – Sweetens the bars healthily; maple syrup or honey are both great options and ensure they are refined-sugar-free.
- Sea Salt – Elevates flavor and balances sweetness; just a pinch is all you need for perfection.
For the Coating
- Organic Dark Chocolate – Coats the bars for an indulgent finish; opt for fair-trade chocolate for better quality and taste.
Dive into these satisfying treats and enjoy guilt-free snacking with these Healthy Homemade Butterfingers!
Step‑by‑Step Instructions for Healthy Homemade Butterfingers
Step 1: Prepare the Mixture
In a large mixing bowl, combine 1 cup of organic peanut butter, ½ cup of coconut flour, 2 cups of crispy rice cereal, and ½ cup of organic liquid sweetener. Mix well using a spatula or your hands until the mixture is sticky and thoroughly combined. You want to achieve a cohesive texture—think of a dough-like consistency that’s slightly tacky to the touch.
Step 2: Shape the Bars
Line an 8×8-inch baking dish with parchment paper for easy removal. Transfer the peanut butter mixture into the dish, pressing it down firmly with your hands or a spatula to create an even layer. Smooth the top until it’s flat and even, then refrigerate for about 30 minutes. This setting time will help firm up the mixture, making the bar shaping easier.
Step 3: Melt the Chocolate
While the mixture is chilling, set up a double boiler by placing a heatproof bowl over a pot of simmering water. Add 1 cup of organic dark chocolate chips to the bowl and stir continuously until melted and smooth. Be patient, ensuring the chocolate doesn’t burn; this process typically takes about 5-7 minutes. Once melted, remove from heat and let cool slightly while you prepare for coating.
Step 4: Coat the Bars
Once the bars have set in the refrigerator, remove the mixture and lift it out using the parchment paper. Cut into rectangular bars using a sharp knife or a pizza cutter. Take each bar and dip it into the melted dark chocolate, making sure it’s evenly coated. Gently shake off any excess chocolate and place the coated bars on a parchment-lined tray.
Step 5: Chill Again
After coating all the bars, return them to the refrigerator on the parchment-lined tray for about 20-30 minutes or until the chocolate has hardened. This cooling period allows the chocolate to set firmly, creating that signature crunchy coating for your Healthy Homemade Butterfingers. Once set, enjoy or store for later!
What to Serve with Healthy Copycat Butterfingers?
Transform your indulgent treat into a delightful meal with these perfect pairings that complement the flavors beautifully.
-
Almond Milk: This creamy drink enhances the nutty peanut butter flavor, making it a refreshing choice alongside your bars.
-
Fresh Fruit Salad: A medley of vibrant fruits adds a refreshing, juicy contrast that balances the richness of the Butterfingers. Toss together some berries, melon, and citrus for a colorful side.
-
Greek Yogurt Parfait: Layer tangy Greek yogurt with granola and honey for a crunchy, creamy, and high-protein complement to your treats.
-
Nutty Granola Bars: Offer these alongside the Butterfingers for a delightful mix of textures that satisfy varying sweet cravings.
-
Iced Herbal Tea: A chilled cup of floral or fruity herbal tea provides a refreshing and light beverage option to enjoy with your dessert.
-
Coconut Flavored Rice Pudding: Its creamy texture and mild flavor pairs wonderfully, enhancing the overall sweetness experience.
-
Chocolate Avocado Mousse: For a rich and velvety dessert that echoes the chocolate in your Butterfingers, try this creamy alternative as a sophisticated pairing.
The combination of these suggestions creates a wonderful balance of flavors and textures, making your dessert experience truly delightful!
Make Ahead Options
These Healthy Homemade Butterfingers are perfect for meal prep enthusiasts! You can prepare the base mixture (peanut butter, coconut flour, rice cereal, and liquid sweetener) up to 24 hours in advance. Just store it in an airtight container in the refrigerator to maintain freshness. When you’re ready to finish, simply press the mixture into the prepared baking dish and chill for about 30 minutes. Afterwards, melt the dark chocolate and coat the bars as instructed in the recipe. Rest assured, making them ahead won’t compromise quality; they’ll be just as delicious when you serve them! Enjoy hassle-free snacking during busy weeks!
Storage Tips for Healthy Homemade Butterfingers
Fridge: Store these bars in an airtight container in the refrigerator for up to 2 weeks, ensuring they remain fresh and delicious.
Freezer: For longer storage, freeze the Healthy Homemade Butterfingers in a single layer, then transfer to a freezer-safe container for up to 3 months.
Reheating: When ready to enjoy, simply thaw in the fridge overnight or at room temperature for about 30 minutes before serving to restore their delightful texture.
Separation: If stacking in a container, place parchment paper between layers to prevent sticking and preserve the chocolate coating.
Healthy Homemade Butterfingers Variations
Customize your Healthy Homemade Butterfingers to fit your cravings and dietary needs—let’s make these treats uniquely yours!
-
Nut-Free: Swap organic peanut butter for sunflower seed butter to create a delicious nut-free version everyone can enjoy.
-
Dairy-Free Delight: Instead of organic dark chocolate, use dairy-free chocolate chips for a fully dairy-free treat that still satisfies your sweet tooth.
-
Sugar-Free: Steer clear of sweeteners altogether by using mashed ripe bananas instead of a liquid sweetener for a naturally sweetened bar.
-
Flavor Boost: Add a teaspoon of vanilla extract to the mixture for an extra layer of flavor that perfectly complements the chocolate coating.
-
Crunchy Topping: Before the chocolate sets, sprinkle crushed nuts or seeds on top for a delightful crunch and additional texture, making every bite interesting.
-
Spicy Kick: If you’re feeling adventurous, sprinkle a pinch of cayenne pepper into the chocolate to add a twist of heat that makes these Butterfingers truly unforgettable.
-
Coconut Lover’s Twist: Incorporate shredded coconut into the peanut butter mixture before pressing it into the dish, creating a tropical vibe in your bars.
Explore this recipe’s potential and feel free to pair it with a glass of almond milk or enjoy it as a post-workout snack. Each variation invites you to create something special that tastes divine while meeting your dietary preferences!
Expert Tips for Healthy Homemade Butterfingers
• Mix Thoroughly: Ensure your peanut butter is well-mixed before adding to the other ingredients. This prevents clumping and ensures a smooth texture in the bars.
• Chill Time is Key: Don’t skip the refrigeration time! Allowing the mixture to firm up helps maintain the shape of the bars when you cut and coat them.
• Chocolate Cooling: Let the melted chocolate cool slightly before dipping. This prevents the bars from becoming too soft and maintains their structure.
• Sharp Tools: Use a sharp knife or pizza cutter for clean cuts when shaping the bars. Dull tools can squish and ruin the neat edges of your Healthy Homemade Butterfingers.
• Experiment with Sweetness: Adjust the amount of liquid sweetener based on your taste preferences. Always remember to keep it refined-sugar-free for guiltless indulgence!
Healthy Homemade Butterfingers Recipe FAQs
What kind of peanut butter should I use for the bars?
Absolutely! Opt for organic peanut butter without added sugar or oils. This choice ensures that your Healthy Homemade Butterfingers maintain a pure, wholesome flavor without any unnecessary additives. Look for natural varieties that have a creamy consistency.
How should I store these Healthy Homemade Butterfingers?
For optimal freshness, store the bars in an airtight container in the refrigerator for up to 2 weeks. For longer storage, you can freeze them. Arrange the bars in a single layer, then transfer to a freezer-safe container with parchment paper between layers to prevent sticking. They will keep well for up to 3 months!
Can I freeze Healthy Homemade Butterfingers?
Yes! To freeze, make sure the bars are cooled and set completely. Place them in a single layer on a baking sheet and freeze until firm. Then, transfer them to an airtight container or freezer-safe bag, separating layers with parchment paper to avoid sticking. When you’re ready to enjoy, thaw them in the fridge overnight or let them sit at room temperature for about 30 minutes.
I’m allergic to nuts. What can I use instead of peanut butter?
No worries at all! You can try using sunflower seed butter as a nut-free alternative. It has a similar creamy texture and works well in this Healthy Homemade Butterfingers recipe. Just ensure that your crispy rice cereal is also nut-free to keep the treat safe for you.
What should I do if my mixture feels too dry?
If you find that your mixture is a bit dry or crumbly, don’t hesitate to add a splash more of your organic liquid sweetener, or a touch of coconut oil to help bind everything together. Mix thoroughly; the texture should be sticky but not overly wet, so your bars hold together well when shaped!
Healthy Homemade Butterfingers: Guilt-Free Indulgence You’ll Love
Ingredients
Equipment
Method
- In a large mixing bowl, combine 1 cup of organic peanut butter, ½ cup of coconut flour, 2 cups of crispy rice cereal, and ½ cup of organic liquid sweetener. Mix well until sticky and thoroughly combined.
- Line an 8x8-inch baking dish with parchment paper. Transfer the mixture into the dish, pressing it down firmly to create an even layer. Refrigerate for about 30 minutes.
- Set up a double boiler and melt 1 cup of organic dark chocolate chips, stirring until smooth. Let cool slightly.
- Once set, remove the mixture from the refrigerator and cut into bars. Dip each bar into the melted chocolate and place them on a parchment-lined tray.
- Return the coated bars to the refrigerator for about 20-30 minutes until the chocolate hardens.
Leave a Reply