
As I rummaged through my pantry, seeking a wholesome snack to quell an afternoon craving, an idea sparked. What if I could whip up my own 3-Ingredient Homemade Strawberry Fruit Roll-Ups? With just strawberries, honey, and a dash of lemon juice, I could create a guilt-free treat, free from preservatives and added sugars. These delightful roll-ups not only satisfy that sweet tooth but are also an effortless way to add a touch of homemade magic to your snack routine. Best of all, they require no fancy equipment—just blend, pour, and let your oven do the work. Curious about how to make these chewy, vibrant snacks that everyone will love? Let’s dig into this deliciously simple recipe!
Why Make Strawberry Fruit Roll-Ups?
Guilt-free snacking: These homemade roll-ups are the perfect solution for those who want a tasty treat without the added sugars and preservatives found in store-bought versions.
Three simple ingredients: With just strawberries, honey, and lemon juice, you can whip these up in no time. No fancy equipment required!
Endless variation: Feel free to experiment with different fruits or add spices for a unique twist. Your creative options are limitless!
Kid-approved: These colorful snacks are a hit with both kids and adults, making them a great addition to lunchboxes or road trips.
Healthy indulgence: Packed with natural fruit goodness, you can enjoy these snacks without the guilt. Make them part of your healthy eating routine!
Try making these tasty treats and elevate your snacking game – because who says healthy can’t be delicious? If you’re looking for even more snacks, check out our easy homemade granola bars.
Strawberry Fruit Roll-Ups Ingredients
• Ready to create these delightful treats with just a few essentials?
For the Fruit Mixture
- Strawberries – The star of the show, providing sweet, natural flavor; feel free to swap with mango or mixed berries!
- Honey – Acts as a gentle sweetener to enhance the berry flavor; maple syrup works beautifully for a vegan alternative.
- Lemon Juice – Brightens up the mixture and helps keep that refreshing color, but lime juice can step in as a great substitute.
Step‑by‑Step Instructions for Strawberry Fruit Roll-Ups
Step 1: Preheat Your Oven
Begin by preheating your oven to its lowest temperature, ideally between 140 to 170 degrees F. This gentle heat is crucial for dehydrating the fruit evenly without cooking it. While your oven heats up, take a moment to prepare your baking area and ensure you have all the necessary ingredients at hand.
Step 2: Prepare the Baking Sheet
Line a sheet pan with parchment paper, ensuring the paper covers the entire surface. This step is vital to prevent the fruit mixture from sticking to the pan once it’s dehydrated. Using parchment paper also makes cleanup a breeze, so don’t skip this easy yet essential task before moving on to the next step.
Step 3: Blend the Fruit Mixture
In a food processor or blender, combine your thawed strawberries, honey, and lemon juice. Blend the mixture on high until it reaches a smooth, pourable consistency. This process should take about 1-2 minutes. You want the strawberries to be fully liquefied to create a homogeneous base for your Strawberry Fruit Roll-Ups, so check for any chunky bits before proceeding.
Step 4: Pour and Spread
Carefully pour the smooth strawberry mixture onto the lined sheet pan. Use a spatula to spread it evenly to about ⅛ to ¼ inch thick. This consistency is crucial for achieving the perfect chewy texture. As you spread, ensure the mixture is evenly distributed, which helps it dry uniformly in the oven.
Step 5: Dehydrate in the Oven
Place the prepared pan in your preheated oven and let it dehydrate for approximately 4 to 6 hours. Keep an eye on the fruit leather as it dries, checking for visual cues; the center should no longer be tacky to the touch when it’s ready. You might want to rotate the pan halfway through to promote even drying.
Step 6: Cool the Fruit Roll-Ups
Once the fruit leather has reached the desired consistency, carefully remove the pan from the oven. Allow the Strawberry Fruit Roll-Ups to cool completely on the counter. This cooling period is essential to ensure they set properly and can be handled without tearing.
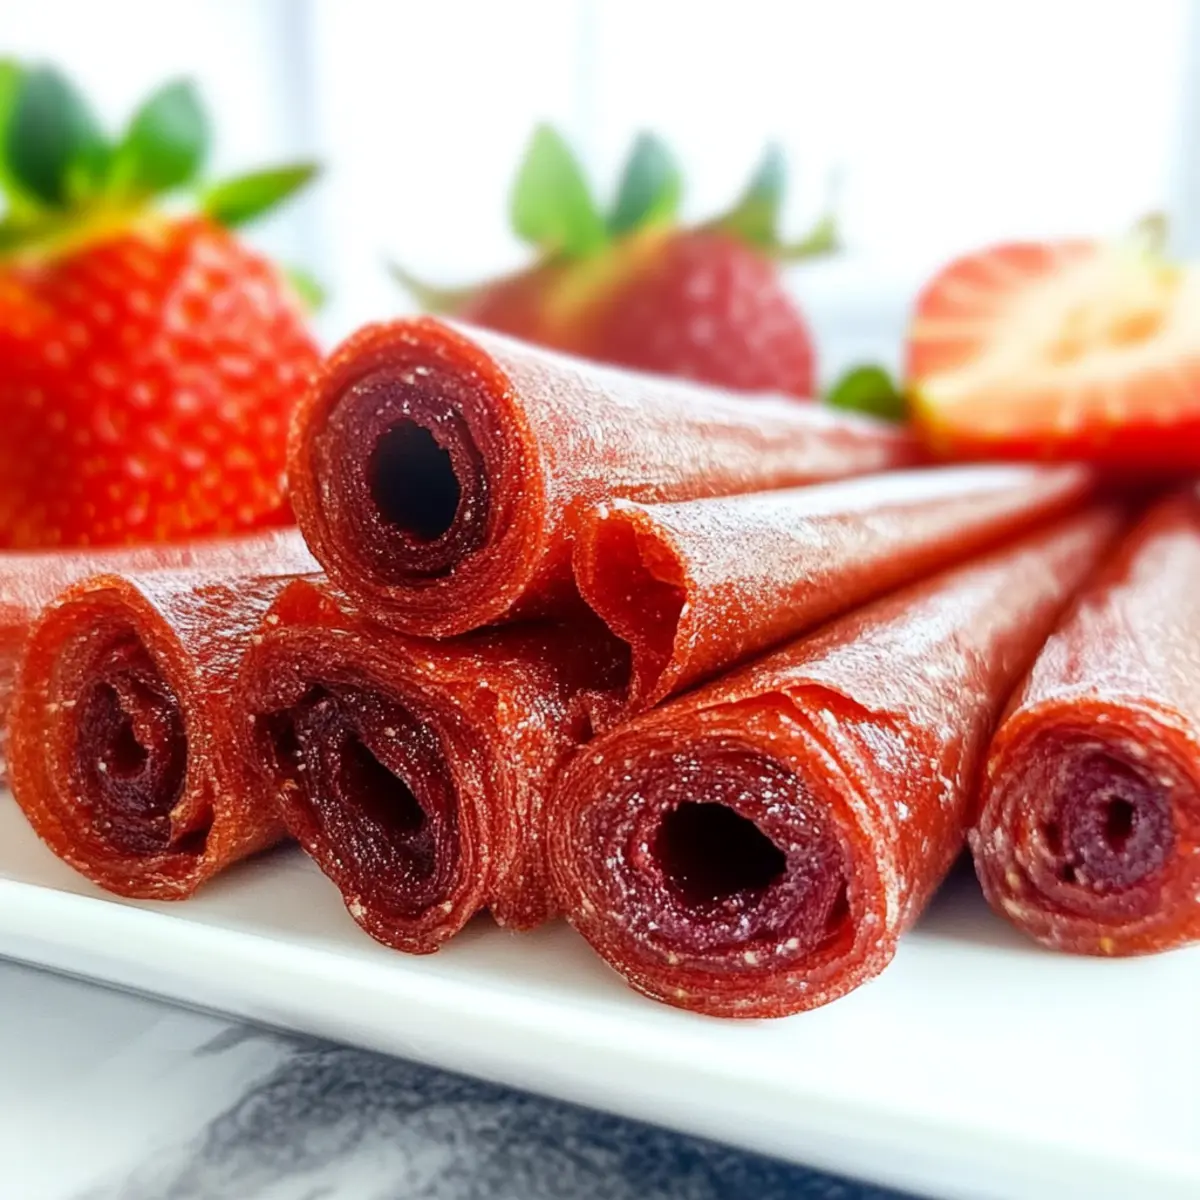
Step 7: Cut into Strips
After the roll-ups have cooled, use kitchen scissors or a sharp knife to cut them into 1-inch wide strips. Feel free to trim the edges if necessary to create uniform shapes. These delightful fruit strips are what will become your chewy snacks, full of flavor and bite.
Step 8: Store and Enjoy
Store your homemade Strawberry Fruit Roll-Ups in an airtight container, perhaps adding a paper towel to absorb any excess moisture. This will help maintain their freshness. These roll-ups make for a fantastic healthy snack alternative, perfect for lunchboxes or after-school treats, so get ready to savor the results of your kitchen efforts!

What to Serve with 3-Ingredient Homemade Strawberry Fruit Roll-Ups
These delightful roll-ups are the perfect touch to elevate your snacking experience, whether you’re packing a lunch or enjoying a family afternoon treat.
- Greek Yogurt: This creamy companion adds richness and pairs beautifully with the fruity sweetness, enhancing your healthy snack moment.
- Fresh Fruit Salad: Bursting with vitamins and flavors, a colorful mix of seasonal fruits complements the chewy roll-ups with a refreshing crunch.
- Nut Butter Dip: A spread of almond or peanut butter provides a protein-packed contrast that rounds out your snack and keeps you satisfied longer.
- Homemade Granola: The crunchy textures of granola match perfectly with the chewy roll-ups, creating a delightful medley for your taste buds.
- Cheese Platter: A mix of mild cheese balances the sweet flavors, providing an indulgent twist to your snacking routine that’s sure to please everyone.
- Herbal Iced Tea: Refreshing and light, this herbal tea offers a fragrant sip that enhances the natural sweetness of the fruit roll-ups without overwhelming them.
- Chocolate-Covered Almonds: For a touch of indulgence, these crunchy treats provide a delightful sweetness that harmonizes beautifully with the fruity roll-ups.
- Coconut Chips: Light and crisp, coconut flakes add tropical flair while complementing the berry flavors for a scrumptious anytime snack.
- Trail Mix: Combine nuts, seeds, and dried fruit with your strawberry roll-ups for a wholesome, energizing bite perfect for on-the-go munching!
Expert Tips for Strawberry Fruit Roll-Ups
-
Avoid Over-Drying: Check your roll-ups every hour after 4 hours to prevent them from becoming too crispy. The ideal texture is chewy, not brittle!
-
Rehydrate Edges: If you notice any crispy edges, gently dab them with a wet paper towel before storing; this helps bring back moisture.
-
Storage Secrets: For freshness, keep your Strawberry Fruit Roll-Ups in an airtight container with a paper towel. This absorbs excess moisture and keeps them chewy.
-
Consistent Thickness: Spread the fruit mixture evenly to ensure uniform drying. A thickness of ⅛ to ¼ inch works best for that optimal chewy consistency.
-
Creative Combinations: Don’t hesitate to mix fruits! Blend strawberries with blueberries or peaches for a burst of flavor in your Strawberry Fruit Roll-Ups.
Strawberry Fruit Roll-Ups Variations
Don’t hesitate to make these Strawberry Fruit Roll-Ups uniquely yours; adding your spin can elevate their delightful flavor!
-
Mixed Berry Magic: Blend strawberries with blueberries or raspberries for a vibrant flavor explosion. The tartness of the berries adds a whole new dimension to your roll-ups!
-
Tropical Twist: Swap strawberries for mango or pineapple for a refreshing, tropical flavor. These fruity variations will whisk you away to a sunny beach vibe.
-
Zesty Lime: Substitute lemon juice with lime juice for a tangy punch. The lime’s brightness perfectly complements the sweetness and can bring a refreshing zestiness to your snack.
-
Spiced Up: Add a dash of cinnamon or a sprinkle of nutmeg to the fruit mixture. This not only enhances the flavor but can give your roll-ups a warm, cozy undertone.
-
Sweetener Switch: If you’re looking for a different sweet taste, try agave nectar or date syrup instead of honey. This simple swap is perfect if you’re aiming for lower glycemic options.
-
Protein Boost: Mix in some powdered peanut butter or almond flour to your fruit mixture for extra protein. This twist transforms your roll-ups into an even more satisfying snack that’s perfect for those energy dips!
-
Chocolate Drizzle: After cutting your roll-ups, melt some dark chocolate and drizzle it on top. This decadent addition turns a simple snack into an irresistible treat that’s perfect for chocolate lovers.
-
Heat It Up: Mix in a pinch of cayenne or chili powder for a surprising kick. The subtle heat paired with the sweetness creates a dynamic flavor balance that’s sure to tantalize your taste buds.
By exploring these variations, you can keep your snacking exciting and tailored to your preferences! If you ever want to explore more exciting recipes, our easy homemade granola bars are a fantastic complement to these fruity snacks!
How to Store and Freeze Strawberry Fruit Roll-Ups
Fridge: Store your Strawberry Fruit Roll-Ups in an airtight container in the refrigerator for up to 2 weeks. This keeps them fresh and chewy!
Freezer: For longer storage, freeze the roll-ups by wrapping them tightly in plastic wrap and placing them in a freezer-safe bag. They can last for up to 6 months.
Defrosting: When ready to enjoy, simply remove them from the freezer and let them thaw at room temperature for about 10-15 minutes.
Reheating: If you prefer them a bit softer, you can lightly warm them in the oven at the lowest setting for a few minutes after defrosting.
Make Ahead Options
These 3-Ingredient Homemade Strawberry Fruit Roll-Ups are perfect for meal prep, allowing you to enjoy guilt-free snacking with ease! You can prepare the fruit mixture (strawberries, honey, and lemon juice) up to 24 hours in advance; just blend and store it in an airtight container in the refrigerator to maintain freshness. If you’d like, you can also spread the fruit mixture onto the parchment-lined sheet pan and refrigerate it overnight before baking. When ready to serve, simply pop the pan in a preheated oven and dehydrate as directed. The roll-ups will be just as delicious, saving you time during busy weeknights!

Strawberry Fruit Roll-Ups Recipe FAQs
How do I choose ripe strawberries for the best flavor?
Absolutely! When selecting strawberries, look for bright red berries with a natural shine. They should be firm to the touch and free from dark spots or mushy areas. Sweetness also peaks when strawberries are fully ripe, so aim for ones that are fragrant and have green caps that are fresh-looking.
How should I store my homemade Strawberry Fruit Roll-Ups?
Very! Keep your Strawberry Fruit Roll-Ups in an airtight container at room temperature for 1-2 days. If you want them to last longer, I recommend refrigerating them in the container for up to 2 weeks. Adding a paper towel inside helps avoid excess moisture, which keeps them chewy!
Can I freeze my Strawberry Fruit Roll-Ups?
Of course! For longer shelf life, wrap your roll-ups tightly in plastic wrap and store them in a freezer-safe zip-top bag. They will stay delicious for up to 3 months. When you’re ready to enjoy them, simply let them thaw at room temperature for about 10-15 minutes.
What if my roll-ups are too sticky after baking?
Don’t worry! If you find that your Strawberry Fruit Roll-Ups are too sticky, they might need a bit more drying time. Continue to bake them for another hour while checking every 20 minutes until they’re no longer tacky. Adjusting the thickness to about ⅛ inch can also help with this.
Are these roll-ups suitable for kids with allergies?
Very much! This recipe is naturally free from gluten and dairy. However, if your child has allergies, make sure to double-check the honey and any substitutes for potential allergens. For vegan options, simply replace honey with maple syrup or agave nectar.
How can I enhance the flavor of my Strawberry Fruit Roll-Ups?
Great question! To add a twist, consider mixing in a pinch of cinnamon or vanilla extract for extra warmth in flavor. You can also blend in complementary fruits like bananas or blueberries for a fun taste experience—your creativity is your only limit!

Homemade Strawberry Fruit Roll-Ups: Healthy & Easy Snacks
Ingredients
Equipment
Method
- Preheat your oven to its lowest temperature, ideally between 140 to 170 degrees F.
- Line a sheet pan with parchment paper, covering the entire surface.
- In a food processor or blender, combine thawed strawberries, honey, and lemon juice. Blend until smooth.
- Pour the strawberry mixture onto the lined sheet pan and spread it evenly to about ⅛ to ¼ inch thick.
- Place the pan in the preheated oven and dehydrate for approximately 4 to 6 hours.
- Remove the pan from the oven and allow the roll-ups to cool completely on the counter.
- Once cooled, cut into 1-inch wide strips.
- Store in an airtight container with a paper towel to absorb moisture.
Leave a Reply