
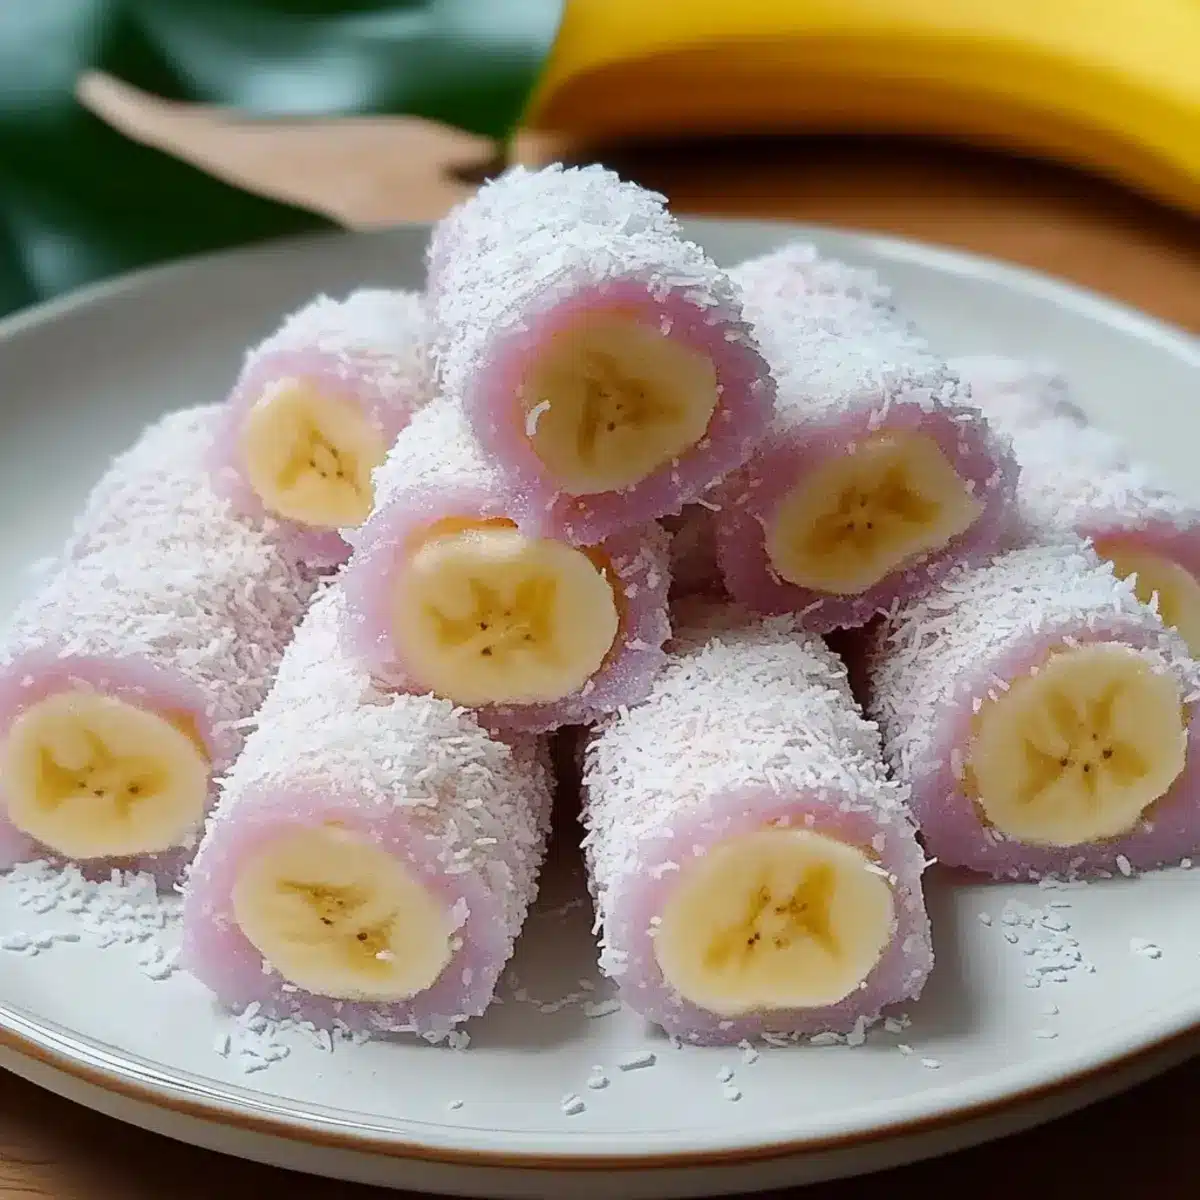
You won’t believe how much joy a little ball of Banana Mochi can bring! Imagine soft, chewy mochi hugging a perfectly ripe banana and then rolled in crunchy coconut flakes—it’s the ultimate treat for your taste buds and a delightful way to impress family and friends. This easy-to-make gluten-free, vegetarian dessert is not only a fun addition to any gathering, but it also comes together quickly, making it the ideal solution for those moments when you crave something sweet but homemade. With variations like mango or Nutella, you can keep the magic alive with each batch. Are you ready to dive into this tropical adventure that’s sure to brighten your day?
Why is Banana Mochi a must-try?
Joyful Experience: Each bite offers a wonderful combination of chewy mochi and sweet banana, resulting in a treat that is both satisfying and delicious.
Quick to Prepare: Made with simple ingredients, this recipe comes together in no time, making it perfect for last-minute gatherings or afternoon cravings.
Gluten-Free & Vegetarian: Satisfy dietary needs without sacrificing flavor, as this dessert is both gluten-free and a hit with vegetarians!
Versatile Filling Options: Get creative by exploring variations, whether it’s traditional banana, luscious mango, or decadent Nutella. Each option adds a unique twist to the classic mochi.
Crowd-Pleasing Delight: Perfect for parties or snacking, this tropical treat is sure to impress your guests and bring a smile to anyone who tries it!
-
Ingredients
• • ## Banana Mochi Ingredients -
For the Mochi Dough
- Glutinous Rice Flour – Essential for the signature stretchy, chewy texture that defines Banana Mochi; avoid regular rice flour.
- Cornstarch – Aids in achieving a softer texture for the mochi, making it delightful to bite into.
- Granulated Sugar – Adds just the right amount of sweetness to complement the bananas perfectly.
- Milk – Hydrates the dry ingredients and helps create a tender dough; feel free to use dairy or plant-based milk.
- Oil (or Melted Butter) – Introduces richness to the mochi; either can be used, but be aware it slightly alters the flavor.
- Dragon Fruit Juice (optional) – Adds a splash of color and a hint of tropical flavor; can be substituted with natural food coloring.
- For the Filling
- Bananas – The star of the show! Choose ripe bananas to ensure maximum sweetness and flavor in every bite.
- For the Coating
- Coconut Flakes – Offers a crunchy and flavorful exterior while preventing the mochi from sticking; a must for that tropical vibe.
- Optional Additions
- Powdered Sugar – A light dusting adds a touch of sweetness if desired.
- Chocolate Drizzle – Melting chocolate over the mochi creates a luxurious finish and additional flavor depth.
Feel free to adapt these components as you like—the core essence of this Banana Mochi lies in its fun, chewy texture, and sweet flavor!
Step‑by‑Step Instructions for Banana Mochi
Step 1: Prepare the Batter
In a mixing bowl, combine 1 cup of glutinous rice flour, ¼ cup of cornstarch, and ¼ cup of granulated sugar. Gradually add 1 cup of milk while stirring until the mixture is smooth and without lumps. This will create your banana mochi’s batter, which should have a silky texture.
Step 2: Steam the Mixture
Pour the batter into a shallow, heatproof dish that fits your steamer. Cover it tightly with a lid or plastic wrap, ensuring to create holes for steam to escape. Steam the batter over boiling water for about 20 minutes, or until it turns translucent and firm when touched.
Step 3: Cool and Knead the Dough
Once steamed, remove the dish from the steamer and allow the dough to cool for about 10 minutes. After it has cooled slightly, sprinkle your hands with cornstarch to avoid sticking, then knead in 1 tablespoon of oil (or melted butter). Optionally, add a splash of dragon fruit juice for touch of color and flavor.
Step 4: Shape the Dough
Pinch off small pieces of the mochi dough, about the size of a golf ball. Roll each piece into a ball, then flatten it into a thin circle using your fingers or a rolling pin, creating a canvas for the banana filling. Keep the dough lightly dusted with cornstarch to prevent sticking.
Step 5: Add the Filling
Prepare your ripe bananas by peeling them and cutting them into bite-sized pieces. Place a piece of banana at the center of each flattened dough circle. Carefully gather the edges of the dough over the banana and pinch to seal, forming a delightful ball. Ensure that the banana is completely enclosed in the mochi.
Step 6: Coat the Mochi
Once your banana mochi are shaped, roll each ball in a plate filled with coconut flakes, ensuring they are well-covered for added texture and flavor. This step not only enhances the taste but also prevents the mochi from sticking to each other as they cool.
Step 7: Optional Finishing Touches
If desired, lightly dust your banana mochi with powdered sugar for extra sweetness or drizzle with melted chocolate for a deliciously indulgent touch. These finishing touches elevate your banana mochi into a fabulous treat that looks as good as it tastes!
What to Serve with Banana Mochi
Indulge in the world of delightful pairings that elevate your Banana Mochi experience to a feast of flavors.
-
Fresh Fruits: Juicy slices of mango or berries add a refreshing contrast to the chewy mochi, enhancing the tropical vibe. They are also full of vibrant colors, making your dessert table more inviting.
-
Green Tea: A warm cup of green tea provides a soothing balance to the sweetness of the mochi, while introducing a depth of flavor that complements the rich coconut flakes.
-
Coconut Sorbet: This icy treat mirrors the coconut coating of the mochi but adds a creamy undertone that is simply irresistible. It’s a refreshing and cooling companion for your tropical treat.
-
Chocolate Drizzle: Elevate your Banana Mochi by drizzling melted chocolate over it. This adds a rich flavor that pairs beautifully with the sweetness of the banana, creating a truly indulgent experience.
-
Nutty Trail Mix: A handful of nutty trail mix adds crunch and saltiness to balance the sweetness of the mochi. It’s a delightful contrast that keeps each bite exciting.
-
Honey Yogurt Dip: Creamy yogurt mixed with honey creates a delightful dip that you can use to enhance each mochi. The slight tanginess of the yogurt pairs wonderfully with the sweet banana filling.
Each of these pairings brings a new texture or flavor, making your Banana Mochi experience even more delightful!
Expert Tips for Making Banana Mochi
-
Use Glutinous Rice Flour: Ensure you use glutinous rice flour instead of regular rice flour to achieve the signature stretchy, chewy texture.
-
Prevent Sticking: Dust your hands with cornstarch while handling the mochi dough to prevent it from sticking to your fingers during shaping.
-
Let it Cool: After steaming, allow the mochi dough to cool slightly before kneading in oil or butter. This makes it easier to work with and enhances that soft texture in your Banana Mochi.
-
Seal Carefully: When wrapping the banana filling, make sure to completely seal the dough around the banana to avoid any leaks during cooking or while eating.
-
Serve Fresh: For the best experience, consume your banana mochi within 24 hours. Refrigeration may alter the texture, so let them come to room temperature before serving.
How to Store and Freeze Banana Mochi
Airtight Container: Store leftover Banana Mochi in an airtight container to retain its soft texture. Ideally, enjoy them within 24 hours for the best taste.
Refrigeration: You can keep Banana Mochi in the fridge for up to 3 days; however, remember that chilling can change the texture, making it chewier.
Freezing: For longer storage, freeze the mochi for up to 1 month. Place them in a single layer on a baking sheet before transferring them to a freezer bag to prevent sticking.
Thawing: When ready to enjoy, thaw the mochi in the fridge overnight. Allow them to warm up to room temperature for the best flavor and texture before serving.
Banana Mochi Variations & Substitutions
Get ready to transform your homemade Banana Mochi into delightful new creations! The magic lies in the ability to play with flavors and textures.
-
Fruity Fillings: Use ripe mango or juicy strawberries instead of banana for a burst of freshness. Each fruity filling adds its own vibrant charm.
-
Decadent Nutella: Replace the banana with a spoonful of Nutella for a rich, chocolatey surprise inside. This twist is perfect for chocolate lovers!
-
Matcha Touch: Incorporate matcha powder into the mochi dough for a beautiful green hue and earthy flavor that complements the sweetness of the filling.
-
Coconut Milk: Swap out regular milk for coconut milk to enhance the coconut flavor and create an even creamier texture in your dough.
-
Nut Coating: Instead of coconut flakes, try crushed almonds or pistachios for a crunchy outer layer. This adds a delightful nuttiness to each bite!
-
Spicy Surprise: Add a pinch of cayenne pepper or ginger powder to the mochi dough for a subtle kick that will elevate your dessert with a unique blend of heat and sweetness.
-
Fruit Puree Drizzle: Top your mochi with a drizzle of mango or berry puree for a sweet sauce that not only looks stunning but adds an aromatic flavor boost.
-
Chocolate Infusion: Mix in some cocoa powder into your dough for a chocolatey base that pairs beautifully with any filling. Chocolate never hurts, right?
Feel free to explore these enticing variations and discover your favorite combination, or check out other delicious treats like Cherry Mochi or Chocolate Truffles for even more inspiration!
Make Ahead Options
These Banana Mochi are perfect for busy home cooks looking to save time while still impressing family and friends! You can prepare the mochi dough up to 24 hours in advance; simply follow the initial instructions, steam, and cool the dough before storing it in an airtight container in the refrigerator. The bananas, however, are best added fresh before serving. If you do want to prepare the complete mochi, roll them in coconut flakes and refrigerate for up to 3 days—just remember to let them sit at room temperature for about 15 minutes before serving to regain their delightful chewiness. This way, you can enjoy the tropical joy of Banana Mochi with minimal effort!
Banana Mochi Recipe FAQs
What type of bananas should I use for the filling?
Absolutely! For the best results, choose ripe bananas that are slightly speckled. Ripe bananas are sweeter and more flavorful, ensuring your Banana Mochi has a delightful taste. Avoid overly mushy bananas, as they can make the filling too sticky.
How should I store leftover Banana Mochi?
Very simply! Store any leftover Banana Mochi in an airtight container at room temperature for best texture; ideally, consume them within 24 hours. If you want to keep them longer, you can refrigerate them for up to 3 days, but keep in mind that refrigeration may make them chewier.
Can I freeze Banana Mochi? How do I do it?
Of course! To freeze your Banana Mochi, first, lay them out in a single layer on a baking sheet and freeze for about 1-2 hours until solid. This prevents them from sticking together. Then, transfer the mochi into a freezer bag or airtight container. They can be frozen for up to 1 month. Thaw overnight in the fridge when ready to enjoy!
What can I do if the mochi dough is too sticky?
If your dough becomes sticky, don’t worry! Simply dust your hands and the work surface with more cornstarch while shaping. This will help manage the stickiness. If the dough seems overly sticky after steaming, let it cool down a bit before kneading in additional cornstarch.
Are there any dietary considerations I should keep in mind?
Absolutely! This Banana Mochi recipe is gluten-free and vegetarian, making it suitable for many dietary needs. However, if you’re preparing this treat for guests, be mindful of any potential banana allergies. Additionally, if you use alternative fillings like Nutella or other fruits, check for any allergies related to those ingredients as well.
Banana Mochi: Chewy Joy with a Tropical Twist
Ingredients
Equipment
Method
- Combine glutinous rice flour, cornstarch, and granulated sugar in a mixing bowl. Gradually add milk until smooth.
- Pour batter into a heatproof dish, cover, and steam over boiling water for about 20 minutes until translucent.
- Allow dough to cool for 10 minutes, then knead in oil (or butter) and optional dragon fruit juice.
- Pinch off small pieces of dough, flatten into circles, and add banana pieces in the center.
- Gather edges of dough around banana, pinch to seal, and form a ball.
- Roll each ball in coconut flakes until well coated.
- Optionally dust with powdered sugar or drizzle with melted chocolate before serving.
Leave a Reply