
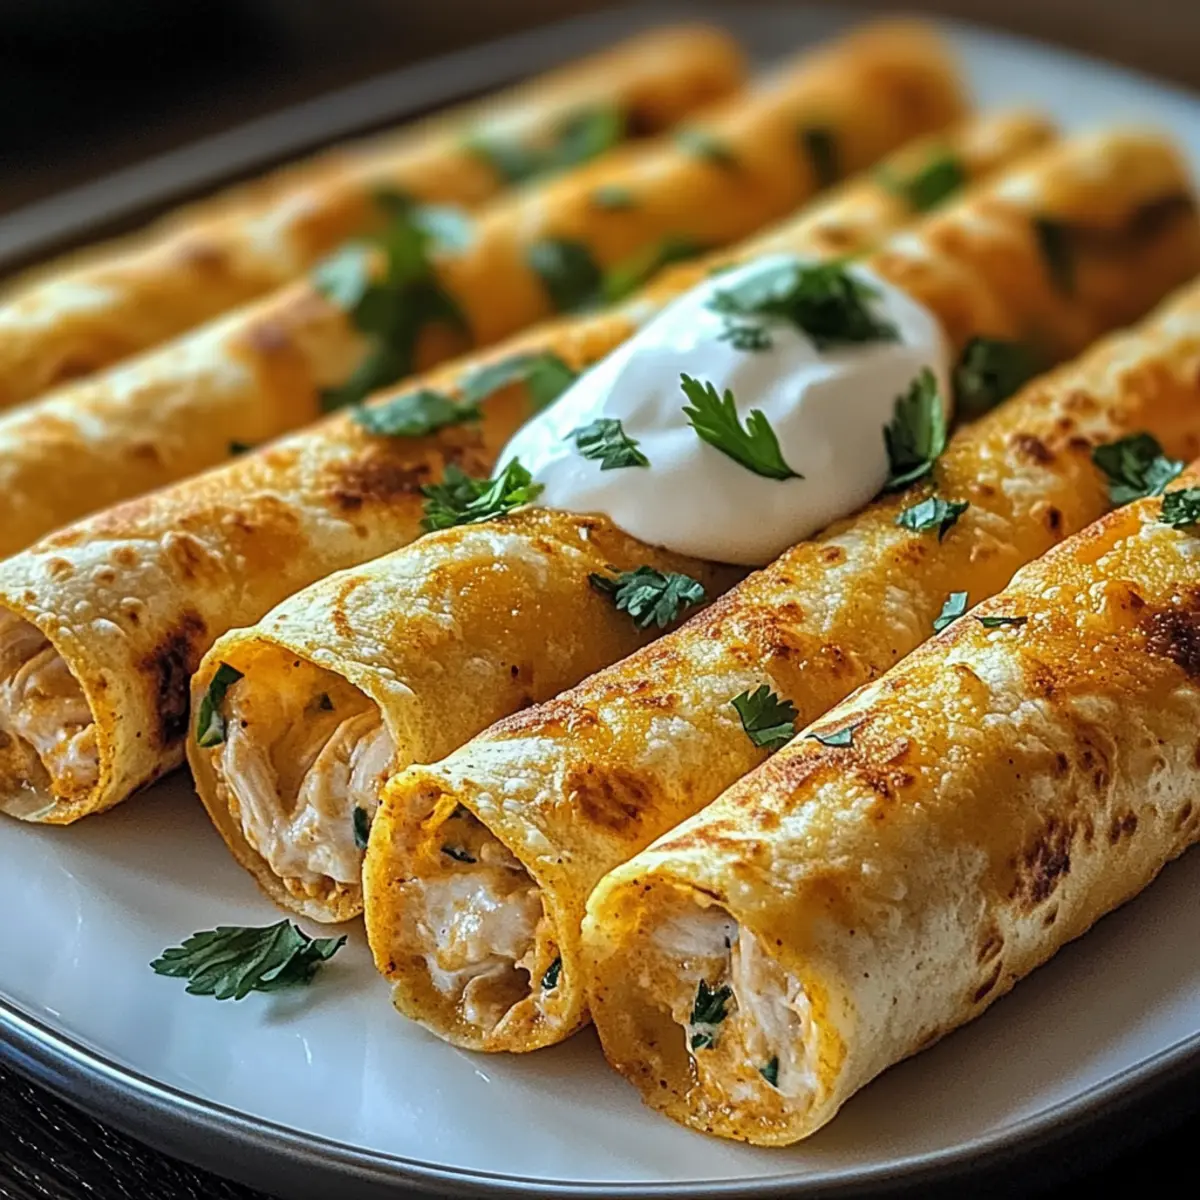
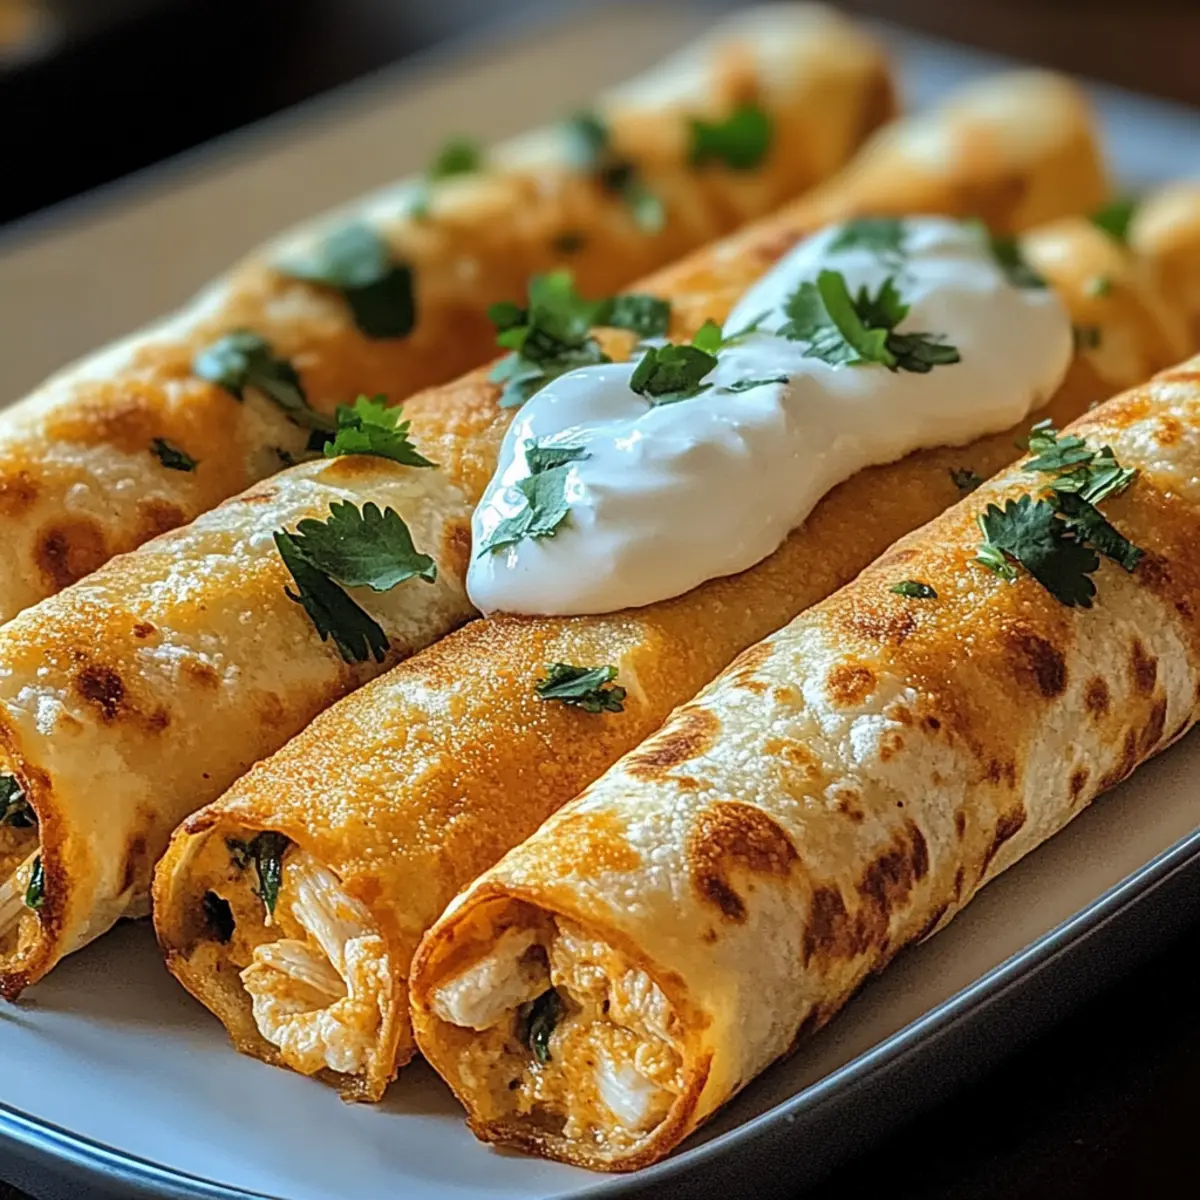
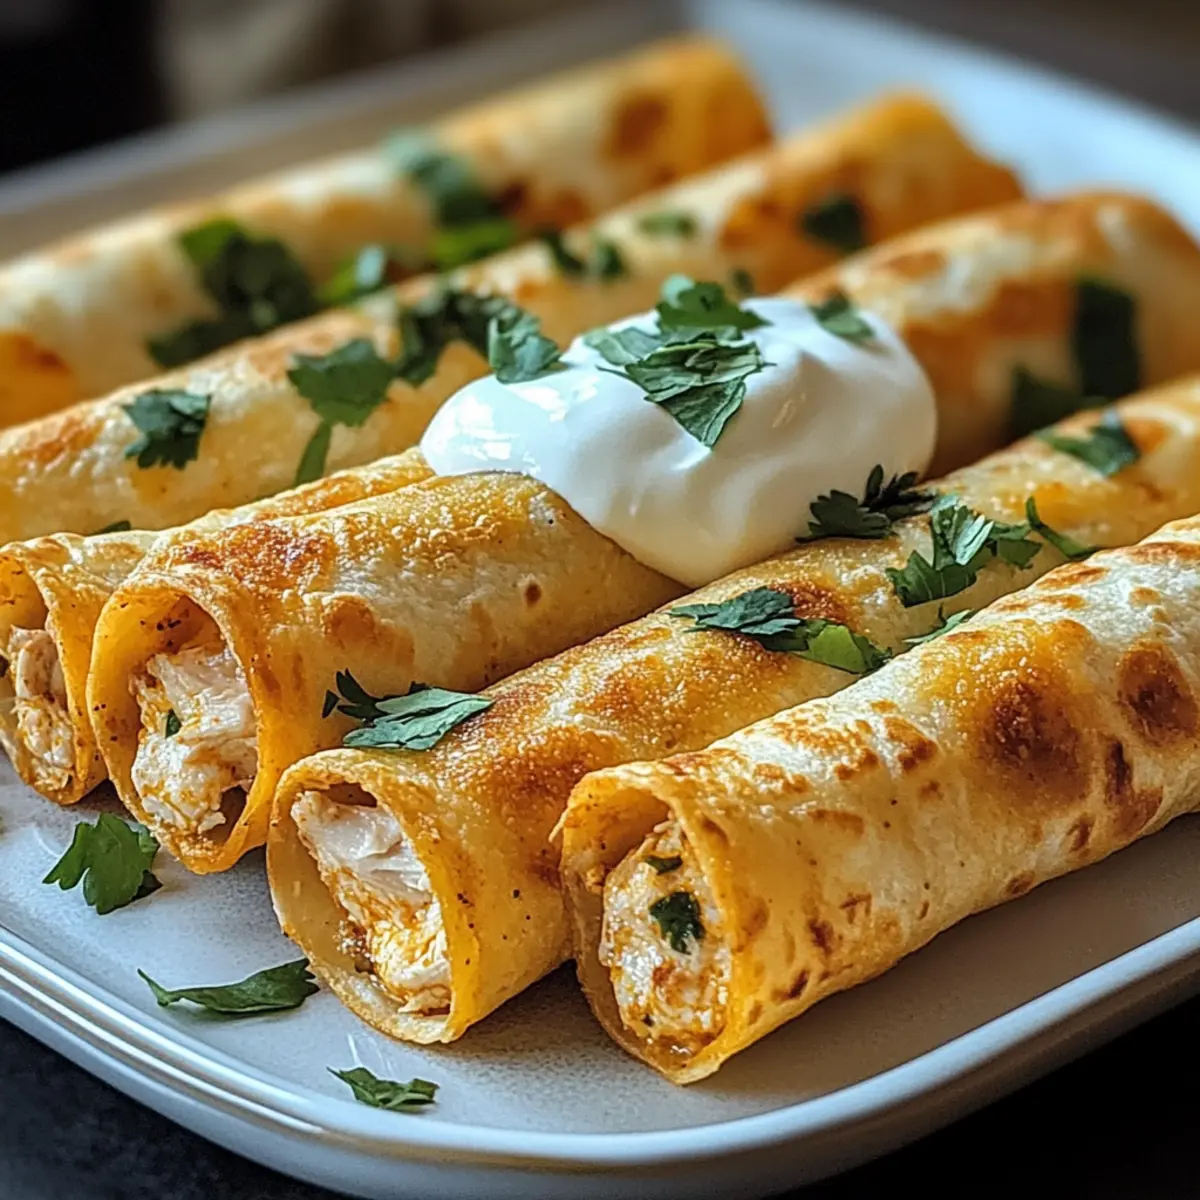
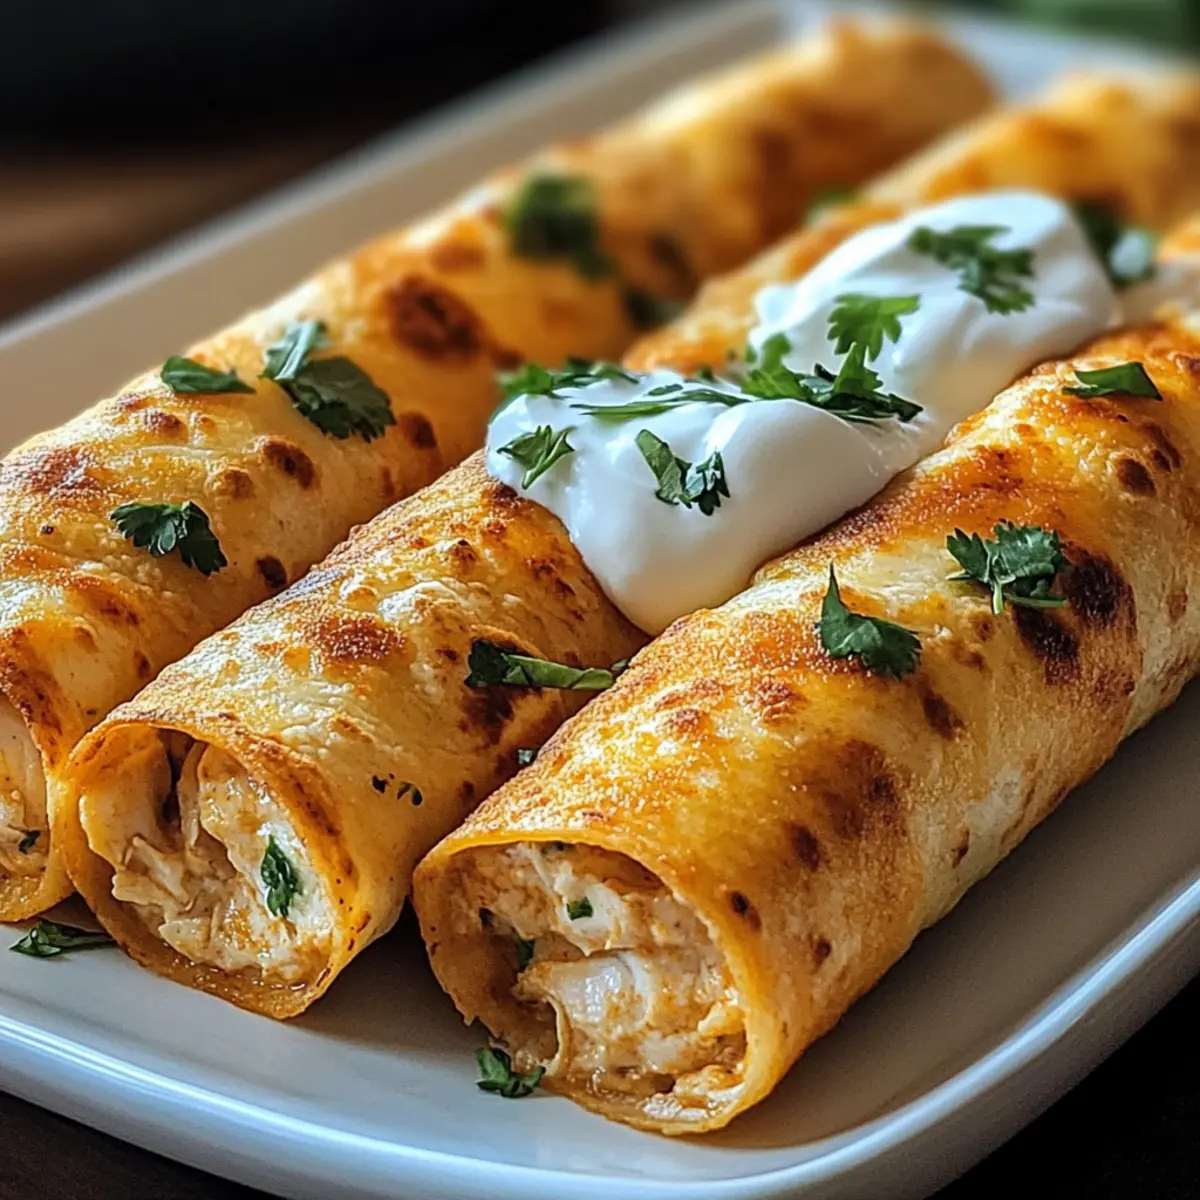
As the golden rays of sunset flood my kitchen, the irresistible aroma of Crispy Chicken Taquitos fills the air, instantly transporting me to a bustling street market in Mexico. These delightful bites are more than just snacks; they’re a labor of love that blends convenience and comfort into every crunch. Easy to prepare and unbelievably satisfying, they offer a tasty twist on your typical weeknight meal or game day treat, making them the perfect alternative to takeout. Picture crispy tortillas enveloping a creamy, spiced chicken filling, ready to be dipped in your favorite salsa or guacamole. The best part? You can customize them to your taste with gluten-free options and a variety of flavors! Are you ready to bring a little fiesta to your table?
Why Are Crispy Chicken Taquitos a Must-Try?
Quick and Easy: Crafting these taquitos requires just a few steps, making it perfect for busy weeknights or spontaneous gatherings.
Crowd Favorite: Their delightful crunch and savory filling make them a guaranteed hit at any party or family dinner.
Flavor Packed: The combination of spices, creaminess from the cheese, and zesty salsa creates an explosion of taste in every bite.
Versatile: Customize the filling with your favorite ingredients, whether it’s adding veggies for a healthier twist or adjusting spice levels to suit your crowd.
Gluten-Free Friendly: With the option of corn tortillas, everyone can enjoy these delightful bites without worry.
Channeling the spirit of tradition with a contemporary twist, Crispy Chicken Taquitos truly bring joy to your table! For more delectable ideas, explore our easy recipes curated to elevate your home cooking experience.
Crispy Chicken Taquitos Ingredients
For the Filling
• Cooked Shredded Chicken – Adds protein and substance; using rotisserie chicken saves time.
• Cream Cheese (4 oz) – Provides creaminess and richness, perfect for a delicious filling.
• Shredded Cheese (½ cup) – Enhances flavor and texture; try a Mexican blend or cheddar for best results.
• Salsa (¼ cup) – Infuses moisture and flavor; choose mild for kids or spicy for a kick.
• Garlic Powder (½ tsp) – Adds depth of flavor; fresh garlic can be used for an extra punch.
• Chili Powder (½ tsp) – Offers a mild kick; adjust to taste if you prefer it spicier.
• Cumin (½ tsp) – Contributes warmth and complexity, creating a well-rounded taste.
• Salt and Black Pepper – Essential for enhancing overall flavor.
For the Taquitos
• Small Tortillas (8) – The base for the filling; use corn for gluten-free Crispy Chicken Taquitos.
• Cooking Spray or Oil – Helps achieve a crispy exterior during baking; olive oil is a flavorful choice.
Optional Toppings
• Chopped Cilantro – Adds a fresh burst of flavor; perfect for garnishing your taquitos.
• Sour Cream – Balances the spiciness and adds creaminess; a classic accompaniment.
• Guacamole – A flavorful dip that pairs beautifully with the crunchy taquitos.
• Extra Cheese – For those who just can’t get enough cheese on top!
With these ingredients in hand, you’re on your way to creating a fabulous dish that will bring a festive touch to your day! Enjoy the convenience and comfort of homemade Crispy Chicken Taquitos at your next gathering, and don’t forget to share your delicious creations!
Step‑by‑Step Instructions for Crispy Chicken Taquitos
Step 1: Preheat the Oven
Start by preheating your oven to 425°F (220°C) to ensure it reaches the perfect temperature for baking. Line a baking sheet with parchment paper for easy cleanup and to prevent your delicious Crispy Chicken Taquitos from sticking. This will be the base where your taquitos will achieve that golden, crunchy texture.
Step 2: Prepare the Filling
In a large mixing bowl, combine shredded chicken, cream cheese, shredded cheese, salsa, garlic powder, chili powder, cumin, salt, and pepper. Mix thoroughly until the ingredients are well incorporated, creating a creamy and flavorful filling that will enhance your crispy taquitos. Aim for a well-blended consistency that’s inviting and mouthwatering.
Step 3: Warm the Tortillas
To make your small tortillas more pliable and easier to roll, microwave them for about 20 seconds. Wrapping them in a damp paper towel during this process helps to keep them moist, preventing cracks. This step is crucial for achieving beautifully rolled Crispy Chicken Taquitos without any mishaps during assembly.
Step 4: Assemble the Taquitos
Spoon 2-3 tablespoons of the chicken mixture onto one side of each warm tortilla, ensuring you don’t overfill them. Roll the tortilla tightly around the filling, tucking in the edges as you go to create a secure pocket. This technique helps your taquitos maintain their shape during baking and guarantees each bite is packed with flavor.
Step 5: Place on the Baking Sheet
Position the rolled taquitos seam-side down on your prepared baking sheet. Ensure they are spaced apart to allow for even cooking and crisping. This arrangement ensures that each Crispy Chicken Taquito gets the perfect amount of heat and airflow, resulting in a deliciously crunchy exterior.
Step 6: Add Oil for Crispiness
Lightly spray or brush the tops of the taquitos with cooking spray or olive oil. This step is vital for achieving that desired crispiness. The oil will help the tortillas brown beautifully, resulting in a splendid golden color that is as appealing to the eye as it is to the palate.
Step 7: Bake to Perfection
Transfer the baking sheet to your preheated oven and bake for 15-20 minutes. Keep an eye on them, and look for a golden brown color and a crispy texture as signs that your Crispy Chicken Taquitos are ready. If you desire an extra crunch, broil them on high for an additional 1-2 minutes at the end of baking.
Step 8: Serve with Toppings
Once baked to golden perfection, remove the taquitos from the oven and let them cool for a minute. Serve your warm Crispy Chicken Taquitos alongside your favorite toppings like chopped cilantro, sour cream, guacamole, or extra cheese for a delightful finishing touch. Enjoy every flavorful bite!
Make Ahead Options
These Crispy Chicken Taquitos are a fantastic choice for meal prep enthusiasts! You can assemble them and refrigerate for up to 24 hours before baking, ensuring a stress-free cooking experience on busy weeknights. To do this, prepare the filling, roll the taquitos, and place them seam-side down in an airtight container. Just be sure to lightly spray or brush them with oil before covering to maintain their crispiness. When you’re ready to enjoy, bake them straight from the fridge, adjusting the cooking time as needed until they’re golden and crispy. This simple prep ensures you’ll have delicious, homemade taquitos at your fingertips for a satisfying, quick meal!
How to Store and Freeze Crispy Chicken Taquitos
Fridge: Store leftover Crispy Chicken Taquitos in an airtight container for up to 3 days. This keeps them fresh while maintaining their delicious flavor.
Freezer: For longer storage, freeze assembled taquitos on a baking sheet until solid, then transfer to a freezer bag. They can last up to 3 months in the freezer.
Reheating: When ready to enjoy, bake directly from the freezer at 425°F (220°C) for 20-25 minutes or until heated through and crispy.
Wrapping: If storing in the fridge, wrap the taquitos in plastic wrap or aluminum foil to prevent drying out and to retain their crispy texture.
Expert Tips for Crispy Chicken Taquitos
Choose Tortillas Wisely: Use small corn tortillas for gluten-free options; warm them up to prevent cracking during assembly.
Don’t Overfill: Stick to 2-3 tablespoons of filling per tortilla; overfilling can lead to messy taquitos that unravel while baking.
Oil for Crispiness: Lightly spray the taquitos with cooking oil before baking to achieve that golden, crunchy texture everyone loves in Crispy Chicken Taquitos.
Experiment with Spices: Feel free to adjust the chili powder and cumin to your taste. Adding extra spices can elevate flavor profiles to suit your preferences.
Make Ahead: Prepare the taquitos in advance and store them in the fridge or freezer; bake them directly from cold, adding a few extra minutes if frozen.
Serve Fresh: For the best flavor and texture, enjoy taquitos fresh out of the oven; they are at their crispiest and most delicious this way!
What to Serve with Crispy Chicken Taquitos?
As you gather around the table, complement these crunchy delights with flavors that will elevate your meal experience.
-
Creamy Guacamole: A rich avocado dip adds a luscious creaminess, enhancing the flavors of the taquitos while providing that perfect touch of freshness.
-
Spicy Black Bean Salad: This vibrant salad introduces a zesty kick and protein-packed goodness; the contrasting textures offer a delightful balance.
-
Zesty Mexican Rice: Fluffy rice seasoned with lime and cilantro creates a refreshing base that pairs wonderfully with the savory crunch of taquitos.
-
Chilled Corn Salsa: The sweetness of corn and a hint of lime add a bright, refreshing element, making each bite even more enjoyable.
-
Crispy Tortilla Chips: Serve alongside for a satisfying crunch! Pair them with a variety of dips to keep the snacking going.
-
Pineapple Agua Fresca: This refreshing drink quenches your thirst and introduces a sweet, tangy vibe that complements savory dishes beautifully.
-
Mexican Street Corn (Elote): Grilled corn slathered with creamy sauce and cheese brings an irresistible, smoky flavor profile; it’s a must-try alongside your taquitos!
-
Lime wedges: A squeeze of lime does wonders, adding acidity and brightness to balance the richness of the taquitos.
With these delicious pairings, your Crispy Chicken Taquitos become the heart of a joyful feast, perfect for gatherings or cozy nights at home!
Crispy Chicken Taquitos Variations
Feel free to customize your Crispy Chicken Taquitos with these exciting variations that will elevate your culinary experience!
- Dairy-Free: Swap cream cheese and shredded cheese for vegan alternatives to keep it creamy and delicious.
- Vegetable-Packed: Add sautéed bell peppers, onions, or corn to the filling for a colorfully crunchy twist.
- Spicy Kick: Incorporate diced jalapeños or a splash of your favorite hot sauce into the chicken mixture for extra heat.
- Herb-Infused: Mix in fresh herbs like cilantro or parsley to brighten the flavors of your taquitos, making them feel fresh and vibrant.
- Air-Fried: For a lighter option, cook your taquitos in an air fryer for about 12-15 minutes; they’ll still be fabulously crispy!
- Different Meats: Try using pulled pork or seasoned ground beef in place of chicken for a satisfying alternative, each adding a unique flavor.
- Cheese Variety: Experiment with different cheeses, like pepper jack for extra spice or mozzarella for melty goodness without strong flavors.
- Gluten-Free: Use corn tortillas for a gluten-free option that doesn’t sacrifice flavor—perfect for accommodating dietary needs.
These variations open up a world of flavors to explore! If you’re looking for more inspiring ideas, check out our easy recipes collection to take your home cooking to new heights!
Crispy Chicken Taquitos Recipe FAQs
What type of chicken is best for the filling?
Using cooked shredded chicken is ideal, and rotisserie chicken is a wonderful time-saver, packed with flavor and already cooked. Alternatively, you can use leftover chicken or even canned chicken, just be sure to drain and shred it finely for easy incorporation.
How do I store leftover taquitos?
Store leftover Crispy Chicken Taquitos in an airtight container in the fridge for up to 3 days. This keeps them fresh and ready to enjoy later. If you want to retain some crispiness when reheating, I recommend using the oven instead of the microwave.
Can I freeze crispy taquitos?
Absolutely! To freeze, assemble your taquitos and place them on a baking sheet in a single layer. Once they’re firm, transfer them to a freezer bag or airtight container. They will keep well for up to 3 months. When you’re ready to bake, you can cook them directly from the freezer; just increase the cooking time by a few minutes.
Why are my taquitos not crispy?
If your taquitos aren’t coming out crispy, it could be due to a couple of reasons. First, ensure you’ve lightly sprayed or brushed them with oil before baking. This step is essential for browning. Also, avoid overfilling your tortillas, as this can lead to a soggy texture. Finally, try placing them seam-side down to hold everything in place during cooking.
Are there any dietary considerations for these taquitos?
Yes! For gluten-free options, choose corn tortillas and always check ingredient labels for any hidden gluten. If anyone in your household has dairy allergies, you can experiment with dairy-free cream cheese and omit regular cheese. These adjustments ensure that everyone can enjoy these delightful Crispy Chicken Taquitos!
Crispy Chicken Taquitos for a Flavorful Game Day Feast
Ingredients
Equipment
Method
- Preheat your oven to 425°F (220°C) and line a baking sheet with parchment paper.
- In a mixing bowl, combine shredded chicken, cream cheese, shredded cheese, salsa, garlic powder, chili powder, cumin, salt, and pepper. Mix well.
- Microwave the tortillas for about 20 seconds wrapped in a damp paper towel.
- Spoon 2-3 tablespoons of the chicken mixture onto each tortilla and roll tightly, tucking in the edges.
- Place the rolled taquitos seam-side down on the prepared baking sheet, spaced apart.
- Lightly spray or brush the tops with cooking spray or oil.
- Bake in the preheated oven for 15-20 minutes or until golden brown and crispy.
- Serve warm with optional toppings like cilantro, sour cream, guacamole, or extra cheese.
Leave a Reply